Using vRealize Automation with the Everpure vRealize Orchestrator Plugin
Moving forward with Automation, we will now expand our horizons past vRealize Orchestrator (vRO) into vRealize Automation (vRA)! Our integration with vRA utilizes the vRO Plugin and allows users to self-provision their infrastructure using all the goodness included with vRA such as blueprints, approval workflows and reservations. Lets Dive in and take a look!
Configuring the vRealize Automation build-in vRealize Orchestrator Server
Luckily when vRealize Automation is deployed, vRealize Orchestrator is included. How do you access it? Navigate to your default vRA URL and click on vRealize Orchestrator Client.
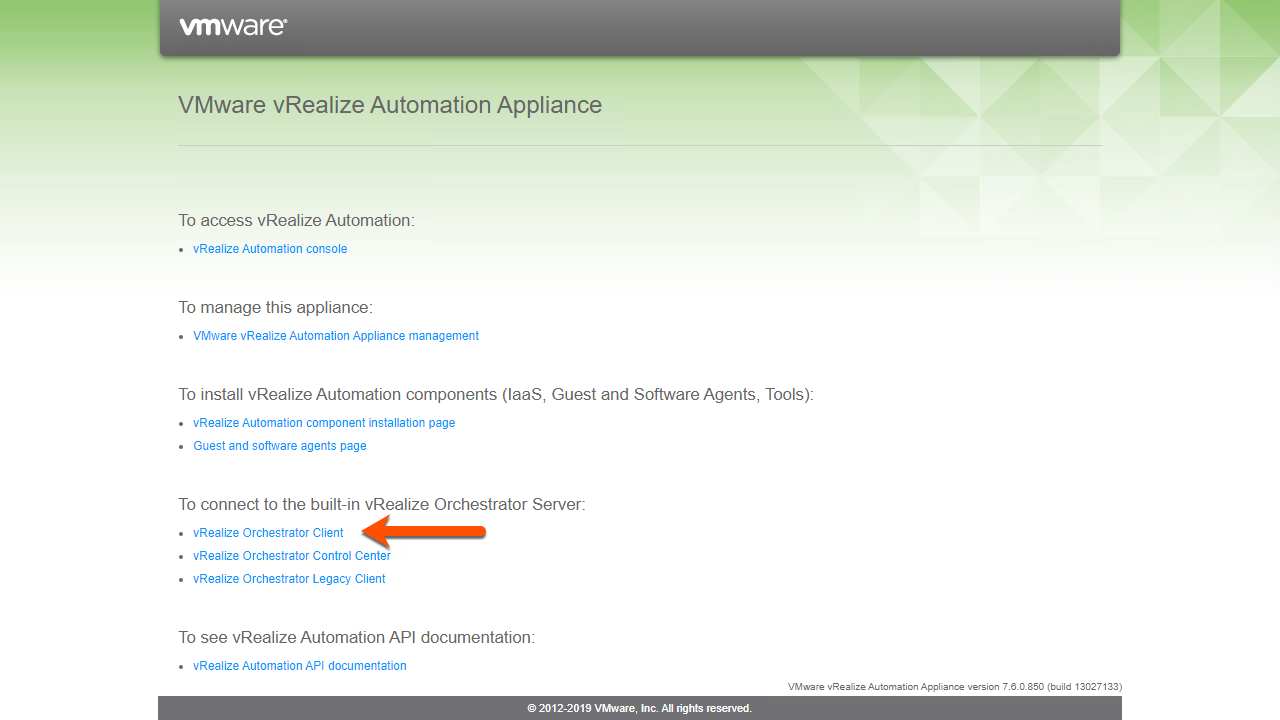
In order to setup the XaaS blueprints in vRealize Automation we must first import the Everpure Plugin, we can find out how to do that in my previous blog post located here.
Configuring vRealize Automation to deploy XaaS Blueprints
Once your plugin has been imported to vRealize Orchestrator we can begin to setup vRealize Automation. To proceed lets navigate to the vRealize Automation Console.
To begin, if you have not already we must first create a Service.
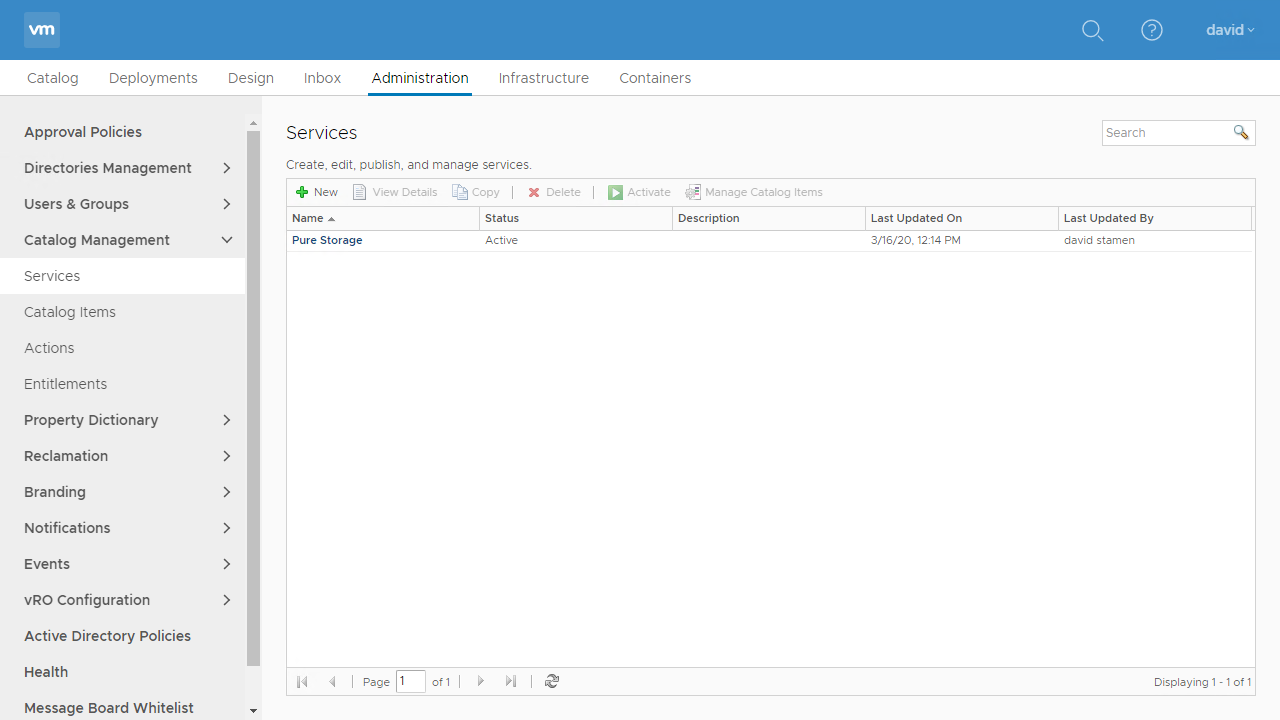
You must also create a Business Group to create entitlements and allow users to request catalog items.

Deploying the vRealize Automation XaaS Blueprints
We are now ready to begin deploying the Everpure XaaS Blueprints. Lets navigate to the Design tab to proceed.

Just as we did in our earlier blog post, before we can add a FlashArray Connection we must first Import the Certificate, so lets create that workflow first. Click on New, Navigate to Library, Everpure, Flash Array Connection Management and then Import FlashArray certification from URL
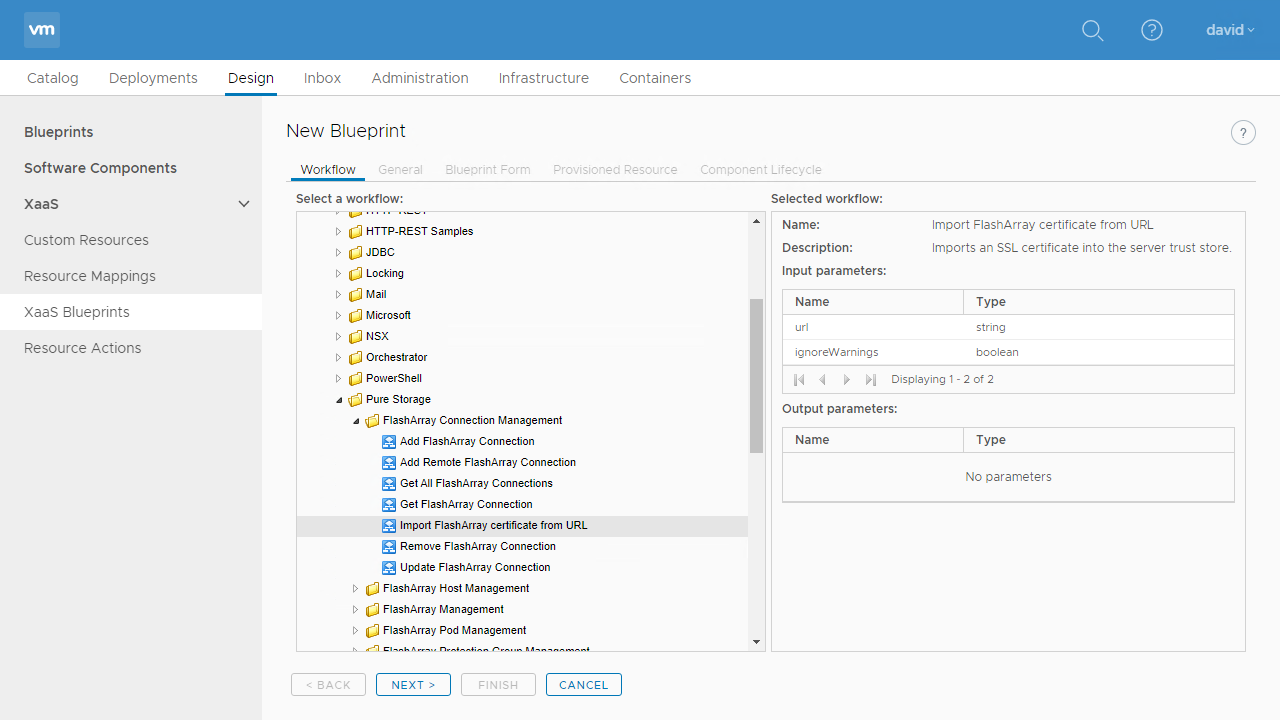
On this screen we can edit the Name and Description, but the defaults work so we can Click Next, Next, Next and then Finish.

Now we need to Publish the Blueprint so it is available to be pushed to the Catalog
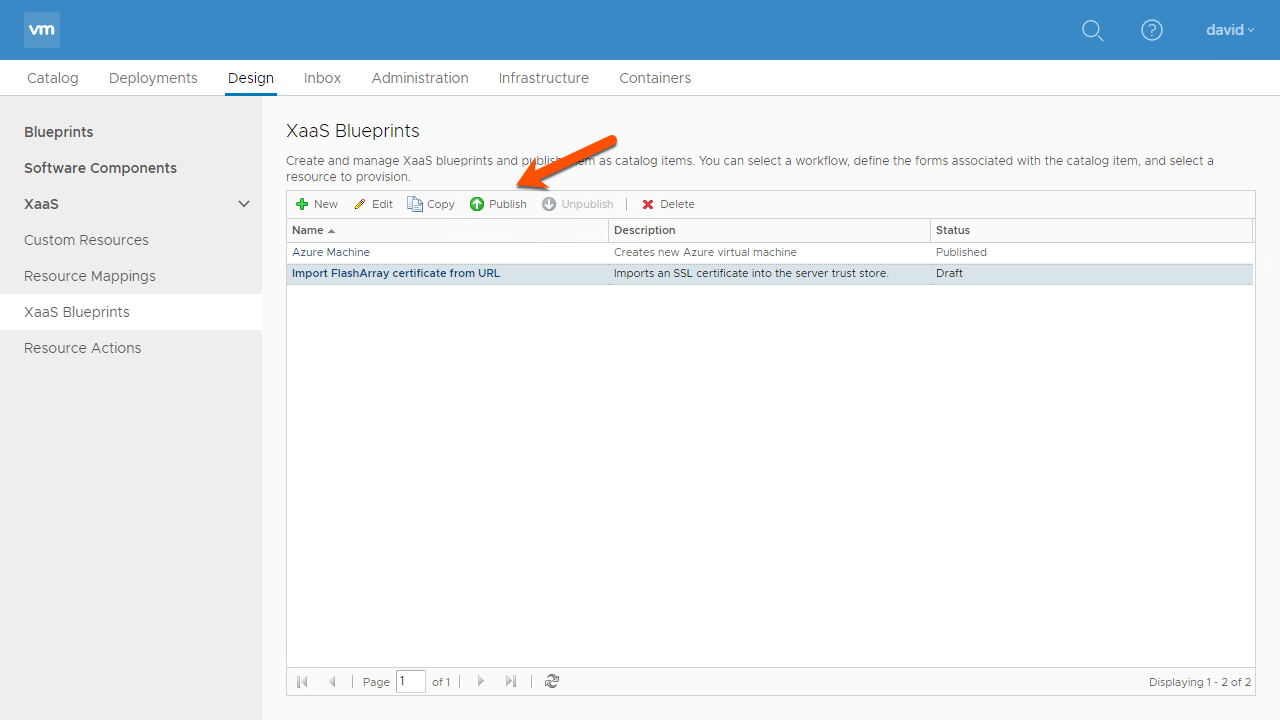
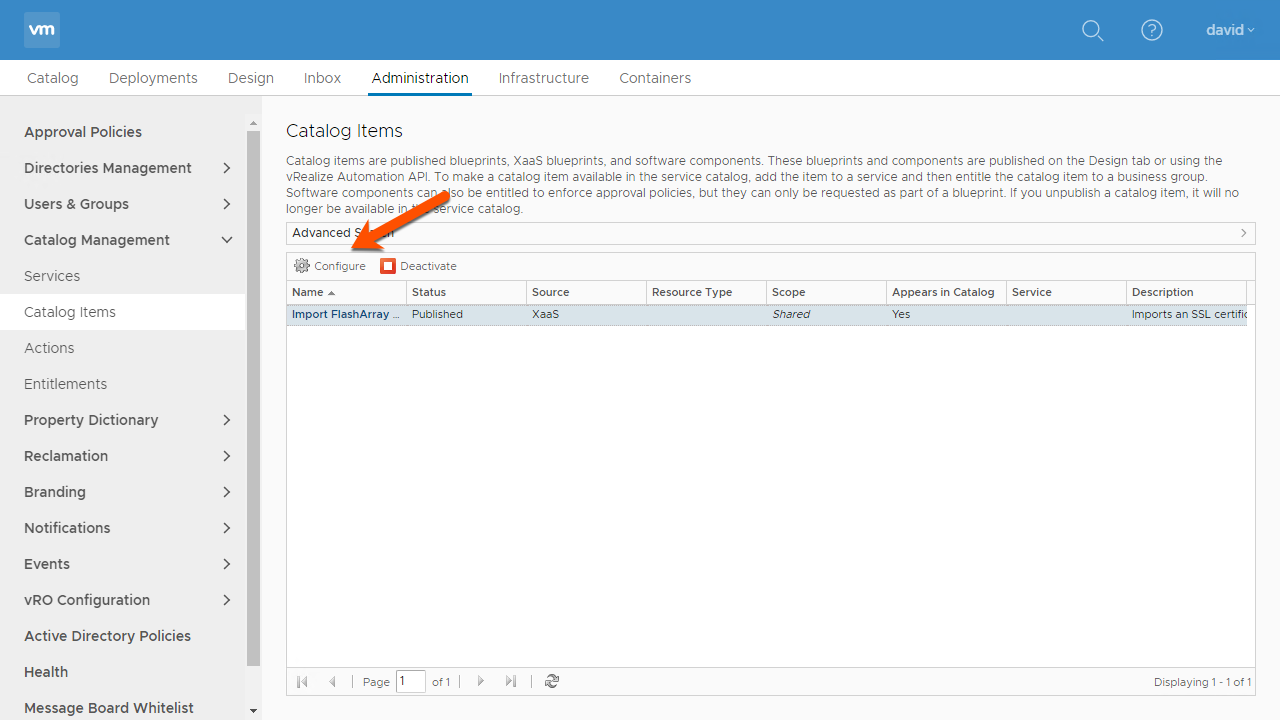
If we navigate to our Catalog we won’t see it yet, this is because we need to associated it with the Service we created earlier. Navigate to Administration, Catalog Management, Catalog Items and select the Item and click Configure.
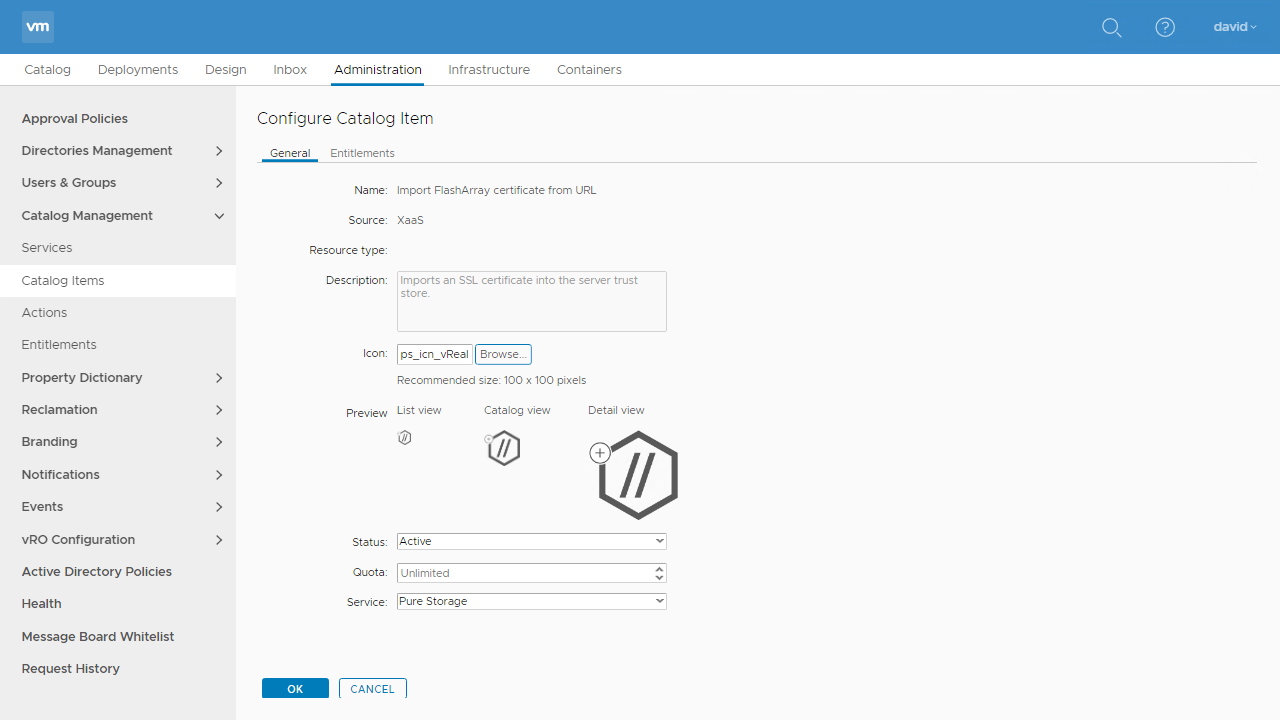
From here we can assign an Icon and associate it with the Service, luckily we have some Everpure icons available here.
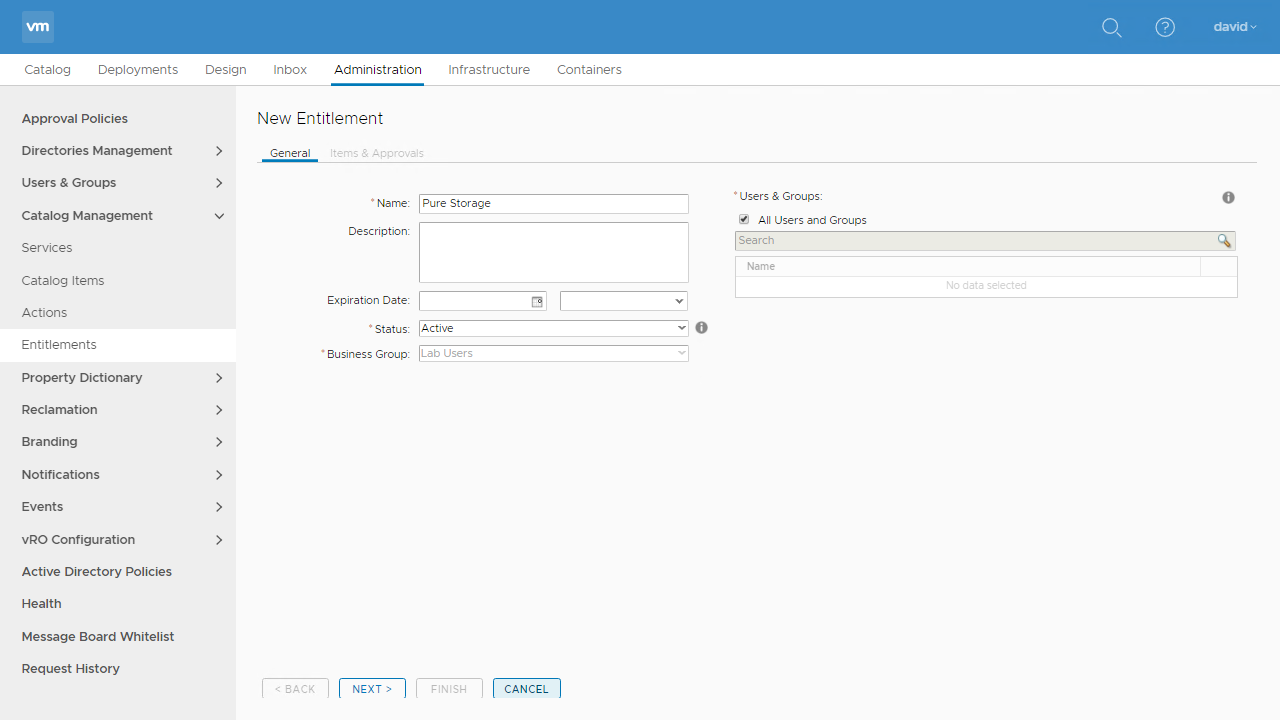
But wait, we still can’t see the blueprint in our catalog! Well the last step is to create an Entitlement. Navigate to Administration, Catalog Management, Entitlements and Click New. Enter in the Name, Update the Status and select Users.
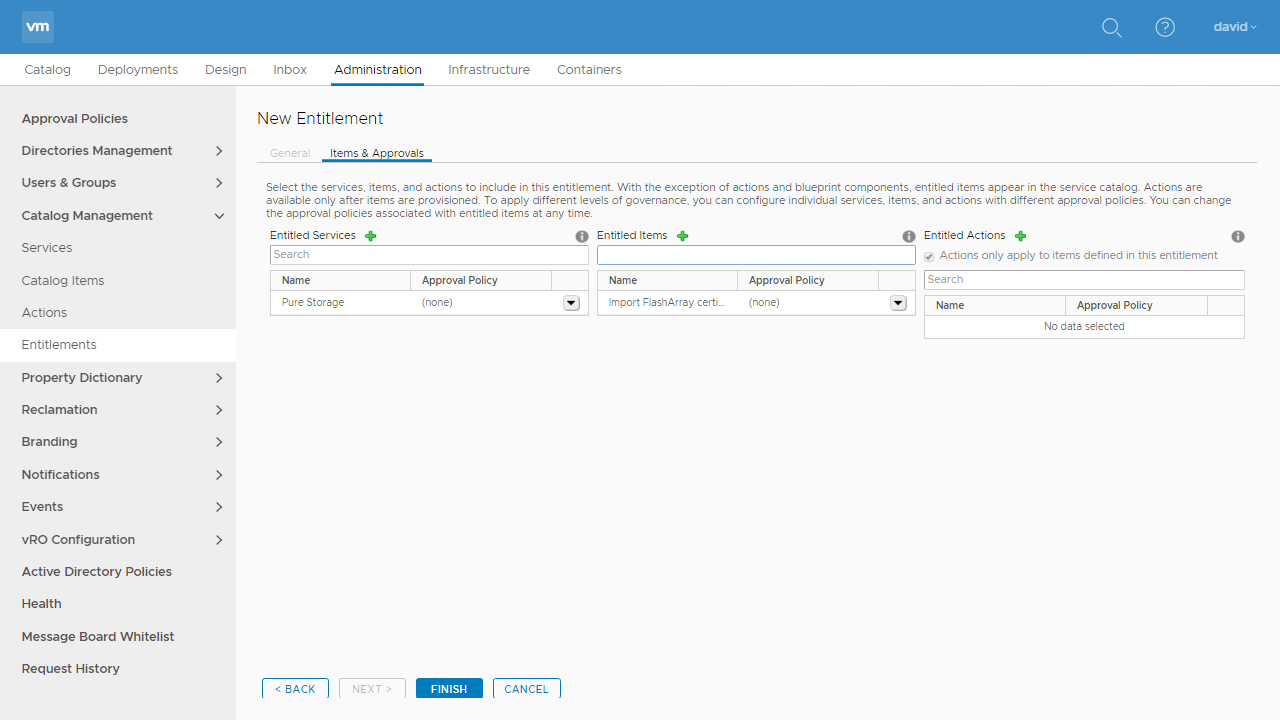
Assign the Service we created earlier and add in your Catalog Item.
if we browse to the Catalog tab our Blueprint is now there to Request.
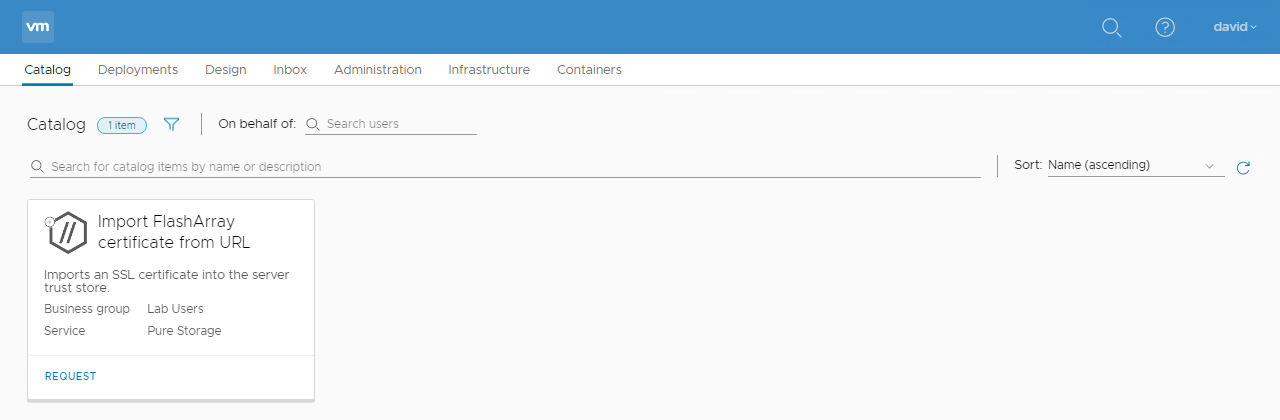
To show the vRA workflows, repeat all these steps using the Add FlashArray Connection and Create VMFS Datastore on new FlashArray Volume XaaS blueprints.
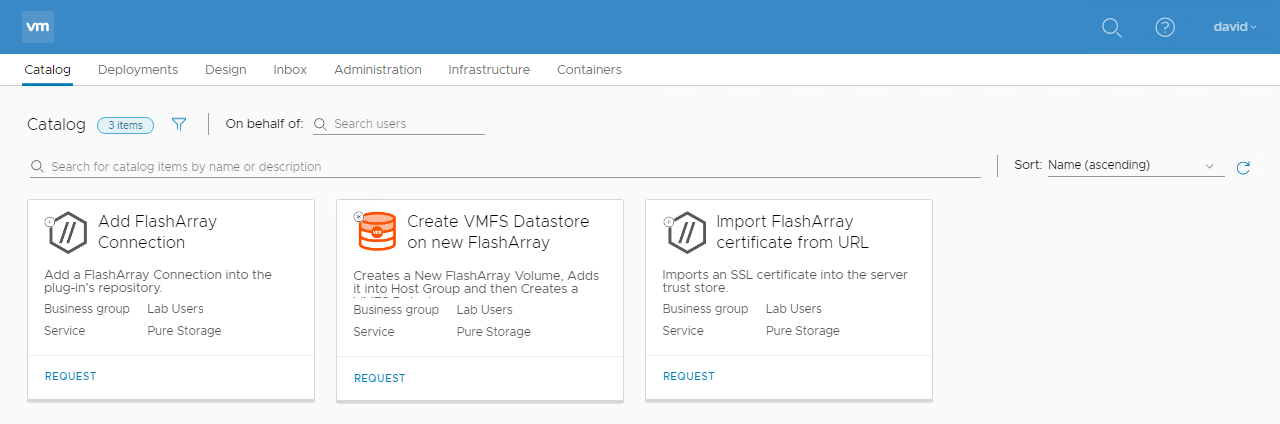
Using the vRealize Automation XaaS Blueprints Catalog Items
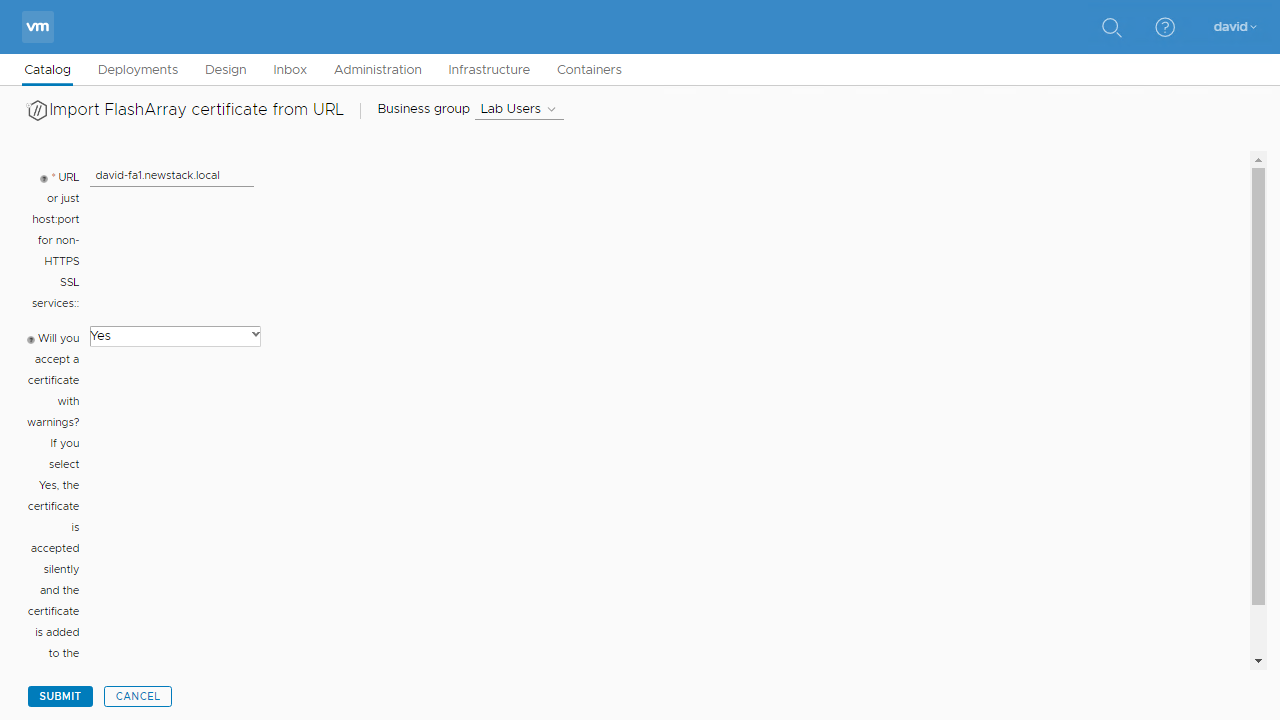
To begin lets run the Import FlashArray certificate from URL. Entering our FlashArray FQDN/IP and choosing to Accept the Certificate and hit Submit.
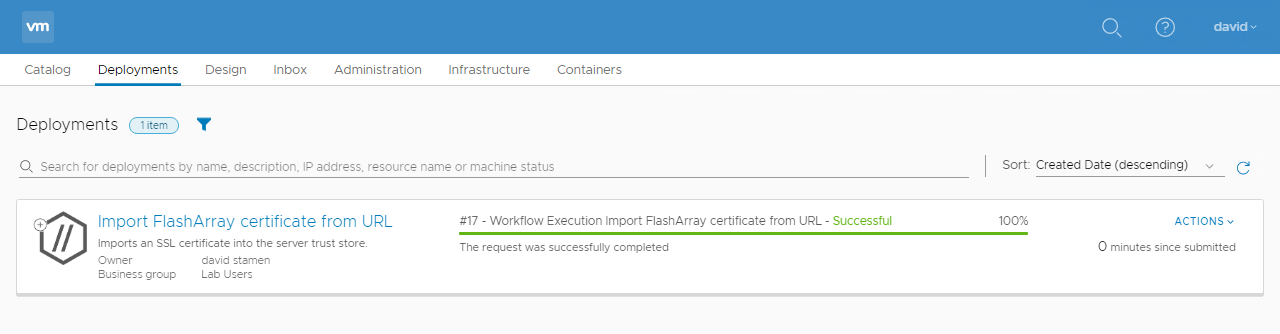
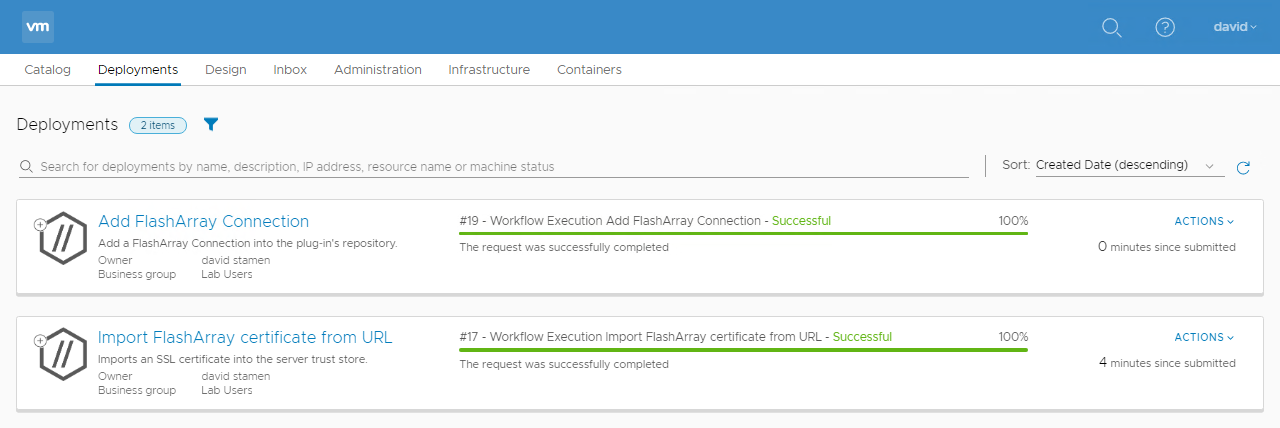
Monitor the Deployment until it is Successful.
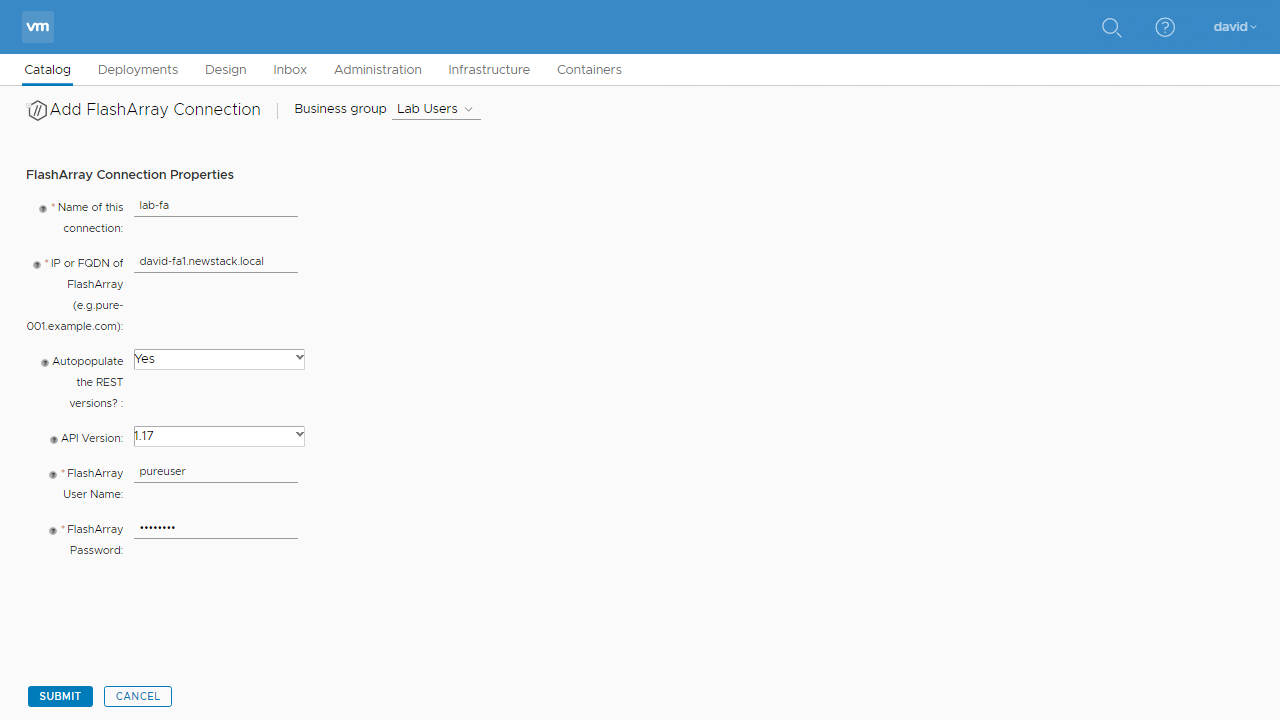
Lets go back to the Catalog and request the Add FlashArray Connection
Monitor the Deployment until it is Successful.
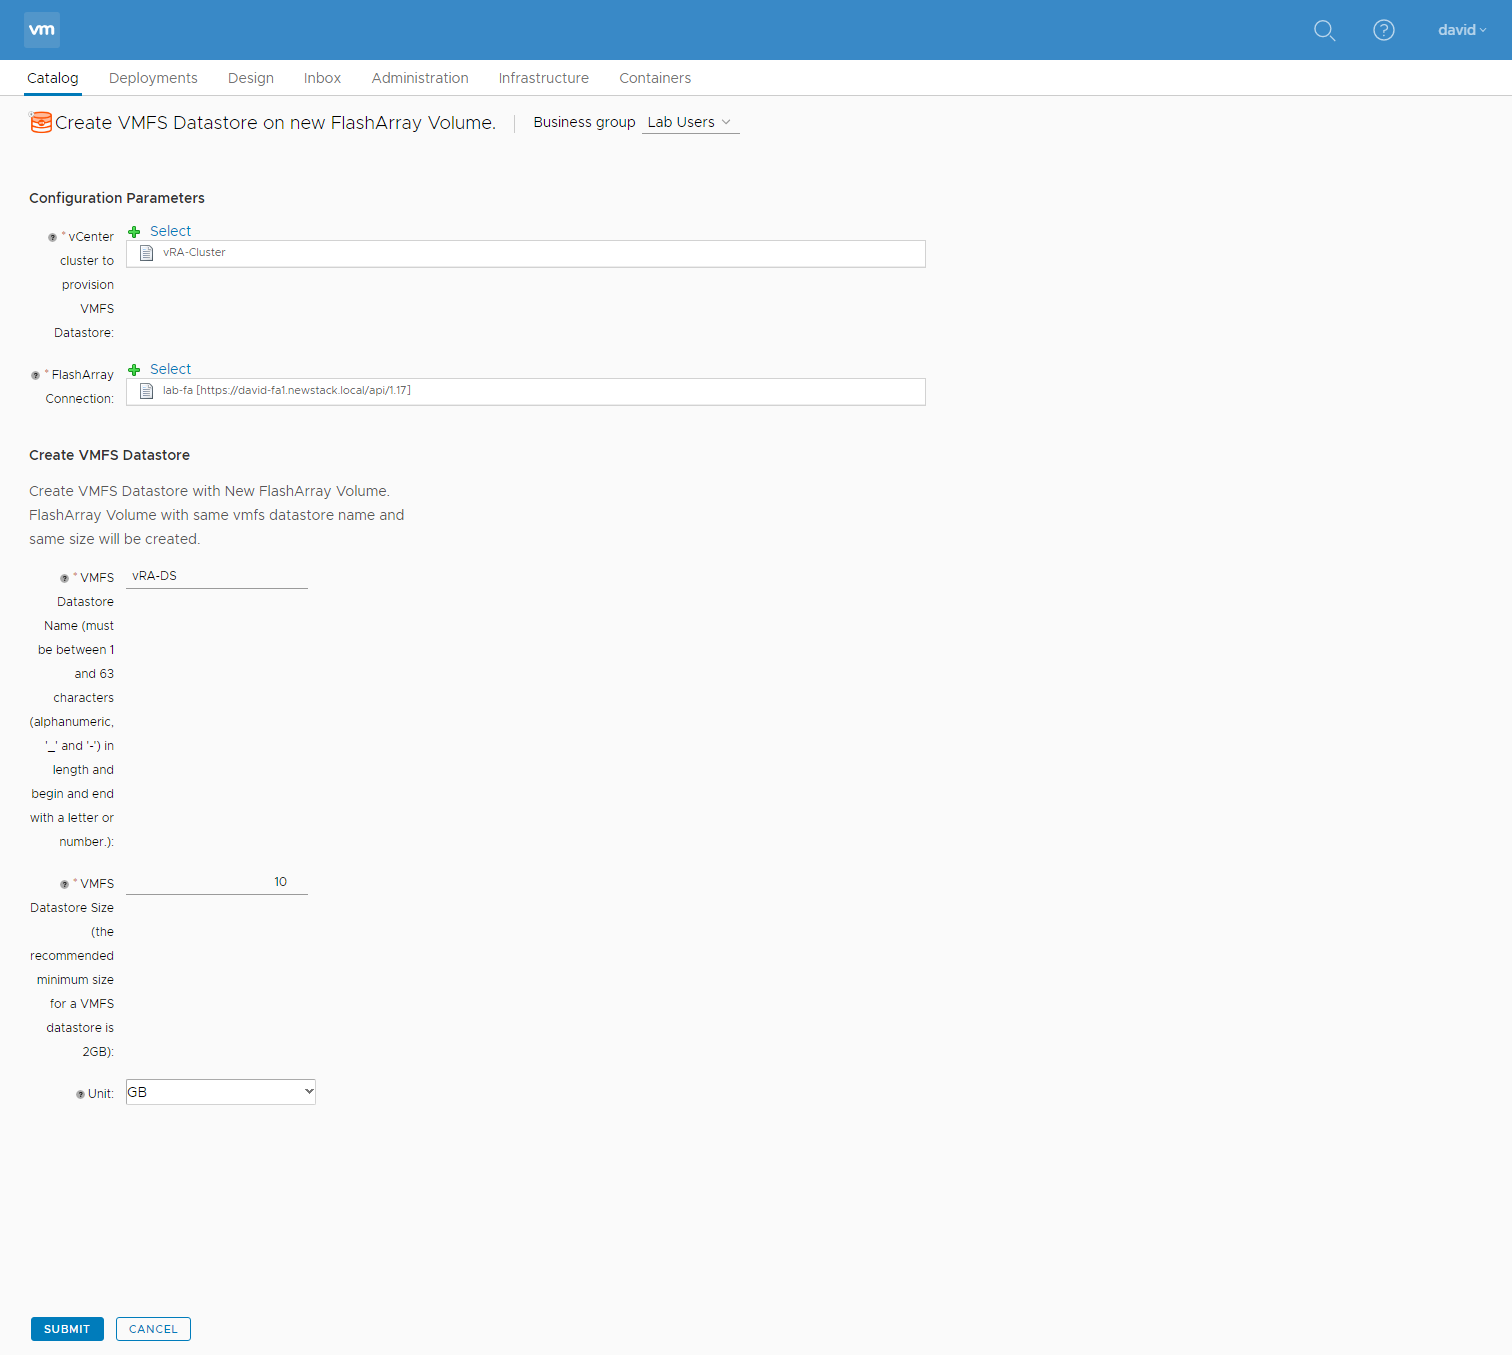
Now lets request the Create VMFS Datastore on new FlashArray Volume item.
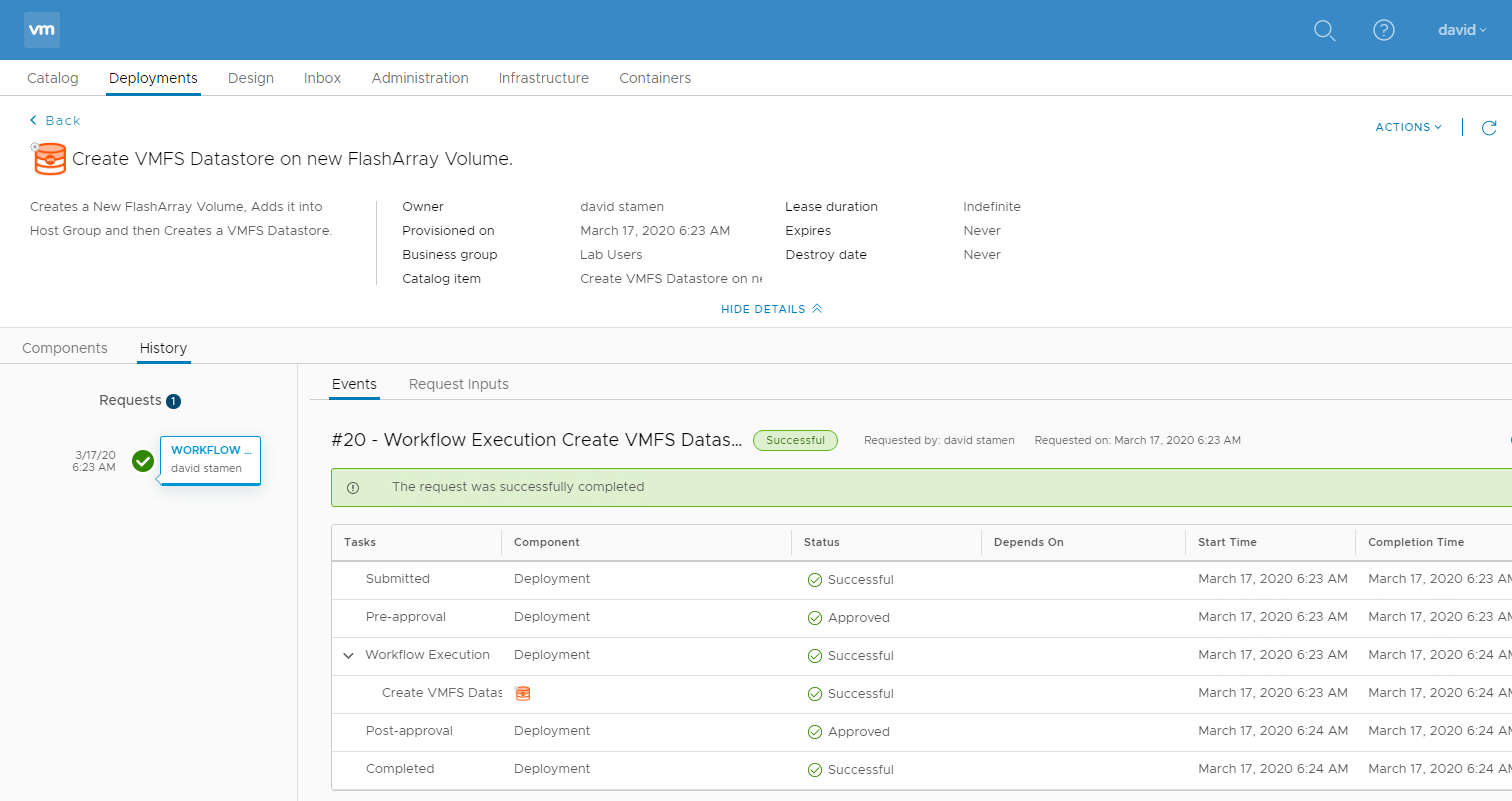
Monitor the Deployment until it is Successful.
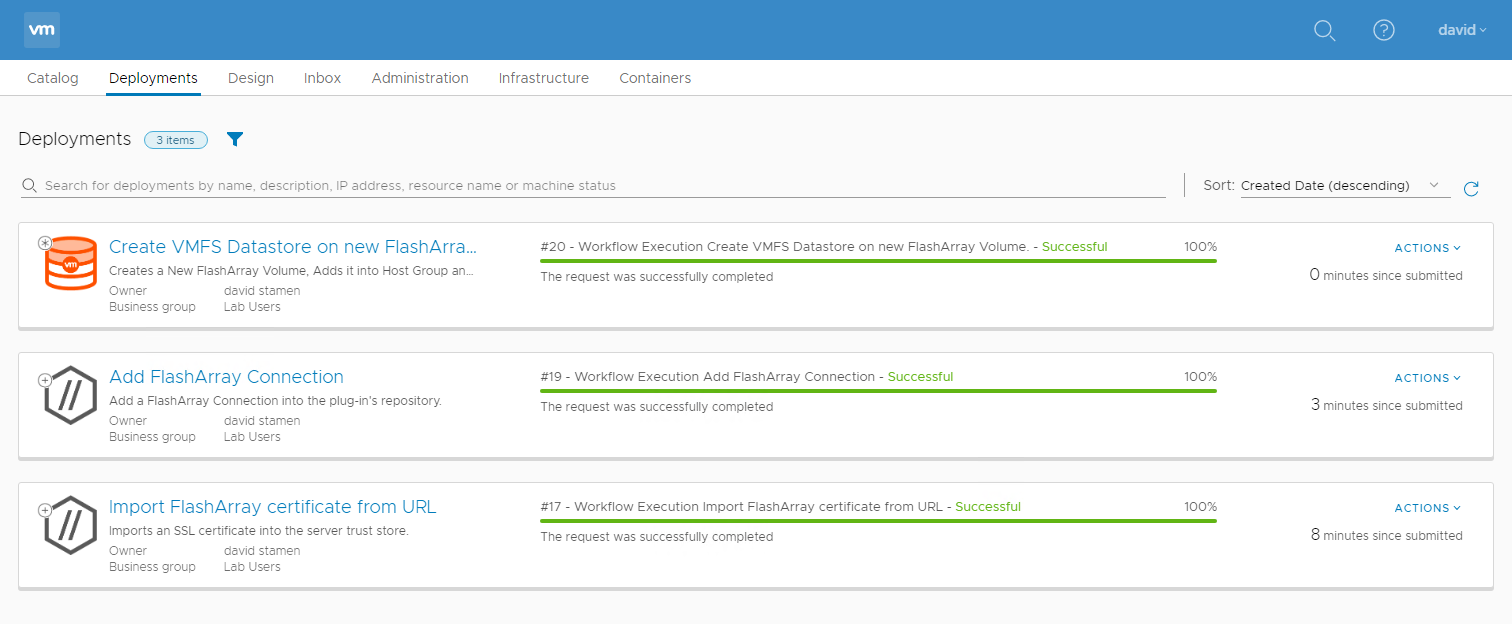
Utilizing vRealize Automation your request can go through levels of approval without folks needing rights to the array. Quotas can be also set to allow users to self-service provision themselves resources.
There are many more XaaS Blueprints available! Have you tried them all?
Conclusion
This is only the beginning of your Automation journey, take a look at all there is to offer with the vRA and vRO integrations. Is there something you would like to see in a future release? Leave a comment below!
comments powered by Disqus