- Part 5: Deploying vSphere with Kubernetes - Using vSphere with Kubernetes
Part 5: Deploying vSphere with Kubernetes - Using vSphere with Kubernetes
vSphere 7 with Kubernetes is finally here and I couldn’t be more excited for it to be available. This blog series will cover the requirements, prequisites and deployment steps in order to deploy a vSphere with Kubernetes (vk8s) environment using vSphere 7 and NSX-T 3.0.
Using vSphere with Kubernetes
Now that we have the environment deployed, what can we do with it? This blog will cover Setting up the Kubernetes CLI, Configuring the TKC Content Library, Creating a Namespace and Deploying Native Pods.
Setting up the Kubernetes CLI Tools
Kubernetes is CLI driven, in order to use vSphere with Kubernetes you must install kubectl and also the vsphere plugin. This can be downloaded from your Supervisor Control Plane VM. The IP address of your Supervisor VM can be found on the Namespaces Overview or the Clusters tab of Workload Management. Navigate to https://{ipofyourvm}

From here you can download the CLI plugin for windows, macos or linux. Once it is downloaded extract the file and copy to your OS’s executable search path.
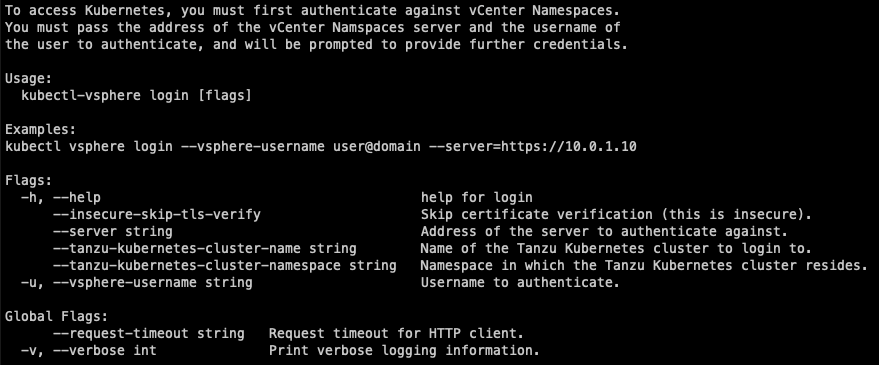
Type kubectl vsphere login -h and make sure the kubectl plugin works.
Configuring a Content Library for Tanzu Kubernetes Clusters
When using TKC’s you can use different versions of Kubernetes. VMware does a great job of hosting these in a Content Library you can easily integrate with your environment!
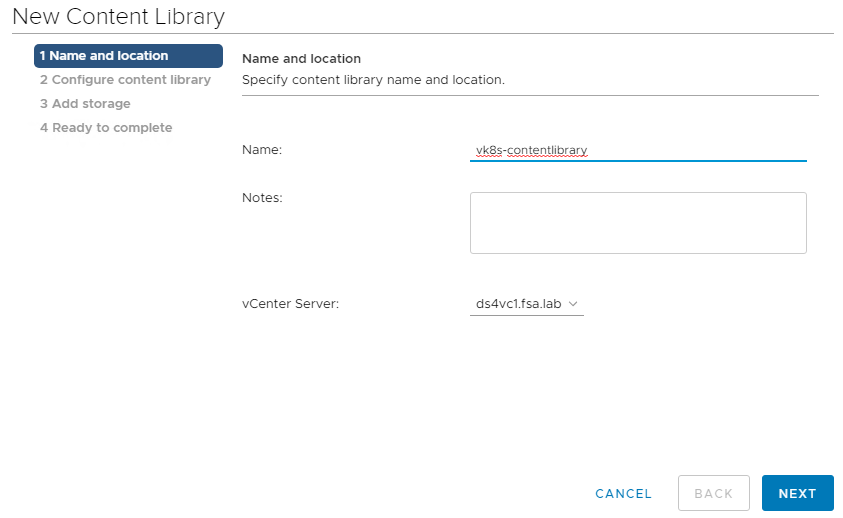
To configure the Content Library navigate to Menu -> Content Libaries in the vSphere Client and Click on Create. Specify a name and choose with vCenter Server it will be created on.
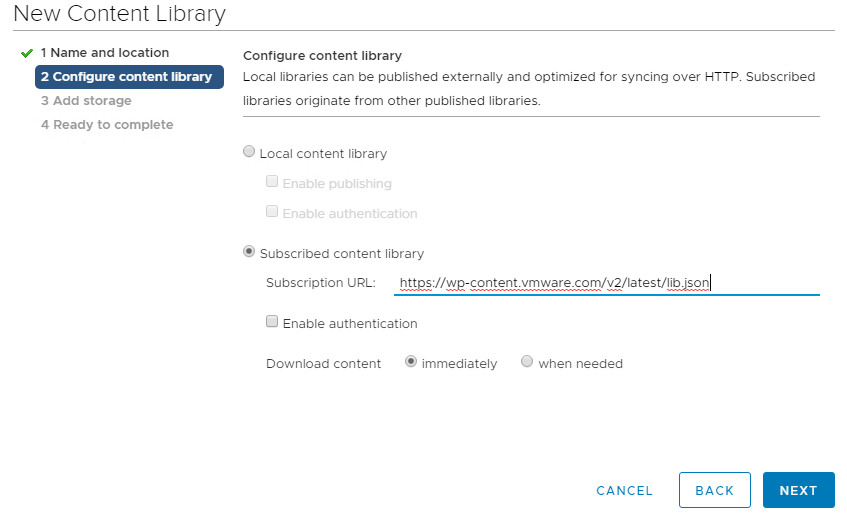
Create a Subscribed Content Library using https://wp-content.vmware.com/v2/latest/lib.json as the subscription URL.
Select a Datastore for the content library images to be stored.

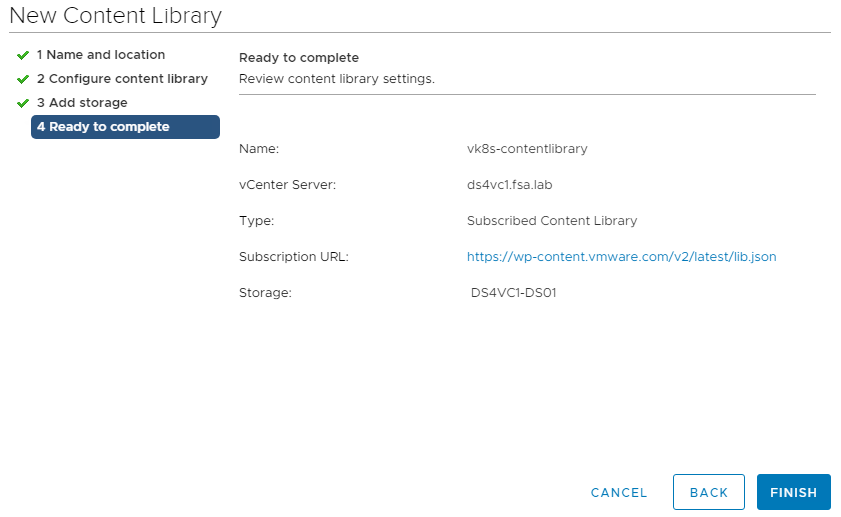
Review your settings and click Finish. Wait for the Content Library Items to be syncronized.
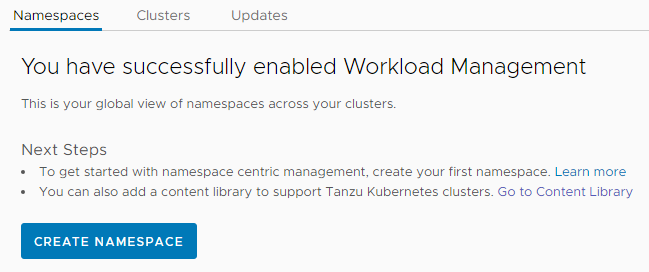
Creating and Configuring a Namespace
A namespace is a unit of management in Kubernetes, in vSphere it is mapped to a resource pool and allows you to provision workloads and assign cpu, memory and storage.
To create a Namespace navigate to Menu -> Workload Management -> Namespaces and Click **Create Namespace
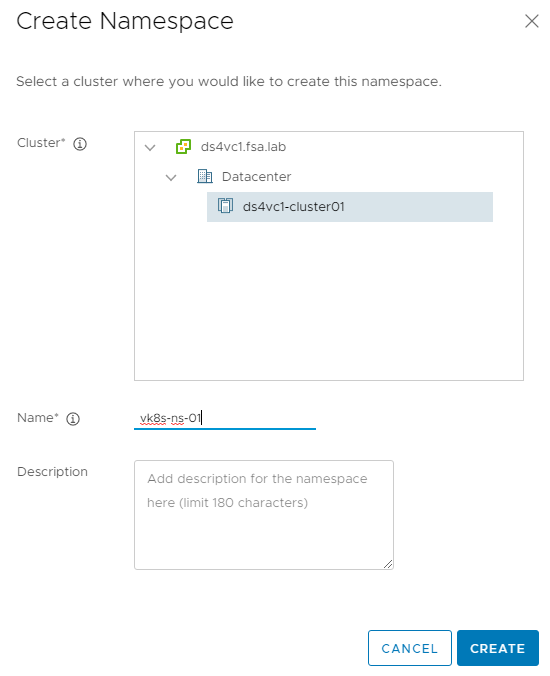
Select your Cluster and Specify a Name
Now we can see the Namespace Overview

Click Add Permission to assign permissions to the namespace. This can be any VC authenticated user.

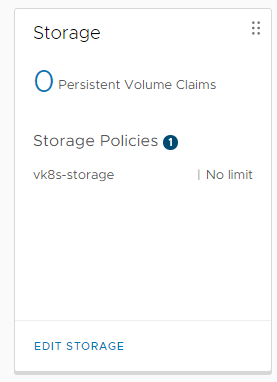
Click Add Storage and select your VM Storage Policy. This is where pods will be deployed.
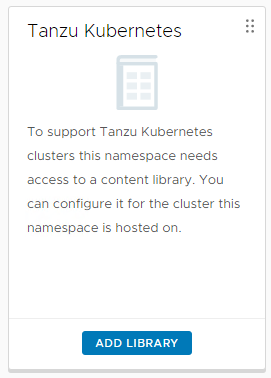
Click Add Library to associate the TKC Content Library to your Namespace.
Your Namespace is now ready to have workloads deployed!

Deploying a Workload
Now that everything is ready, we can now deploy our first workload. I have created a GitHub Repo with some sample applications that can be deployed as Native Pods as well as some that require a TKC.
My first demo I use on every environment I deploy is hello-kubernetes I will walk you through a quick deployment of it.
To begin, authenticate to your vk8s cluster.
kubectl vsphere login --server 10.21.234.65 --vsphere-username [email protected] --insecure-skip-tls-verify
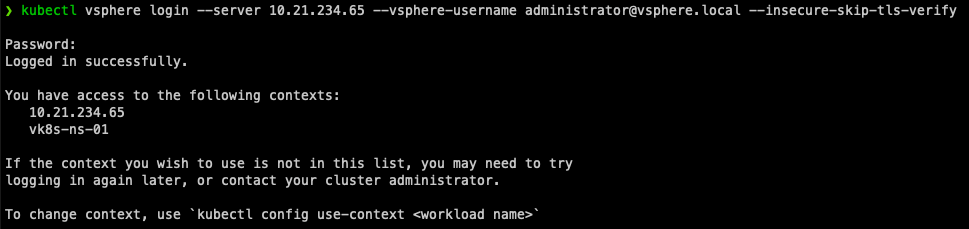
Once logged in you will be shown the contexts aka namespaces you have access to. Lets switch to our namespace.
kubectl config use-context vk8s-ns-01

Execute your YAML file with your application
kubectl apply -f demo-hellokubernetes.yaml

View the svc information to find out the endpoint of the application deployed.
kubectl get svc

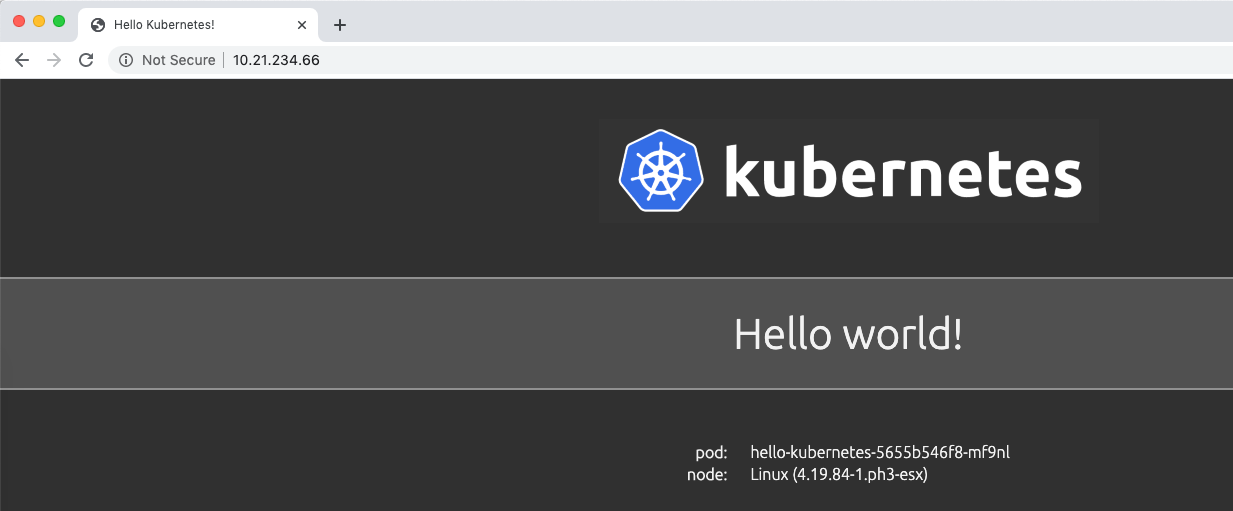
Access your application and validate it is running!
Wrap Up
Wow that was easy! Kubernetes makes deploying workloads very seamless and deploying them on top of vSphere with Kubernetes is even better! Stay tuned for the next post where we cover Provisioning and Managing a Tanzu Kubernetes Cluster.
comments powered by Disqus