Deploy and Configure the NSX Advanced Load Balancer for vSphere with Tanzu
VMware has just released vSphere 7.0 Update 2! With this release NSX Advanced Load Balancer also known as AVI Networks is now a supported load-balancer alongside HA Proxy for vSphere Network deployments. This blog will cover how to deploy and configure the load balancer for use with vSphere with Tanzu.
Pre-Requisites
Deploy the Controller VM
Login to the vCenter Server that you will deploy your AVI Controller to. Right click and select Deploy OVF Template

Browse to the downloaded OVA
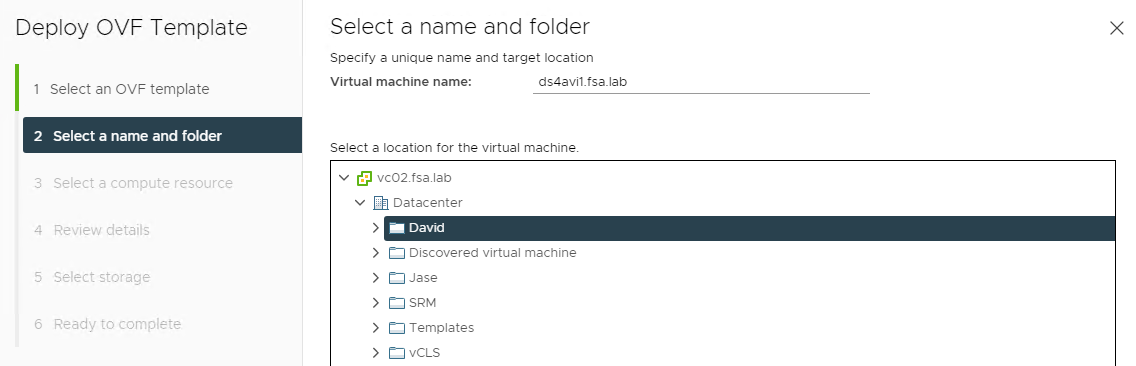
Name your VM and select a folder

Select a compute resource
Select a datastore

Select a your management network

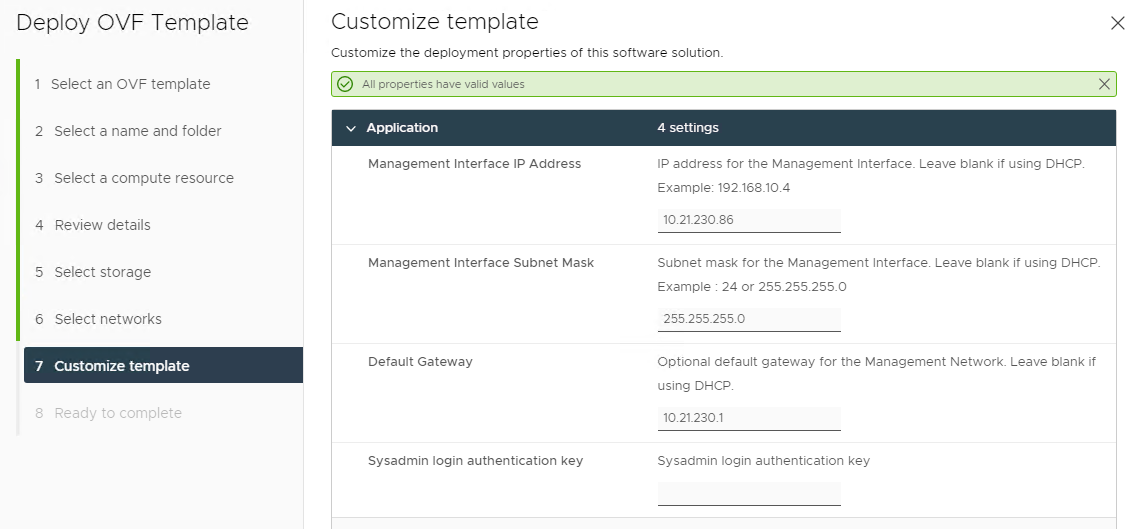
Enter in your management ip, subnet and gateway
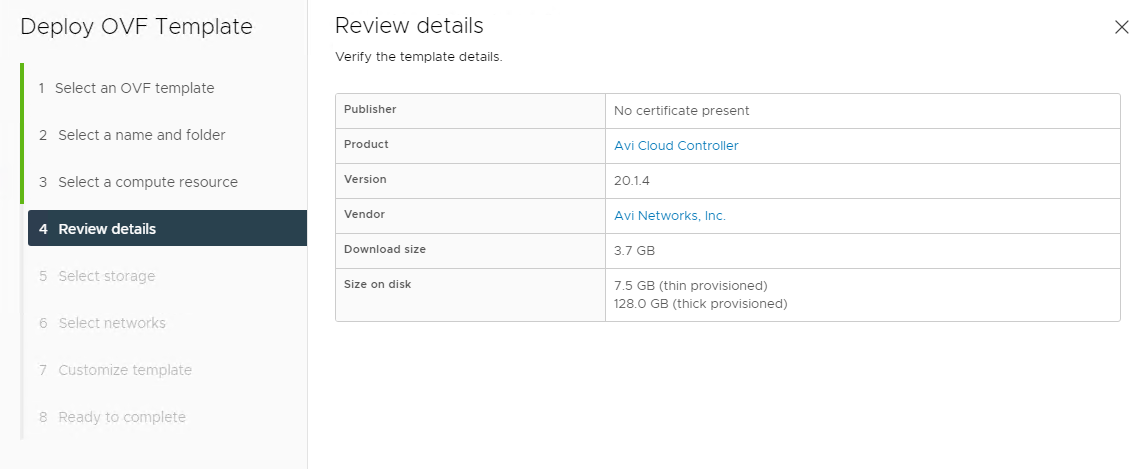
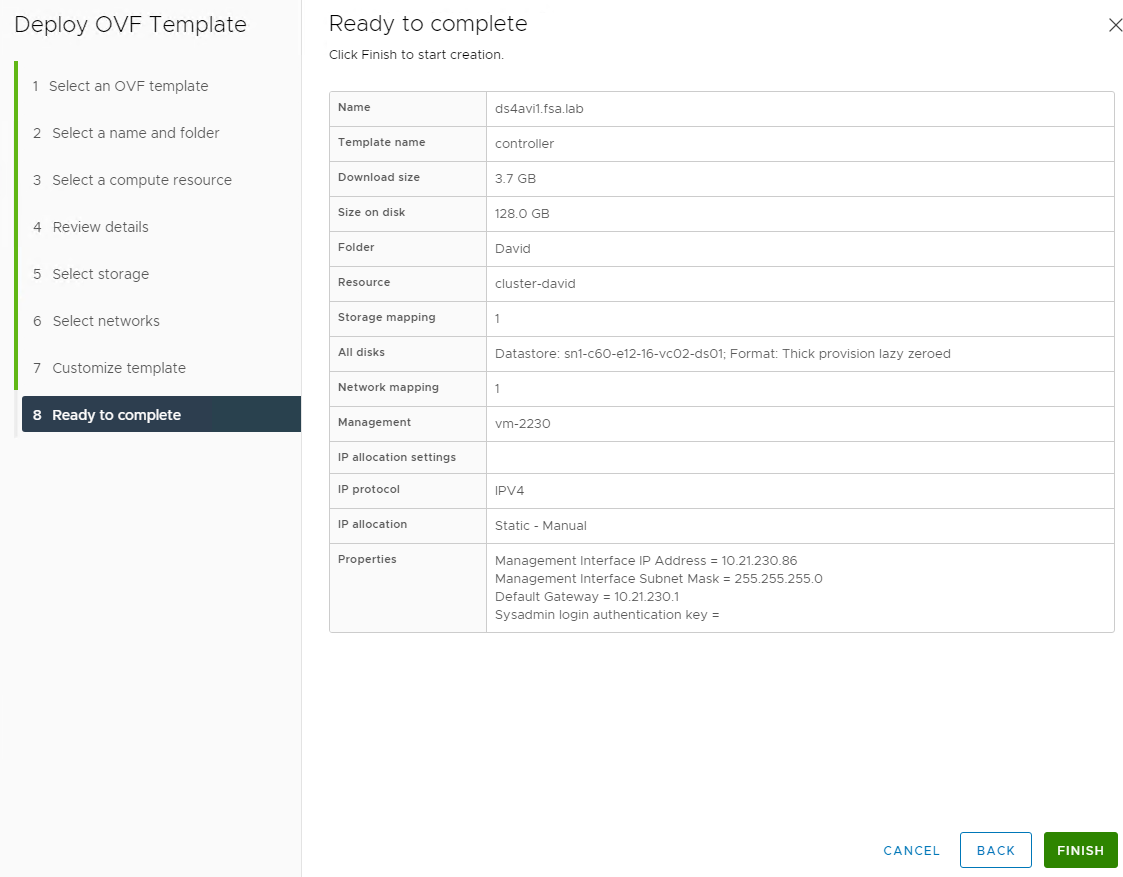
Review your settings and click finish
Configure the Controller VM
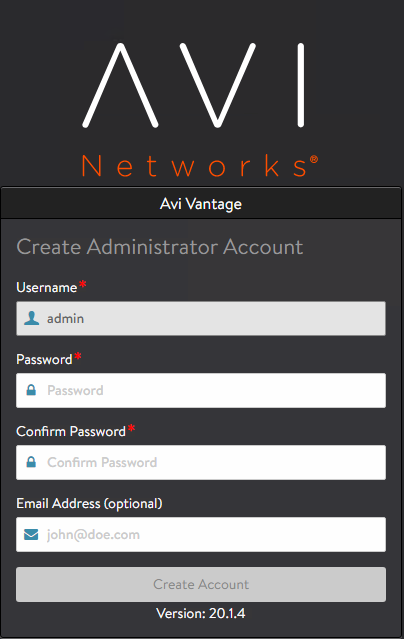
Once the VM has been powered on, navigate to https://mgmt-fqdn-or-ip
Provide a username, password and email to be used for the administrator account
Provide DNS Servers, DNS Domain and Backup Passphrase to be used for the AVI components
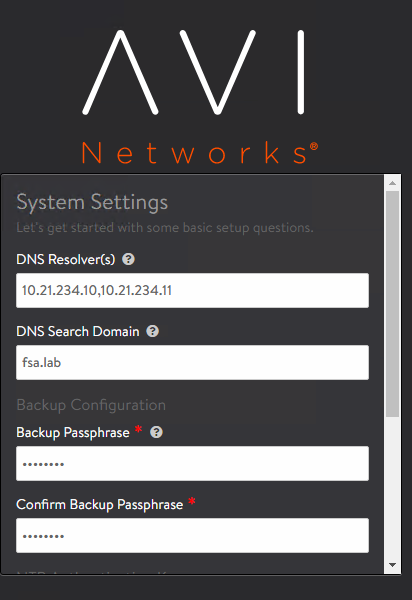
Provide an NTP Server to be used for the AVI components

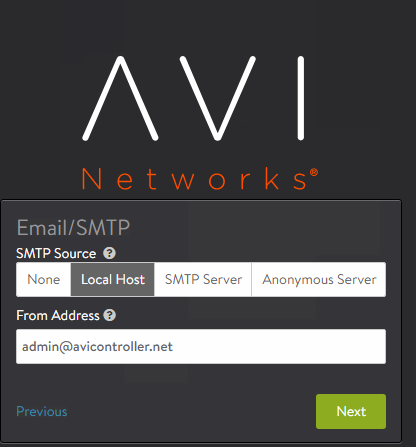
Select an option to use for Email/SMTP
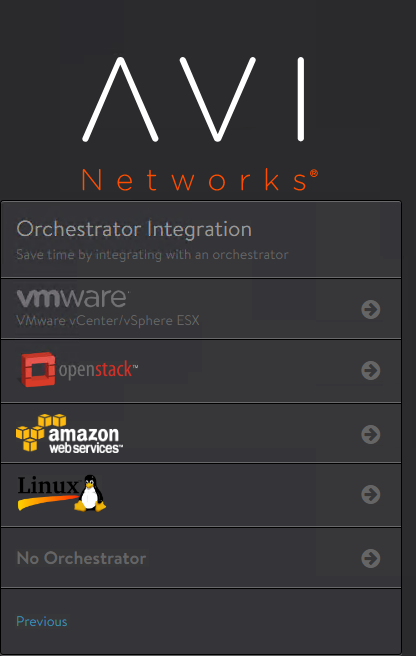
Select VMware for Orchestrator Integration
Provide the vCenter Server information where vSphere with Tanzu will be deployed
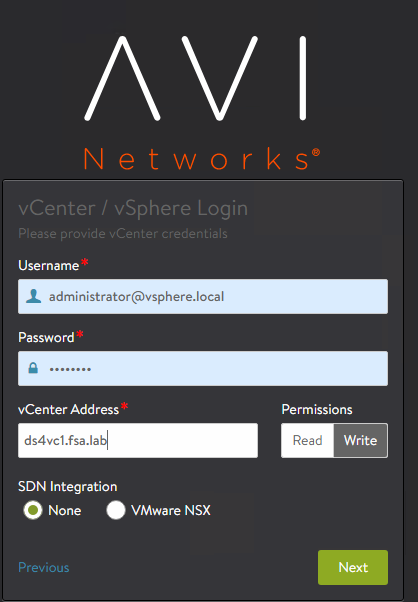
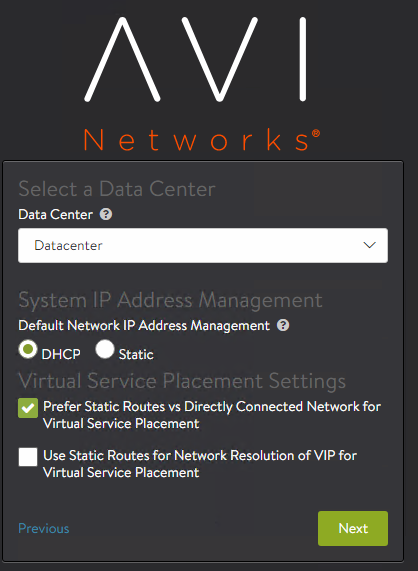
Select the Datacenter where vSphere with Tanzu will be deployed.
Select DHCP for the Network IP Address Management and select Prefer Static Routes vs Directly Connected Network for Virtual Service Placement
Select the portgroup to be used for the management network and select DHCP for network ip address management

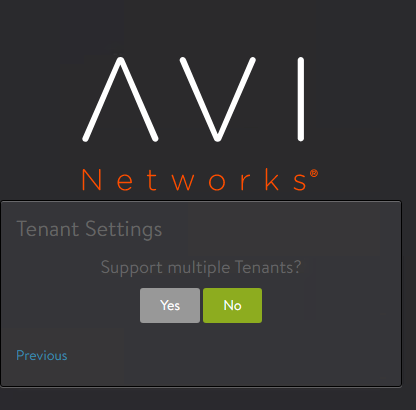
Click No when asked to support multiple tenants
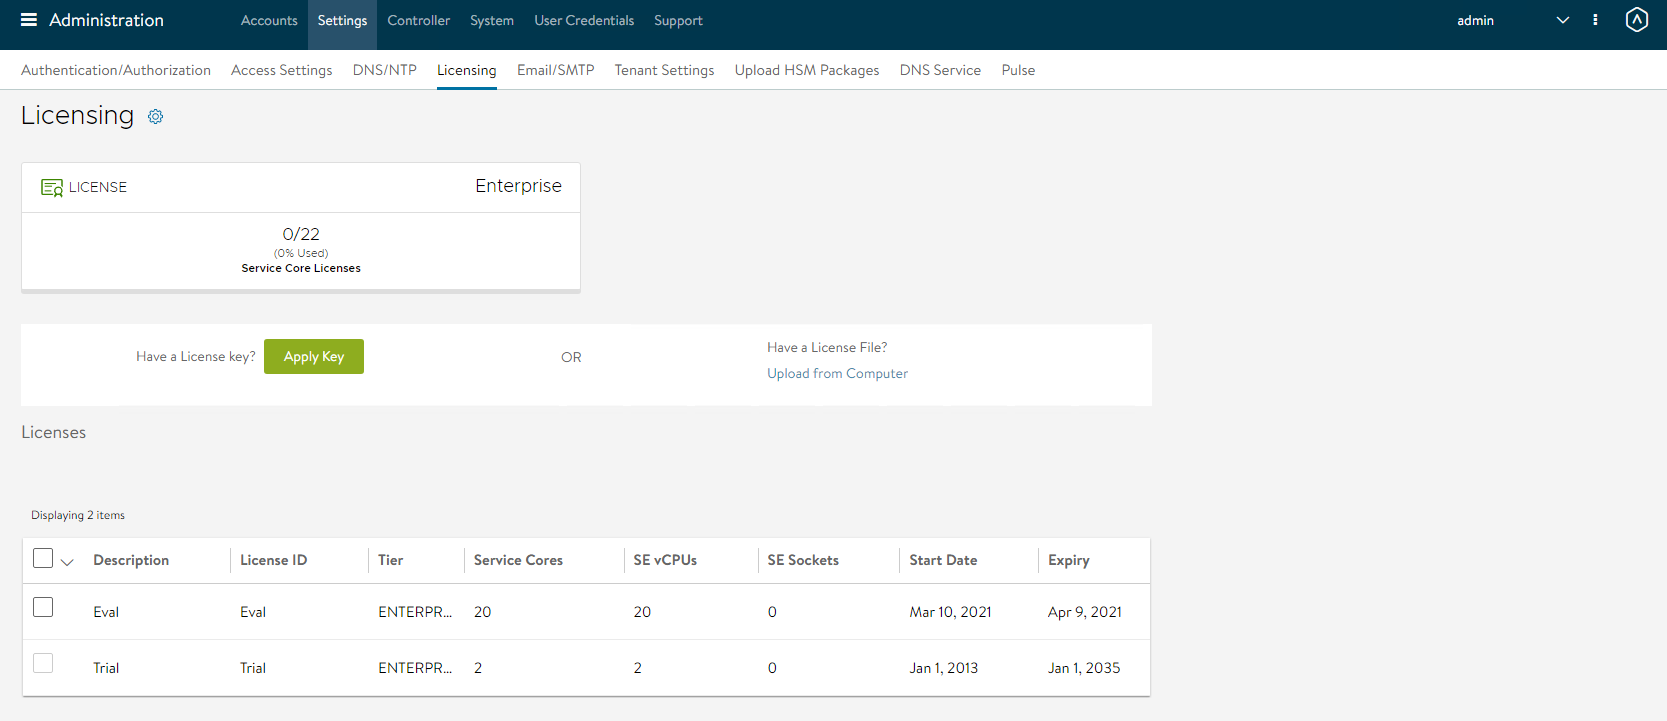
License the Controller
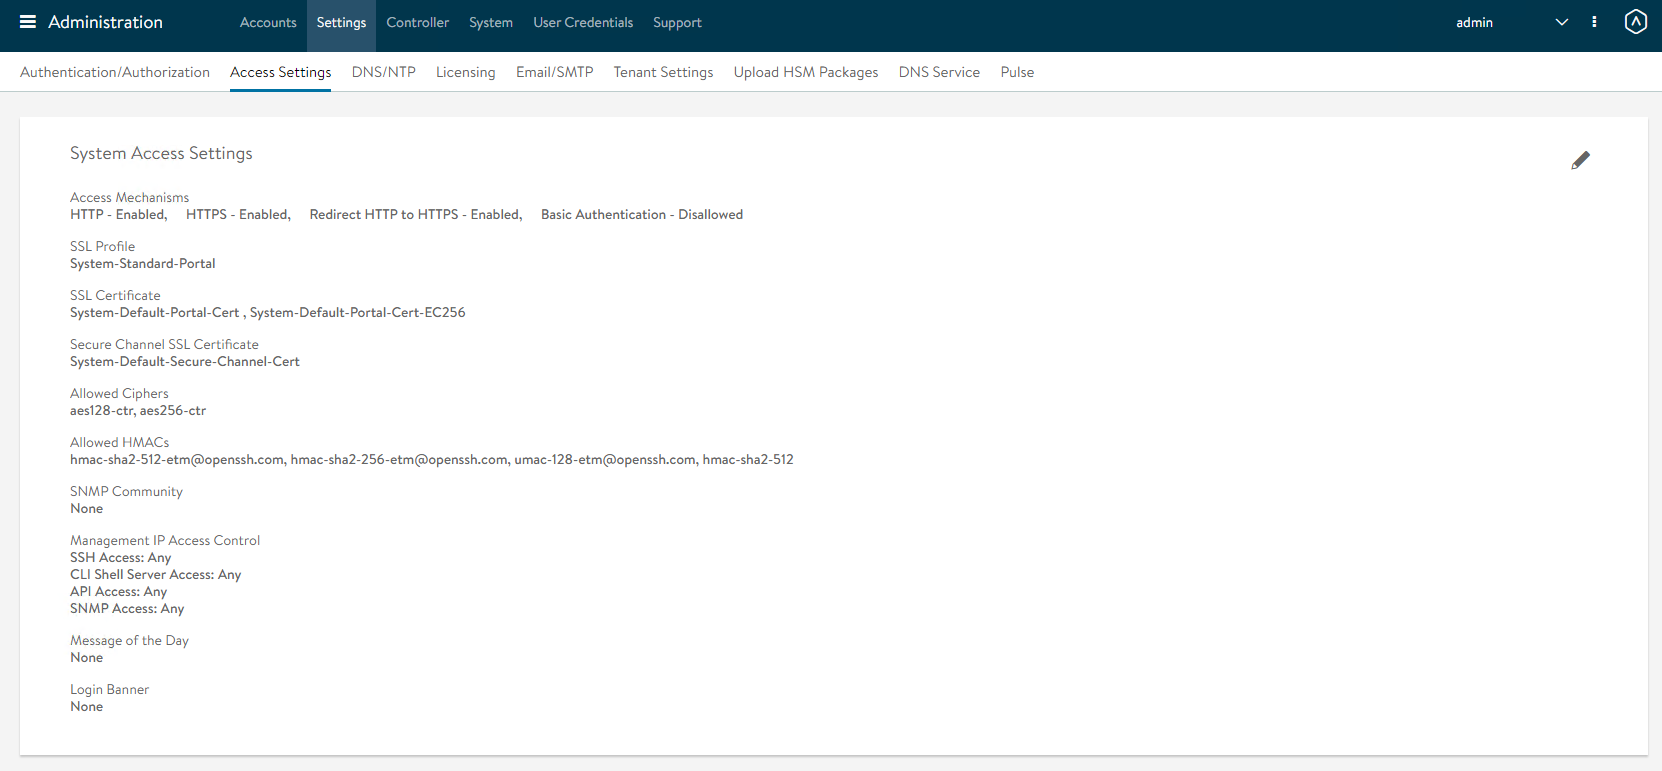
By default an evaluation key is used. To update the license key navigate to Administration -> Settings -> Licensing and apply the key or license file.
Assign a Certificate to the Controller
In the Avi Controller dashboard, navigate to Administration -> Settings -> Access Settings. Click on the edit/pencil icon
Delete the two certificates under SSL/TLS Certificate. Select the dropdown and Create Certificate
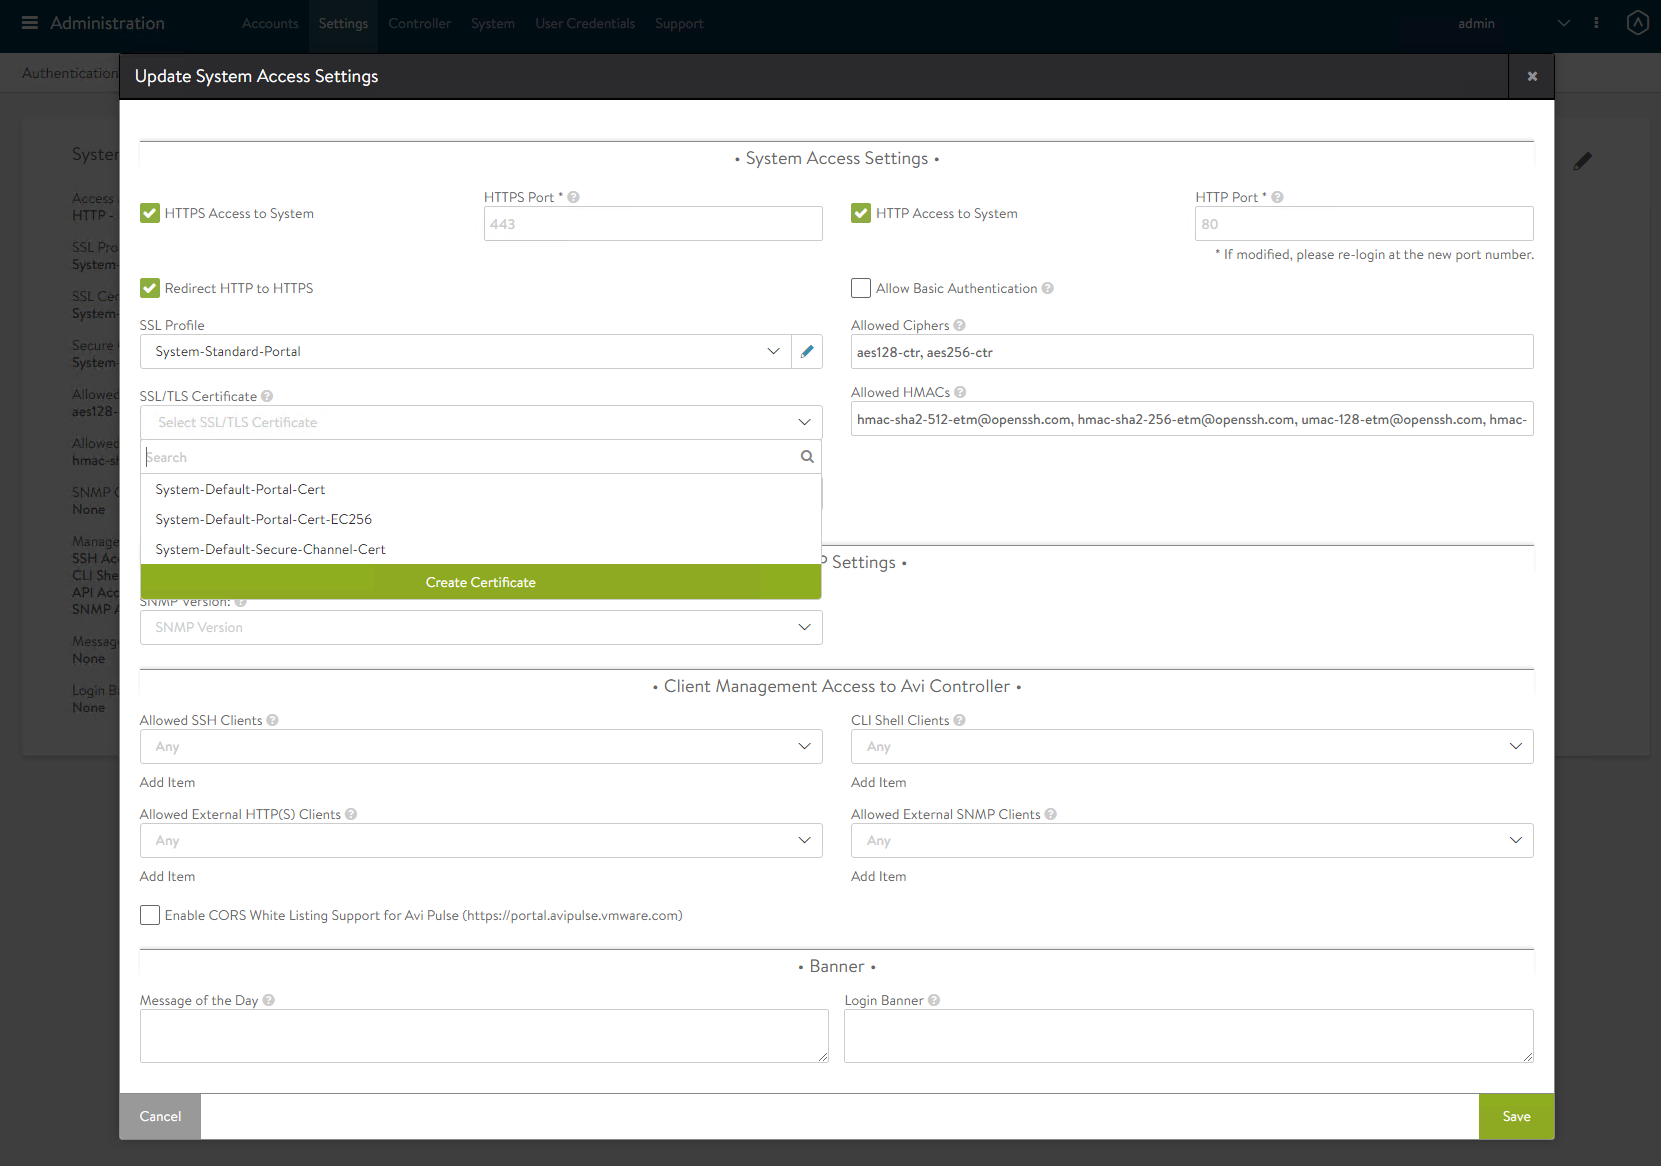
Enter the appliance FQDN/IP for both the name, commonname and SAN. You can either use a Self Signed or CSR
You can either use RSA 2048 or EC SECP256R1 for the algorithm

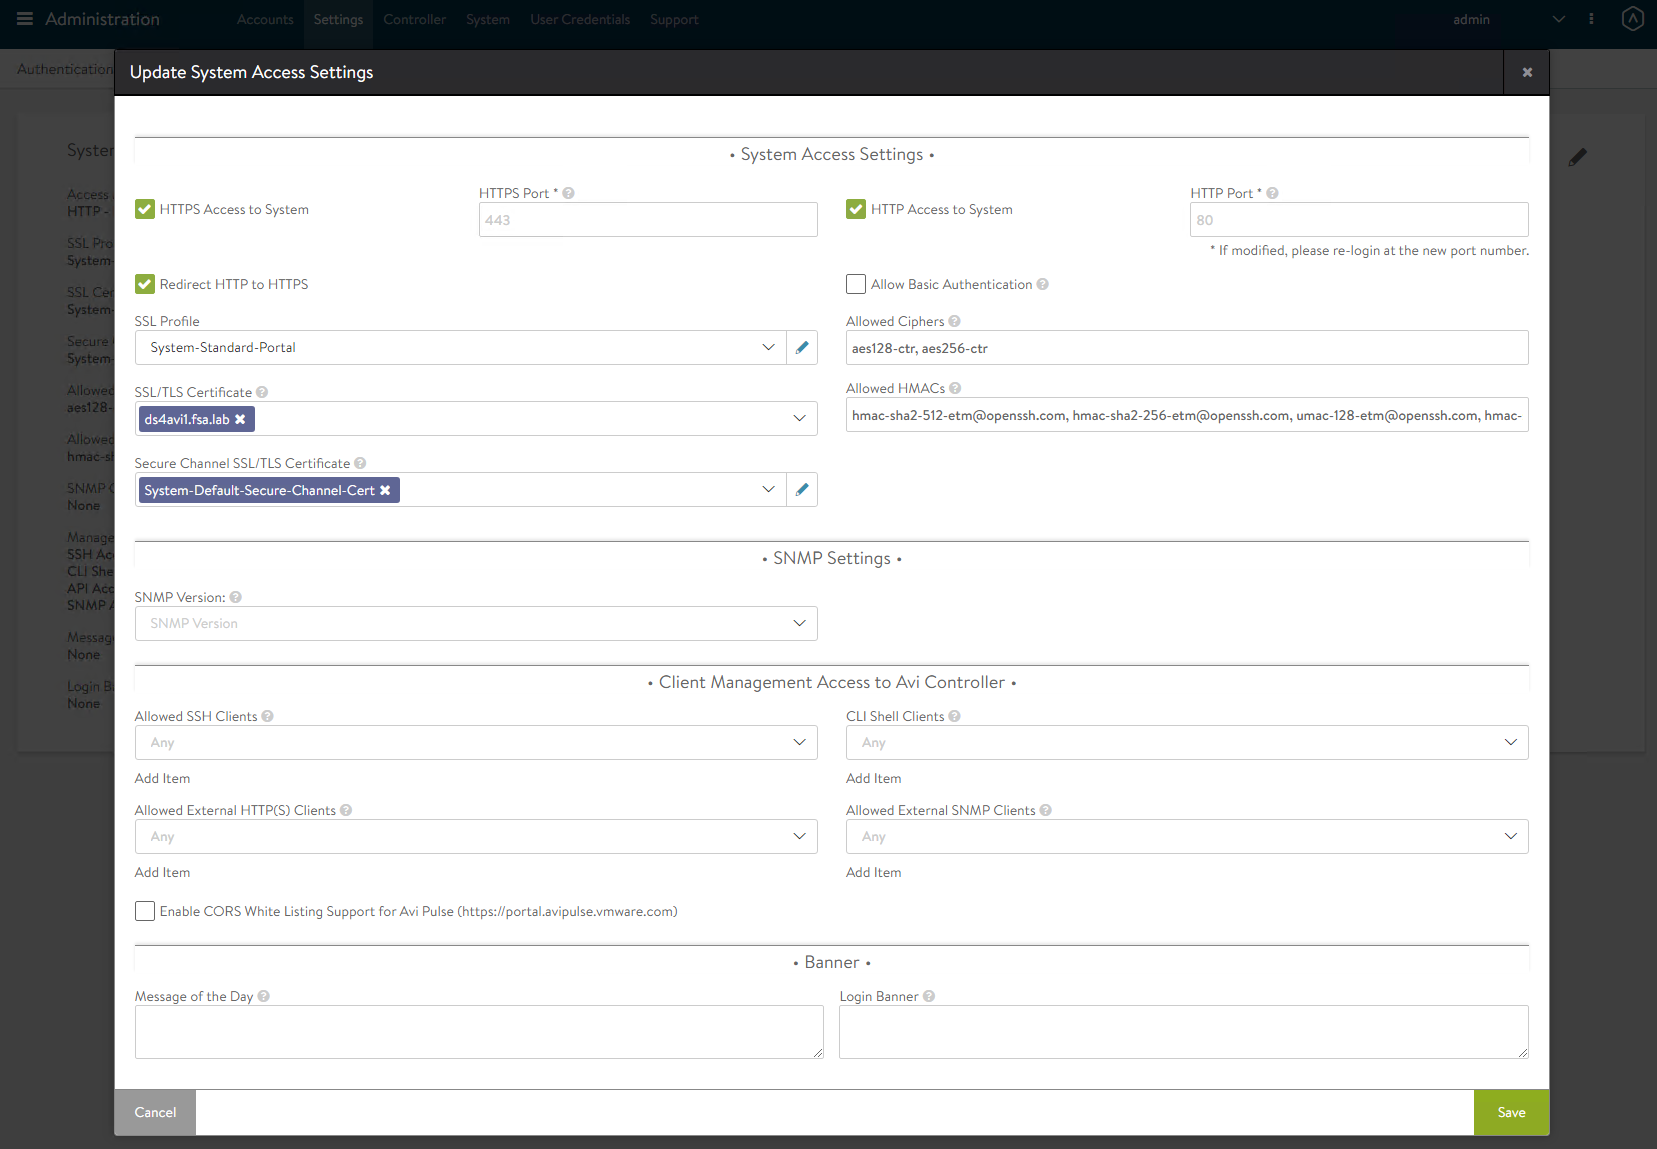
Select the new Certificate and hit Save
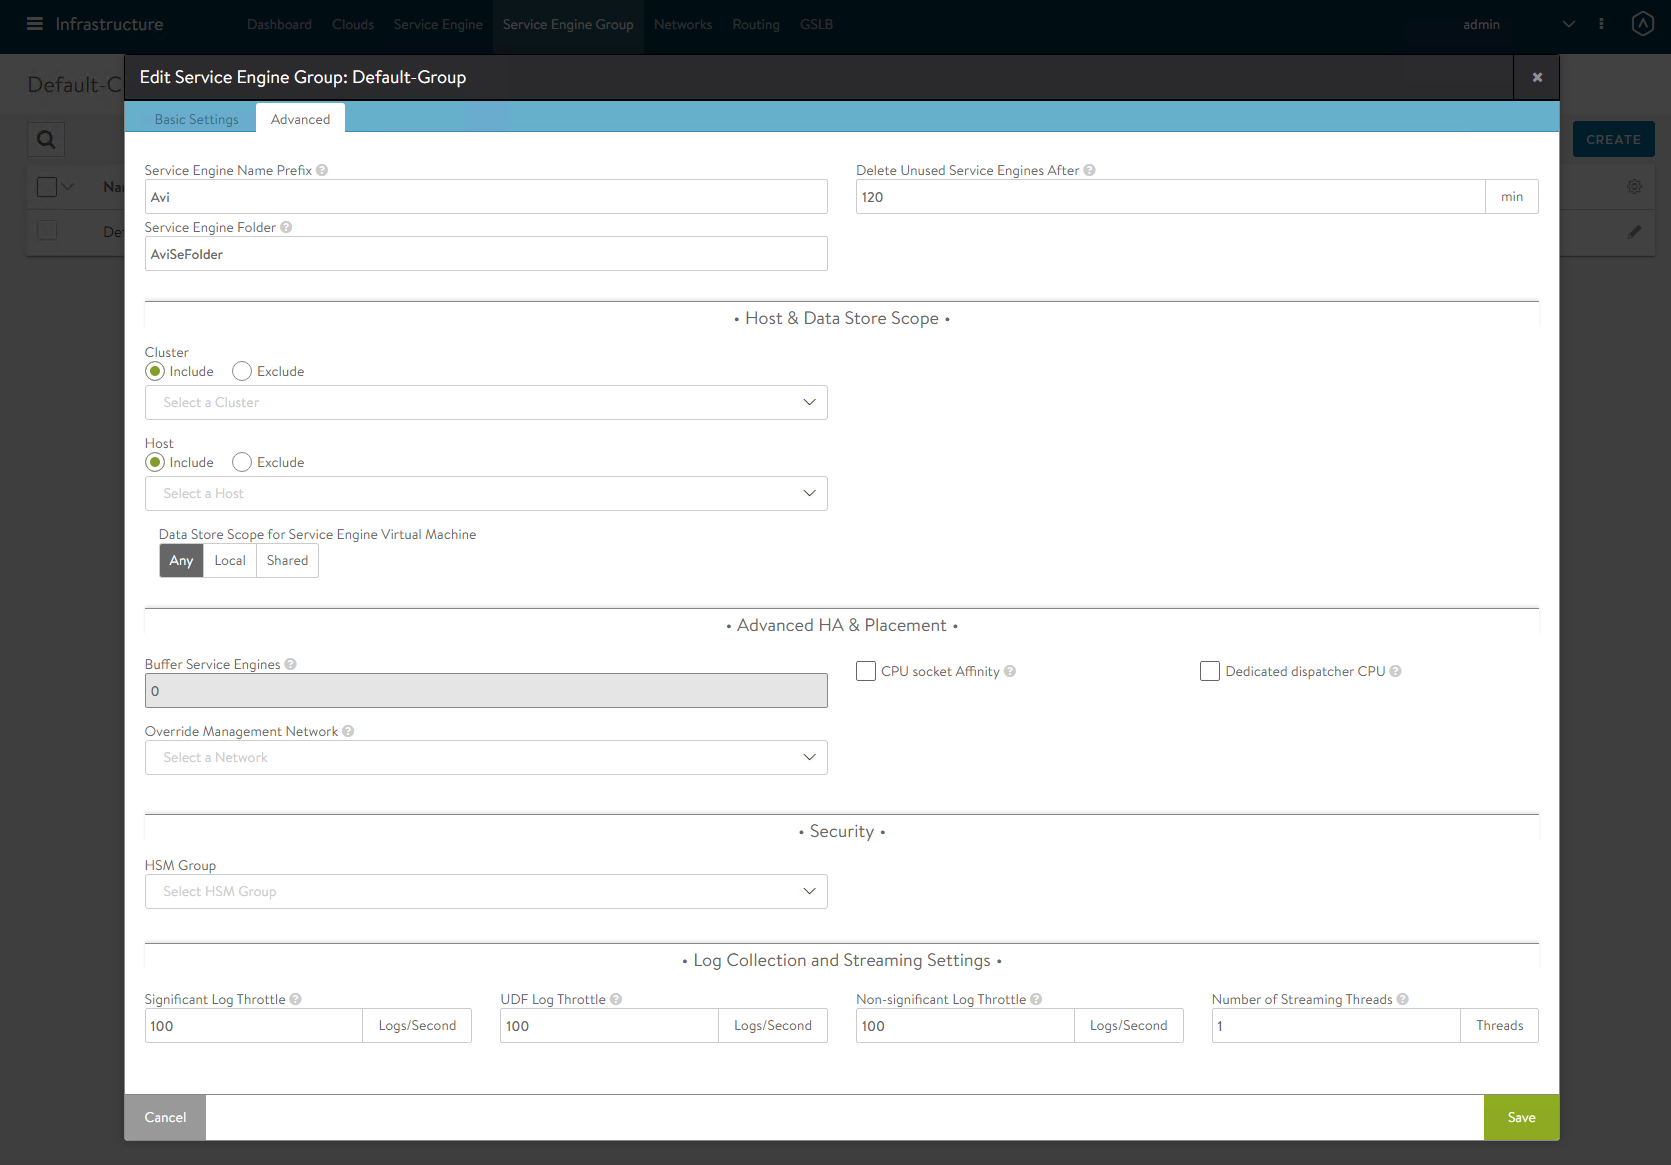
Configure a Service Engine Group
In the Avi Controller dashboard, navigate to Infrastructure -> Service Engine Group Select the edit/pencil for the Default -Group

Change the High Availability Mode to Active/Standby if using an Essentials License
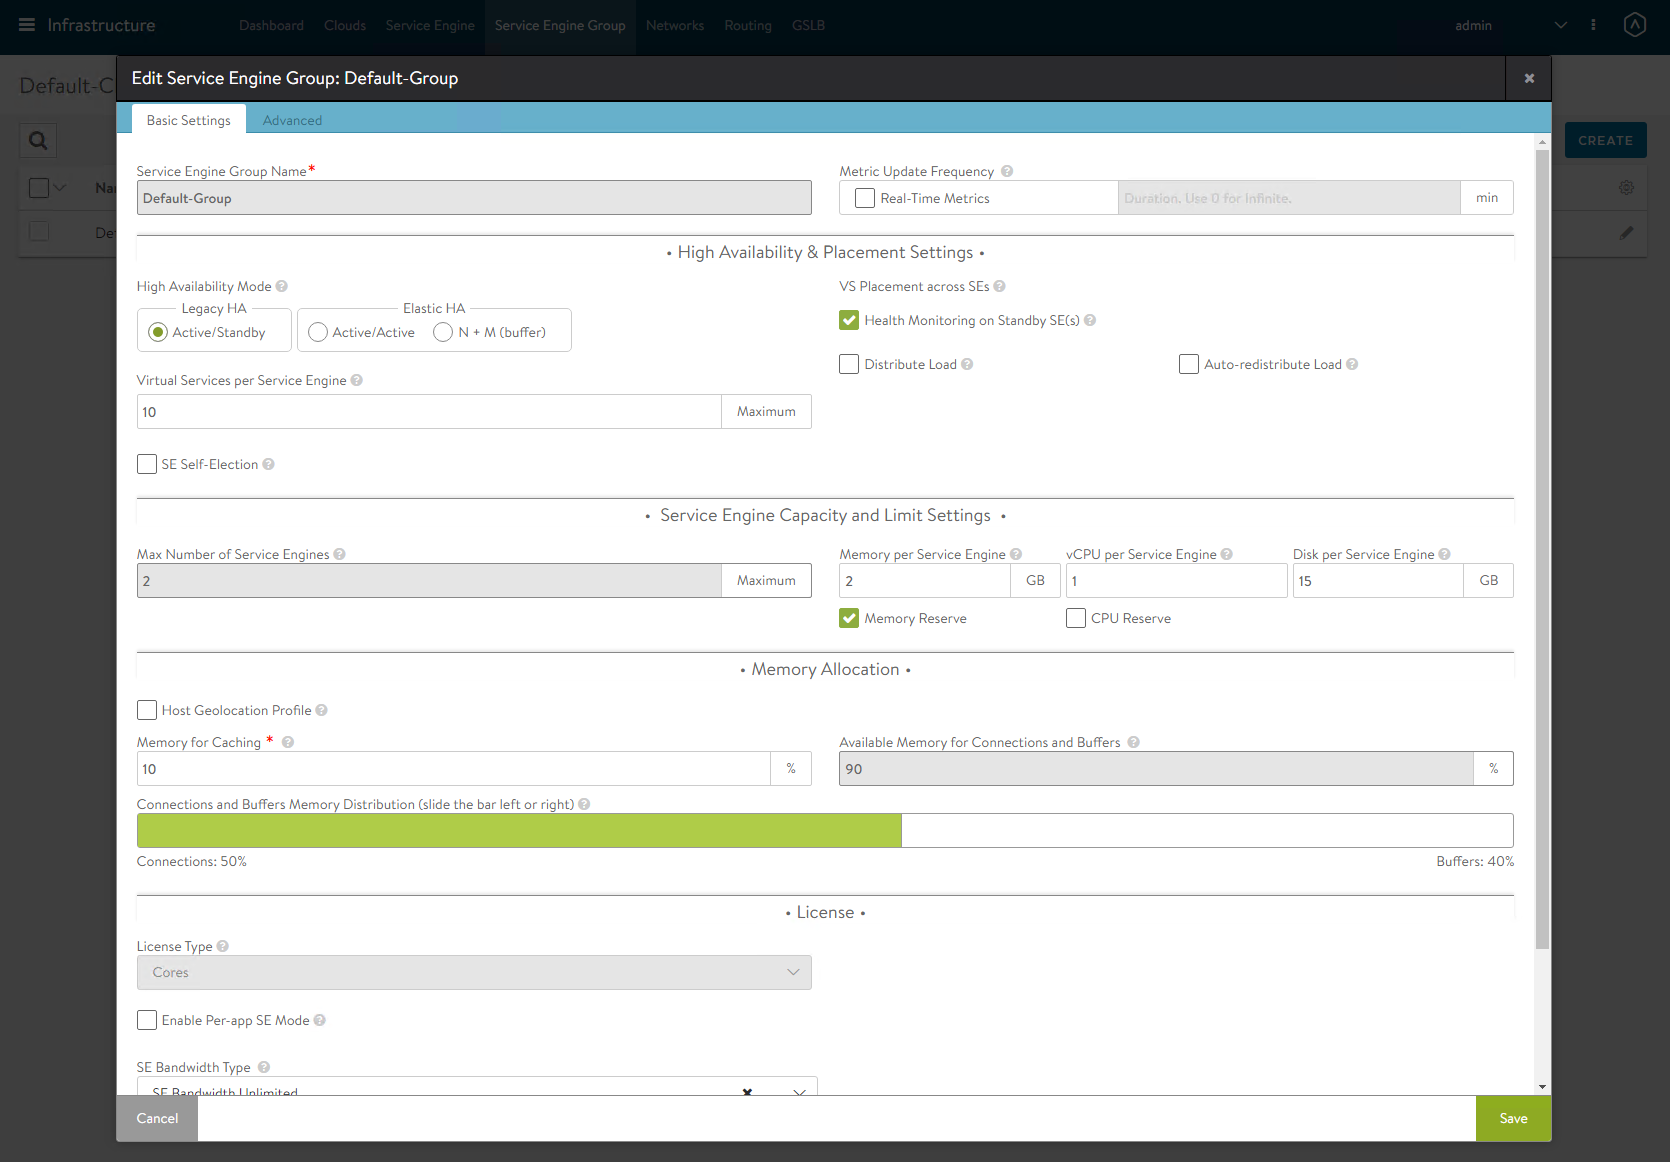
Under Advanced you can change the Service Engine prefix, Folder and deployment locations if multiple clusters exist.
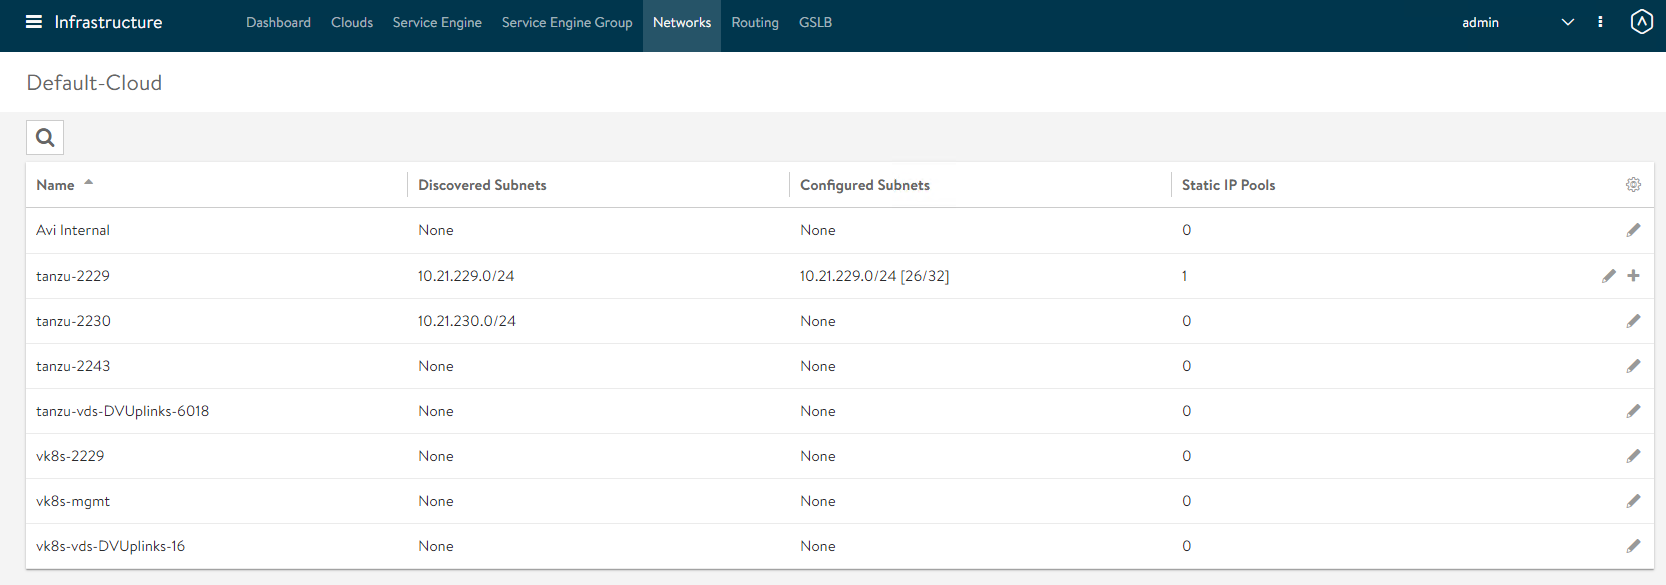
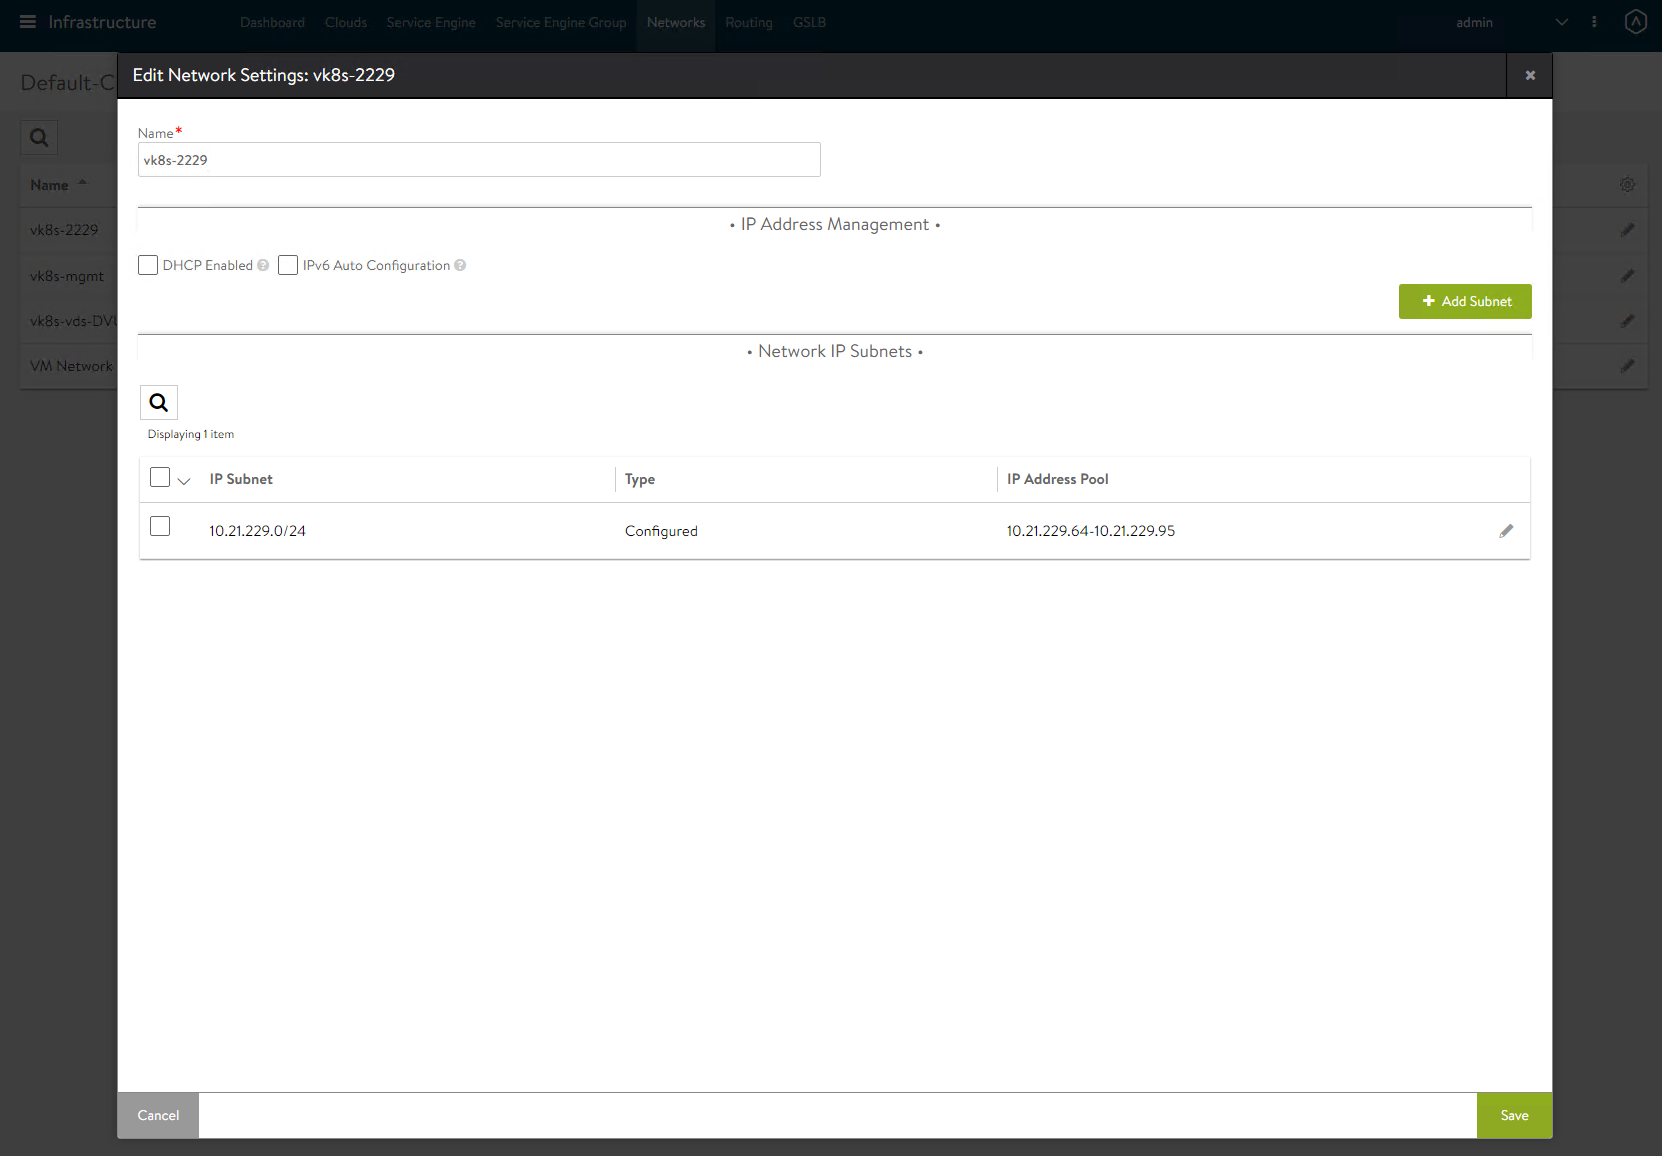
Configure a Virtual IP Network
In the Avi Controller dashboard, navigate to Infrastructure -> Networks Select the edit/pencil icon of the icon you wish to use for Load Balancing
If the Subnet is not autodiscovered click on Add Subnet. Enter in the Subnet that will be used for the Loadbalancer, Select Use Static IP Address for VIPs and SE and then enter a Static IP Address Pool
Deselect DHCP Enabled and Exclude Discovered Subnets for Virtual Service Placement
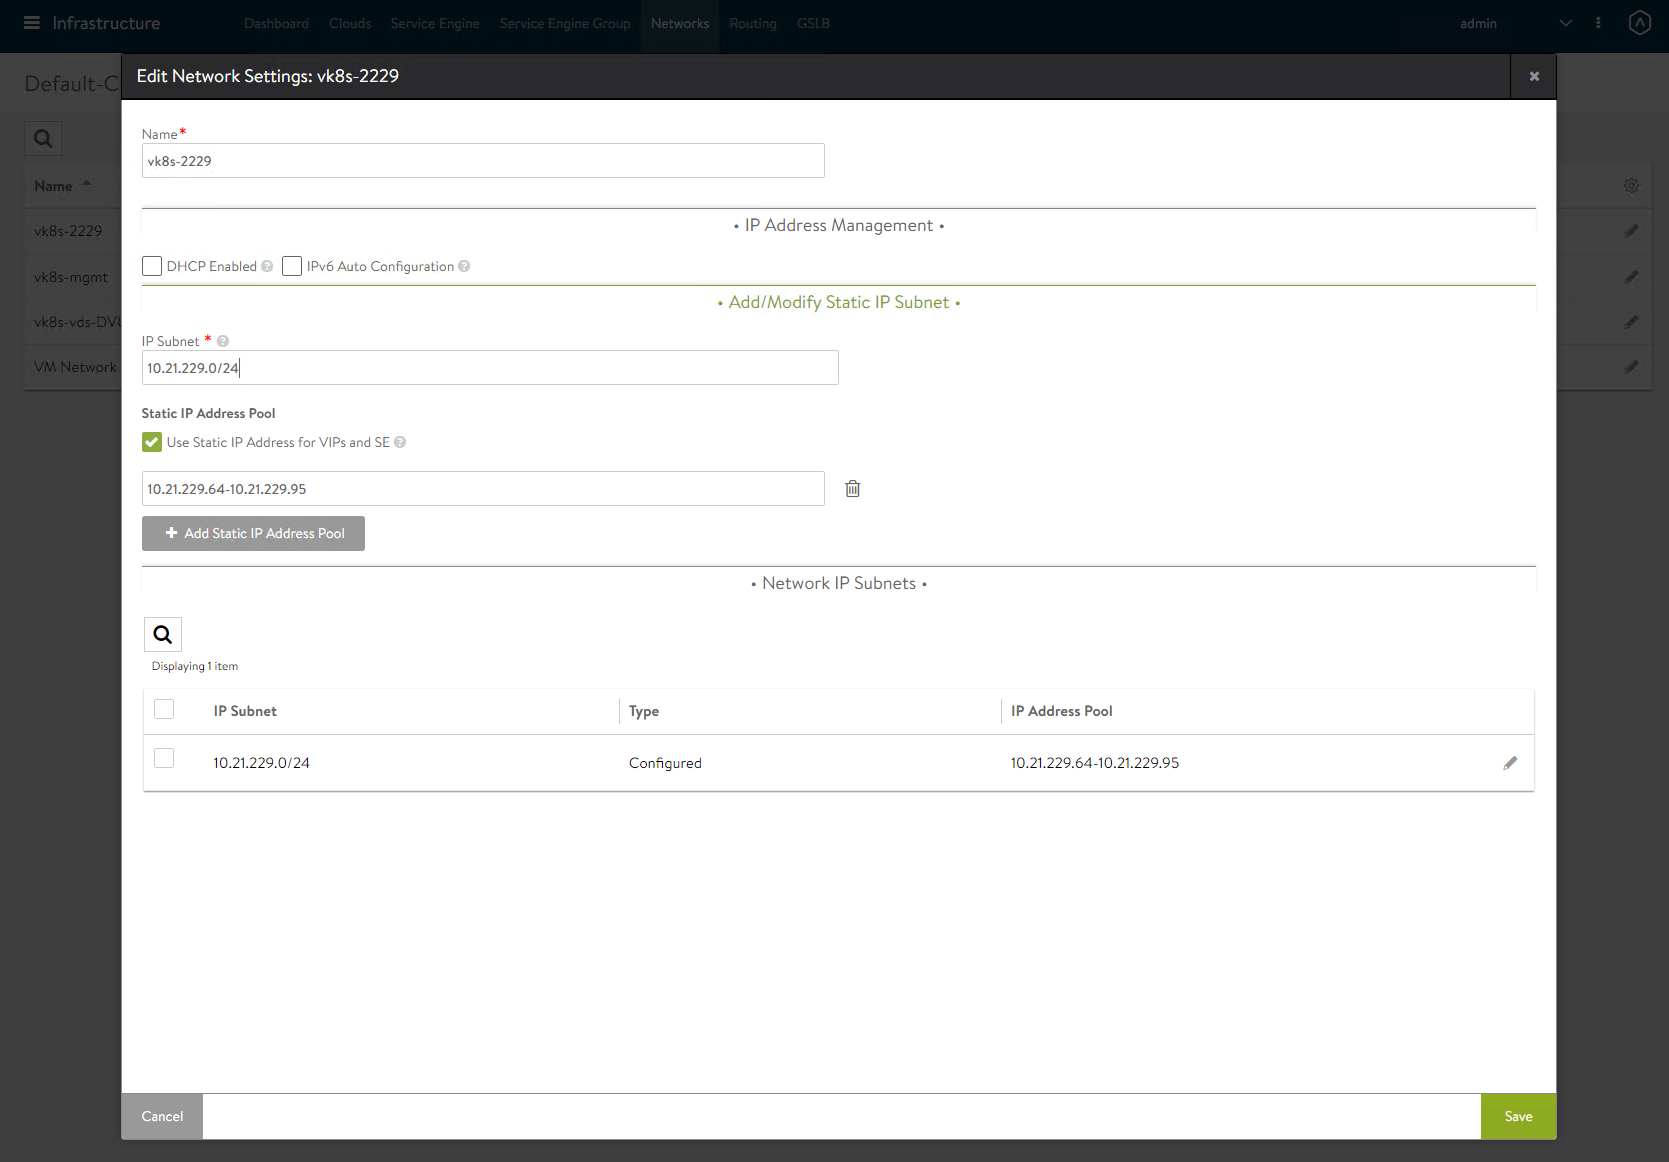
Verify the subnets and click Save
Configure Static Routes
In the Avi Controller dashboard, navigate to Infrastructure -> Routing

Click Create, For Gateway Subnet enter the subnet for the Workload network. For Next Hop, enter the gateway IP address for the management network and click Save

Validate your Static Route

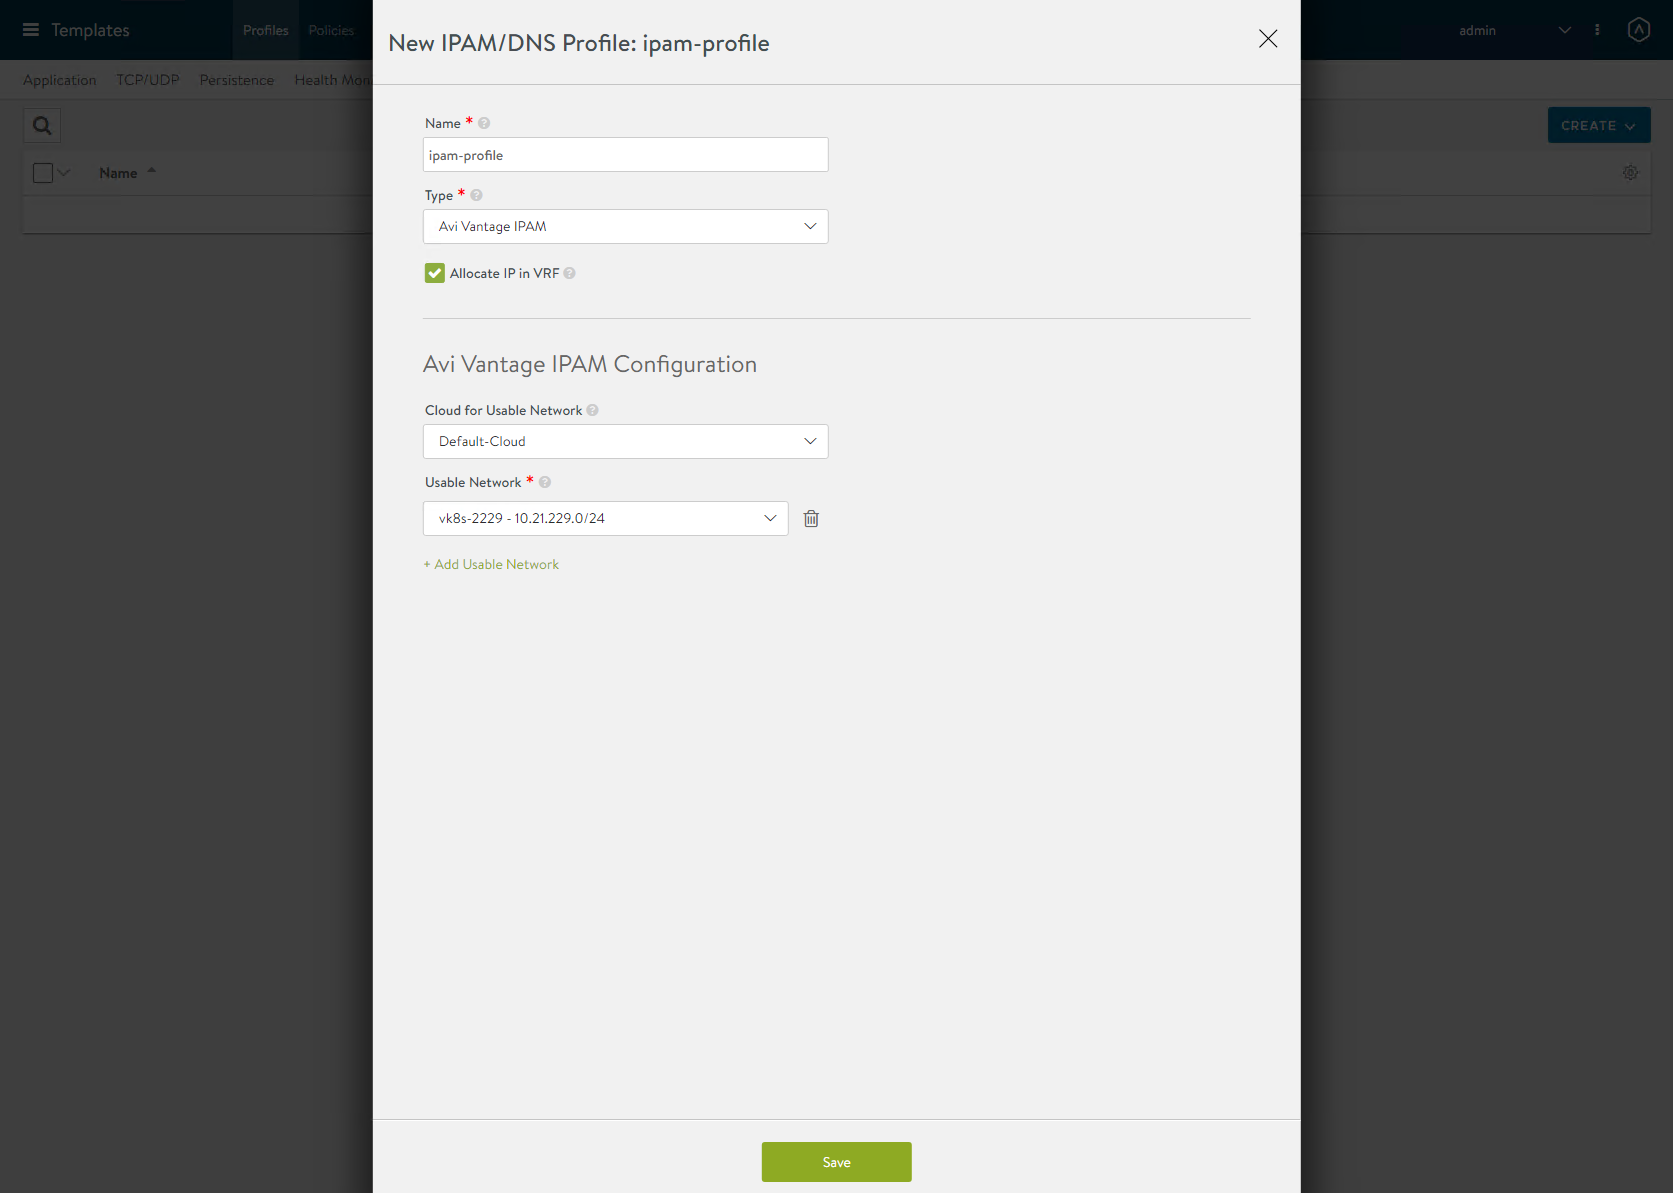
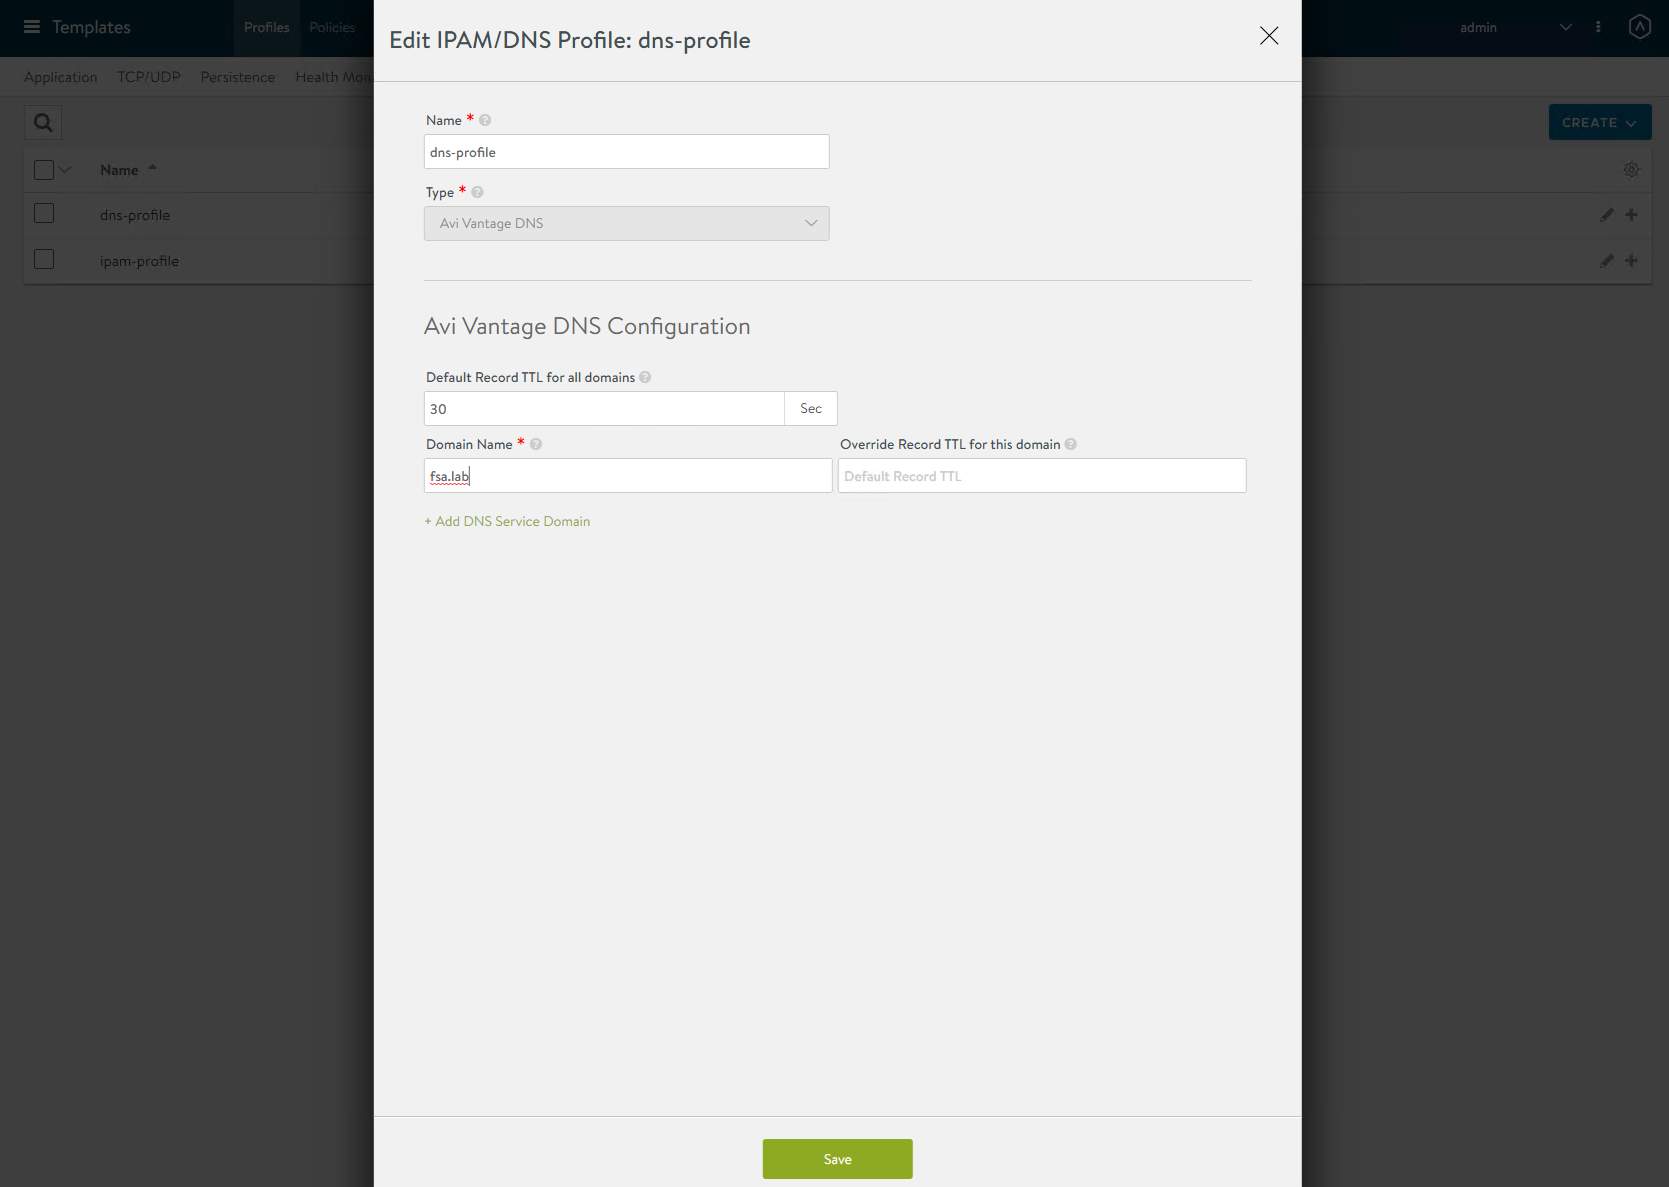
Configure the IPAM and DNS Profiles
Navigate to Templates -> Profile -> IPAM/DNS Profiles.
Click on Create IPAM Profile. Configure profile as seen in the image. Allocate IP in VRF and select your Default Cloud and Load Balancer network. Click Save
Click on Create DNS Profile. Configure profile as seen in the image. add a Domain Name and set a Default Record TTL. Click Save
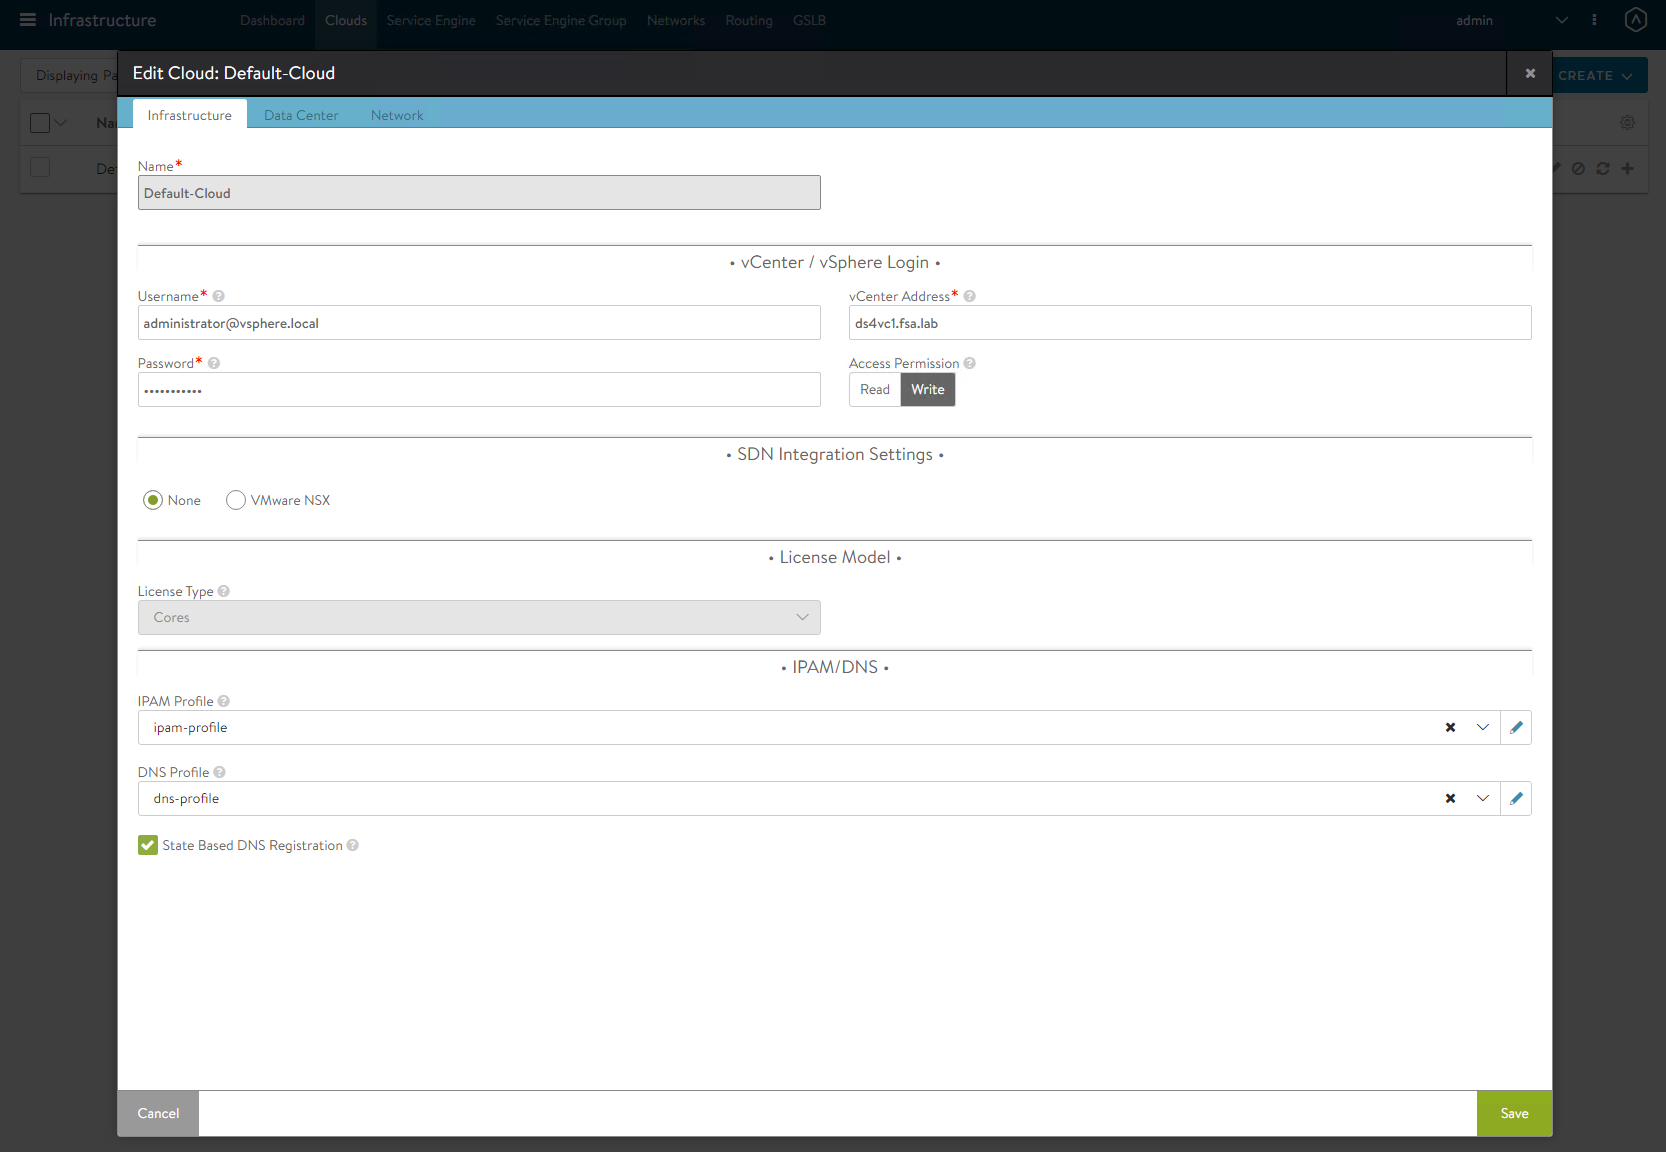
Assign these profiles to the Default Cloud by going to Infrastructure -> Clouds. Click the edit/pencil and assign the profiles.
Validate the NSX Advanced Load Balancer Configuration
Make sure status shows Green

Conclusion
This may seem a little more complex than HA Proxy setup, however it is still WAY easier then using NSX. Join me in the next post as I will show how to deploy vSphere with Tanzu using the NSX Advanced Load Balancer aka AVI.
If you have any additional questions or comments, please leave them below!
comments powered by DisqusSee Also
- Part 6: Deploying vSphere with Kubernetes - Provisioning and Managing a Tanzu Kubernetes Cluster
- Part 5: Deploying vSphere with Kubernetes - Using vSphere with Kubernetes
- Part 4: Deploying vSphere with Kubernetes - Enabling vSphere with Kubernetes
- Part 3: Deploying vSphere with Kubernetes - Deploy and Configure NSX-T
- Part 2: Deploying vSphere with Kubernetes - Configuring vCenter Server