- A Guide to Using iPXE + Pure Cloud Block Store for Stateless EC2 Instances - Part 1
A Guide to Using iPXE + Pure Cloud Block Store for Stateless EC2 Instances - Part 1
Are you searching for a more modern approach to deploying and managing your Amazon EC2 fleet? While the traditional EC2 boot process is dependable, it relies on local EBS storage. In this guide, I’ll show you how to leverage Pure Cloud Block Store to overcome this limitation by using an iPXE-based AMI. This method enables you to bootstrap EC2 instances over iSCSI, allowing for fully stateless deployments.
Introduction
On July 17th, AWS announced support for deploying external boot volumes with AWS Outposts. While I am still waiting for our Outposts to arrive, I decided to explore whether this functionality could be achieved using Amazon EC2 and Pure Cloud Block Store, instead of an AWS Outpost and a Pure Storage FlashArray.
Many of the steps in this guide mirror the process for creating and preparing an AMI, but the key differences are in how the boot volumes are provisioned and attached. In a future post, I’ll cover how to implement this workflow with AWS Outposts when it becomes available.
In Part 1 of this guide will walk you through setting up the environment, building a boot image, importing, exporting, or converting the boot image and downloading the image. In Part 2 we will cover the provisioning of the hosts, writing the image to a Pure Cloud Block Store volume, optionally creating a custom iPXE AMI, and deploying the EC2 instances.
Prerequisites
- Install the AWS CLI
- Python
- GitHub Reposistory for AWS Third Party Storage
- Deployed Cloud Block Store on AWS
- S3 Bucket for Images
- (Optional) OVF Tools
Prerequisite Setup
Note: All instructions below are based on using a machine running Linux. If you are using macOS or Windows, please refer to the documentation for platform-specific commands.
To get started, clone the required GitHub repository:
git clone https://github.com/aws-samples/sample-outposts-third-party-storage-integration.git
cd sample-outposts-third-party-storage-integration
Making sure you are in the directory, run the following commands to setup the Python environment:
# Create a virtual environment
python3 -m venv .venv

# Activate the virtual environment
source .venv/bin/activate

# Install dependencies
pip install -r requirements.txt
Next you will need to configure your AWS credentials, there are two ways to do this based on how you are authenticating to AWS.
If you are using AWS IAM Users you can use the following script to pull the temporary credentials
Usage
python3 scripts/get_temporary_credentials_awscli.py
Example Output
Requesting temporary AWS credentials…
Temporary AWS credentials are generated successfully!
These credentials will be valid for 11 hours and 59 minutes.Please copy and paste the following commands into your shell to configure your AWS environment:
export AWS_ACCESS_KEY_ID=ASIA1234567890EXAMPLE
export AWS_SECRET_ACCESS_KEY=abcdefghijklmnopqrstuvwxyz1234567890EXAMPLE
export AWS_SESSION_TOKEN=AQoEXAMPLEH4aoAH0gNCAPyJxz4BlCFFxWNE1OPTgk5TthT…
export AWS_DEFAULT_REGION=us-west-2\
If you are using AWS Identity Center like I am. The following documentation explains how to configure your SSO profile.
To make the AWS_PROFILE variable permanent export the value to your ZSH or BASH profile.
echo 'export AWS_PROFILE=AWS_AdministratorAccess-#######' >> ~/.zshrc
Login to AWS using the AWS CLI.
aws sso login --profile AWS_AdministratorAccess-#######
With all prerequisites in place, we can now proceed to the next phase: preparing the boot image that will be used for our stateless EC2 deployment.
Build a Custom Boot Image
When building your boot image, you have two main options: use an existing vSphere/on-premises image or customize an Amazon AMI to fit your needs.
If you choose an on-premises virtual machine, you can start with an existing VM or template, or create a new image from scratch using Packer. Packer is a powerful tool for automating the creation of base templates for vSphere environments.
Once your VM or template is ready, export it to OVF format (for VMware) by following the AWS VM Import guide.
Next, convert the OVF files to an OVA package using the OVF Tool.
For an example of the conversion process, you can run:
<pathtovftool>/ovftool ./ubuntu24.ovf ./ubuntu24.ova
Import Boot Image
AWS provides a robust Import/Export workflow through the VM Import tool. For even greater simplicity, the AWS team has developed the VMIE utility—a Python-based implementation that streamlines the process. VMIE enables you to import images directly as AWS AMIs and export AMIs to RAW format, with added support for customizations.
To use the VMIE Python tool to important an existing image to an AWS AMI, use the following command making sure to pass in your S3 bucket and the path to your OVA file.
python3 -m vmie import --region us-west-2 --s3-bucket ec2-boot-image-12345 --source ../ubuntu24.ova
When the import process is complete, you will see a detailed output including the ID of our imported AMI which we will need for our next step.

Now that the image has been imported, we are one step further to using it to build our EC2. The next section covers how we can export our AMI as a raw image that we can use to write to our external storage volume.
Export Boot Image
Following what we previously did, we will use the VMIE library to export our image to a RAW file. In order to export the file we will need the S3 bucket where we wish to store our RAW file and then the AMI that we wish to export. In this example you can choose to use the –install-sanbootable flag which will prepare your image for iSCSI SAN Boot if it was not done as part of the image creation.
NOTE:
- In order to successfully export the image, the EBS Volumes of the AMI CANNOT be encrypted.
- In order to use the –install-sanbootable flag there must be a default VPC defined as documented in the README
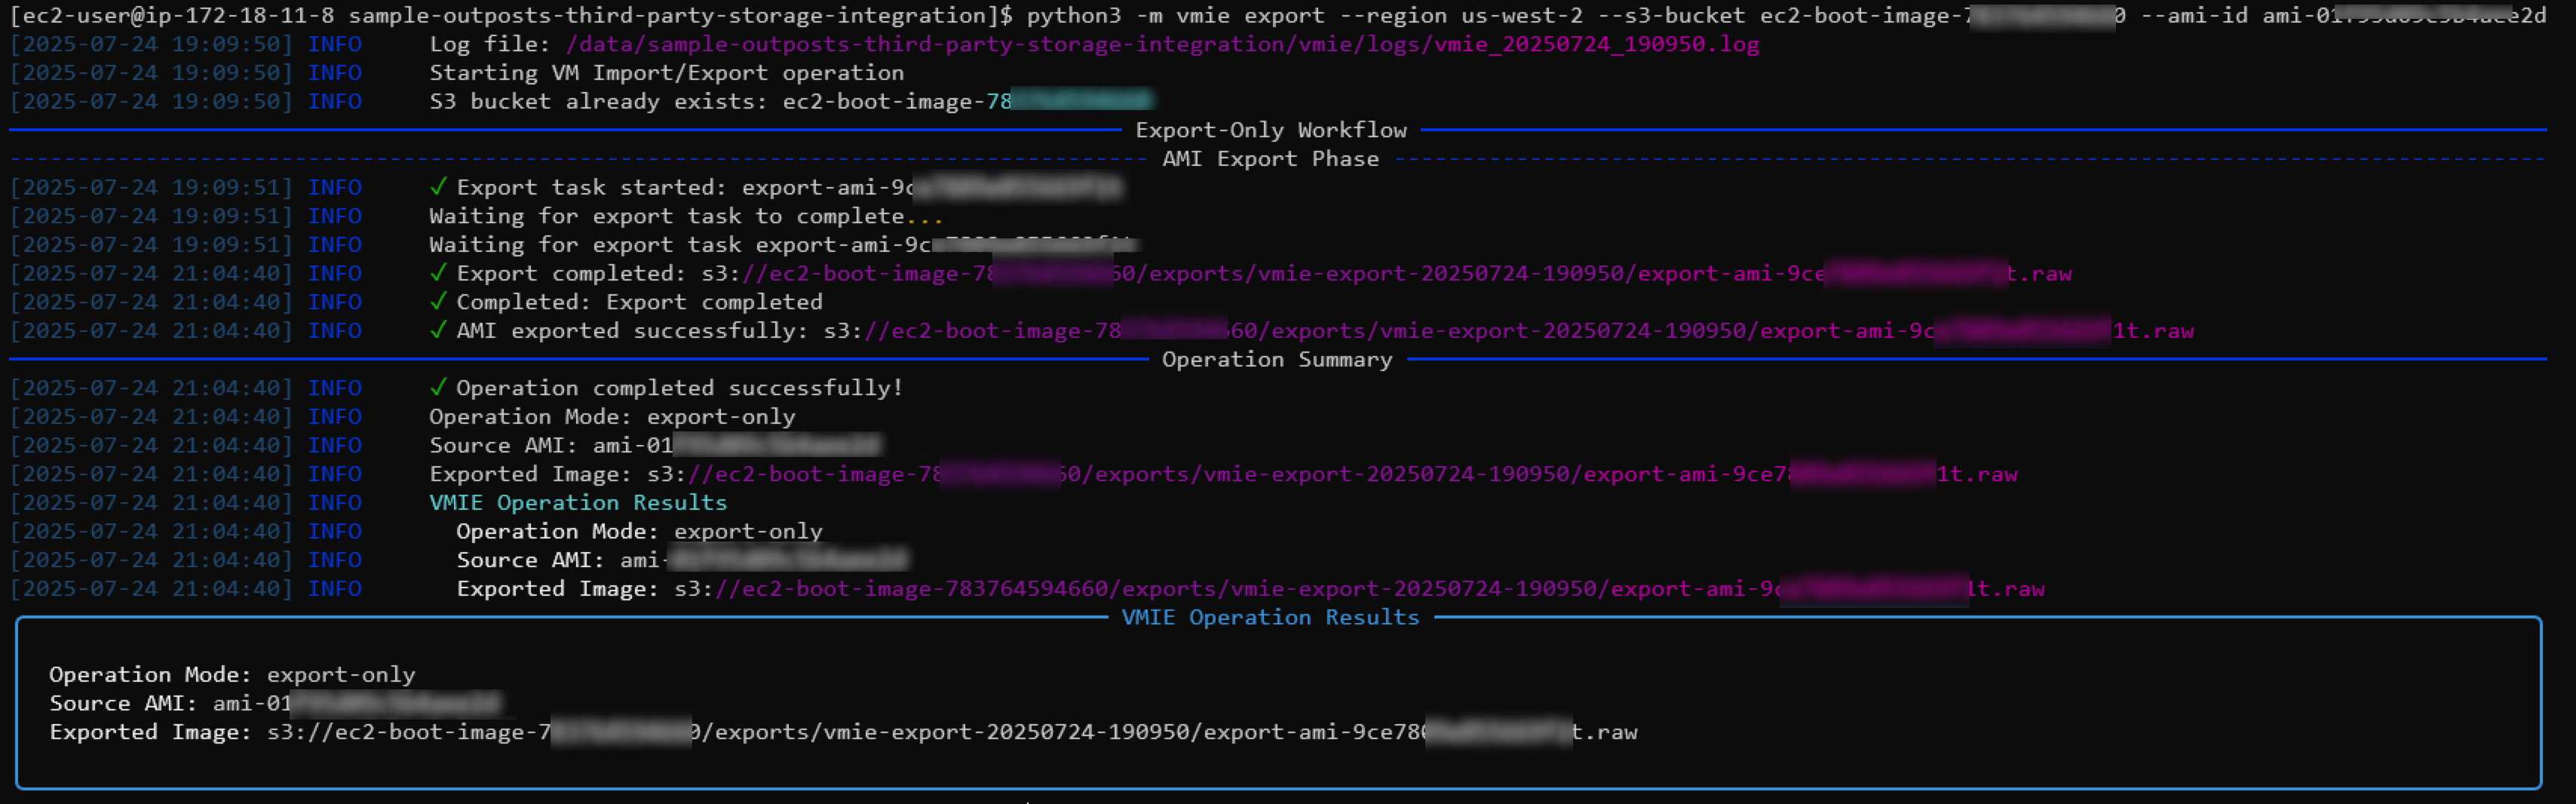
python3 -m vmie export --region us-west-2 --s3-bucket ec2-boot-image-12345 --ami-id ami-0abcd12345 --install-sanbootable
When the export is complete we will see the detailed output including the path to our RAW image that we will use in the following step.
To download the image from the S3 bucket you can use the following command replacing your file location from what was seen in the output above.
aws s3 cp "s3://ec2-boot-image-12345/exports/vmie-export-20250724-215303/export-ami-abcd.1234.raw" ./ubuntu24.raw
Convert Boot Image
The VMIE library also includes a command that can handle both the import and export into a single process in which they call “convert”. The command is similar as above, where we need to pass in the S3 bucket as well as the source image.
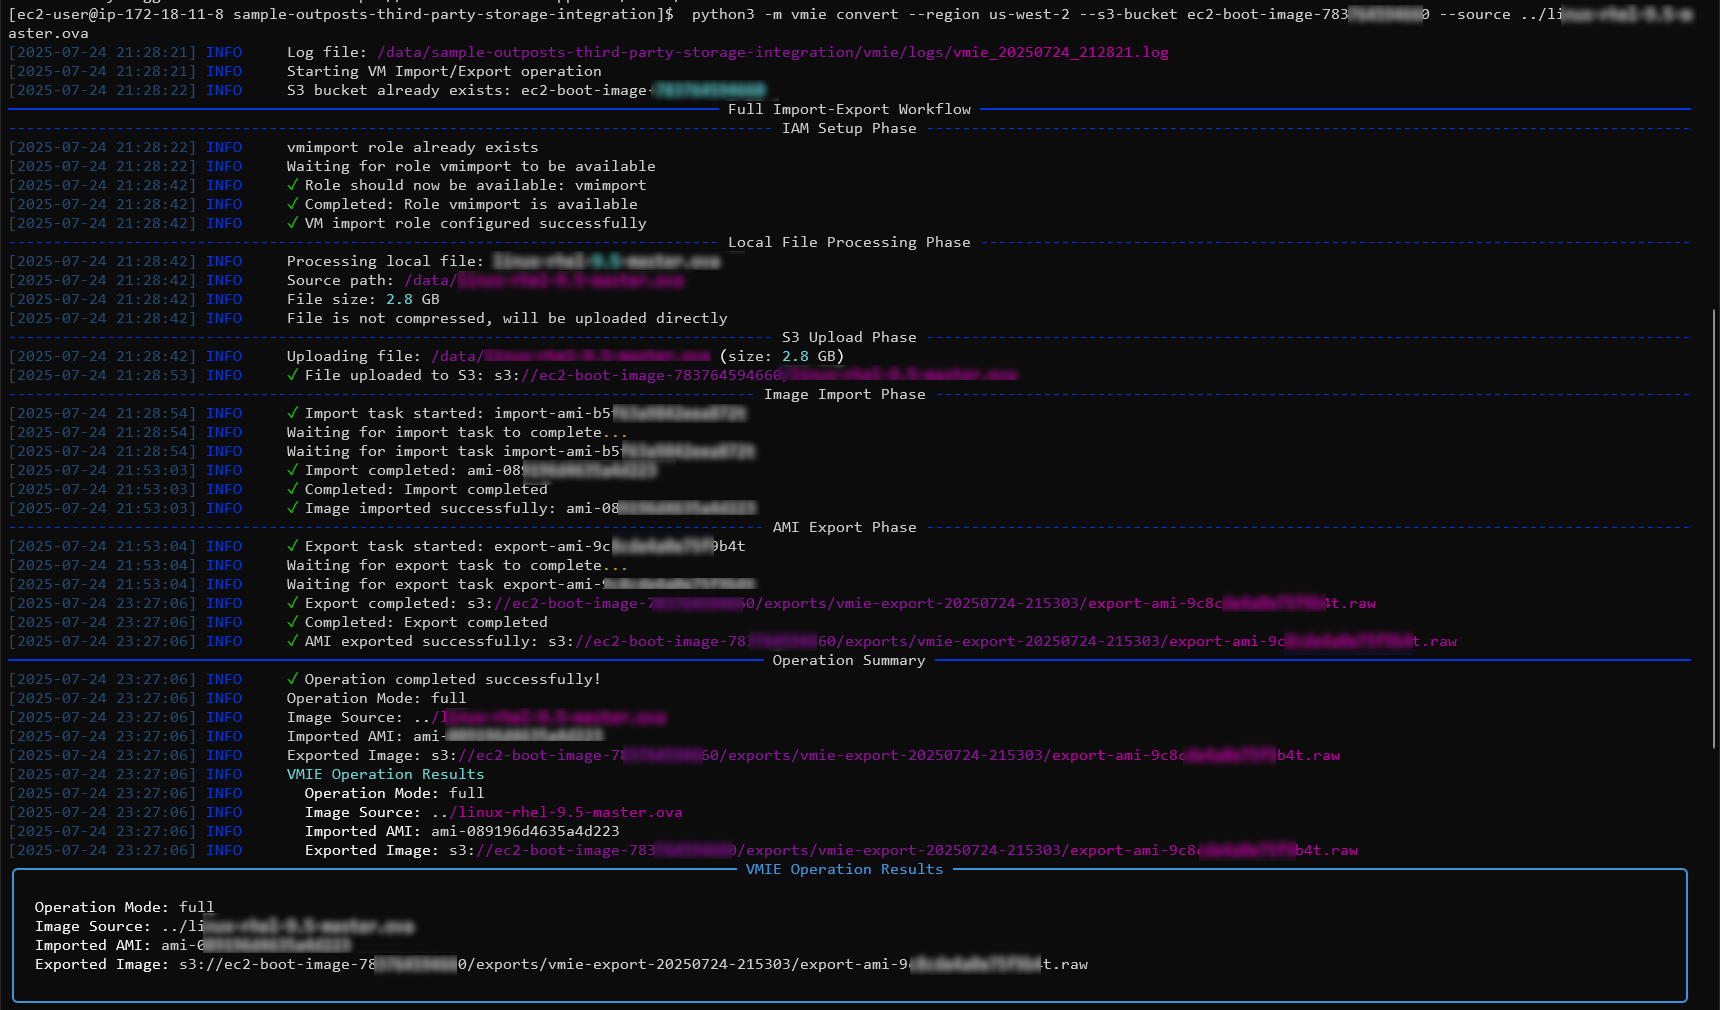
python3 -m vmie convert --region us-west-2 --s3-bucket ec2-boot-image-12345 --source ../ubuntu24.ova --install-sanbootable
Once the conversion process is complete, details such as the imported AMI ID and the path to the exported RAW file will be shown.
Once the process is complete, we can use the same command as above to download the image from the S3 bucket to our local machine.
aws s3 cp "s3://ec2-boot-image-12345/exports/vmie-export-20250724-215303/export-ami-abcd.1234.raw" ./ubuntu24.raw
(Preferred) Use an Existing Amazon EC2 Image
After I had completed my testing using the process above, I was shared an example where instead of creating a custom image I could use an existing AMI which greatly simplified this process. Using the scripting that was part of the library, I was able to add additional customizations using the existing scripts that are completed as part of the export process.
In this example, I now am using the Amazon Ubuntu 24 AMI ami-05f991c49d264708f and the –install-sanbootable flag. Using this flag will allow the image to be prepared for SAN Boot if it was not done as part of the image creation. In my deployment I was able to customize the script that is located here to add in additional image preparation steps to be completed during the conversion process, such as installing updates or additional packages.
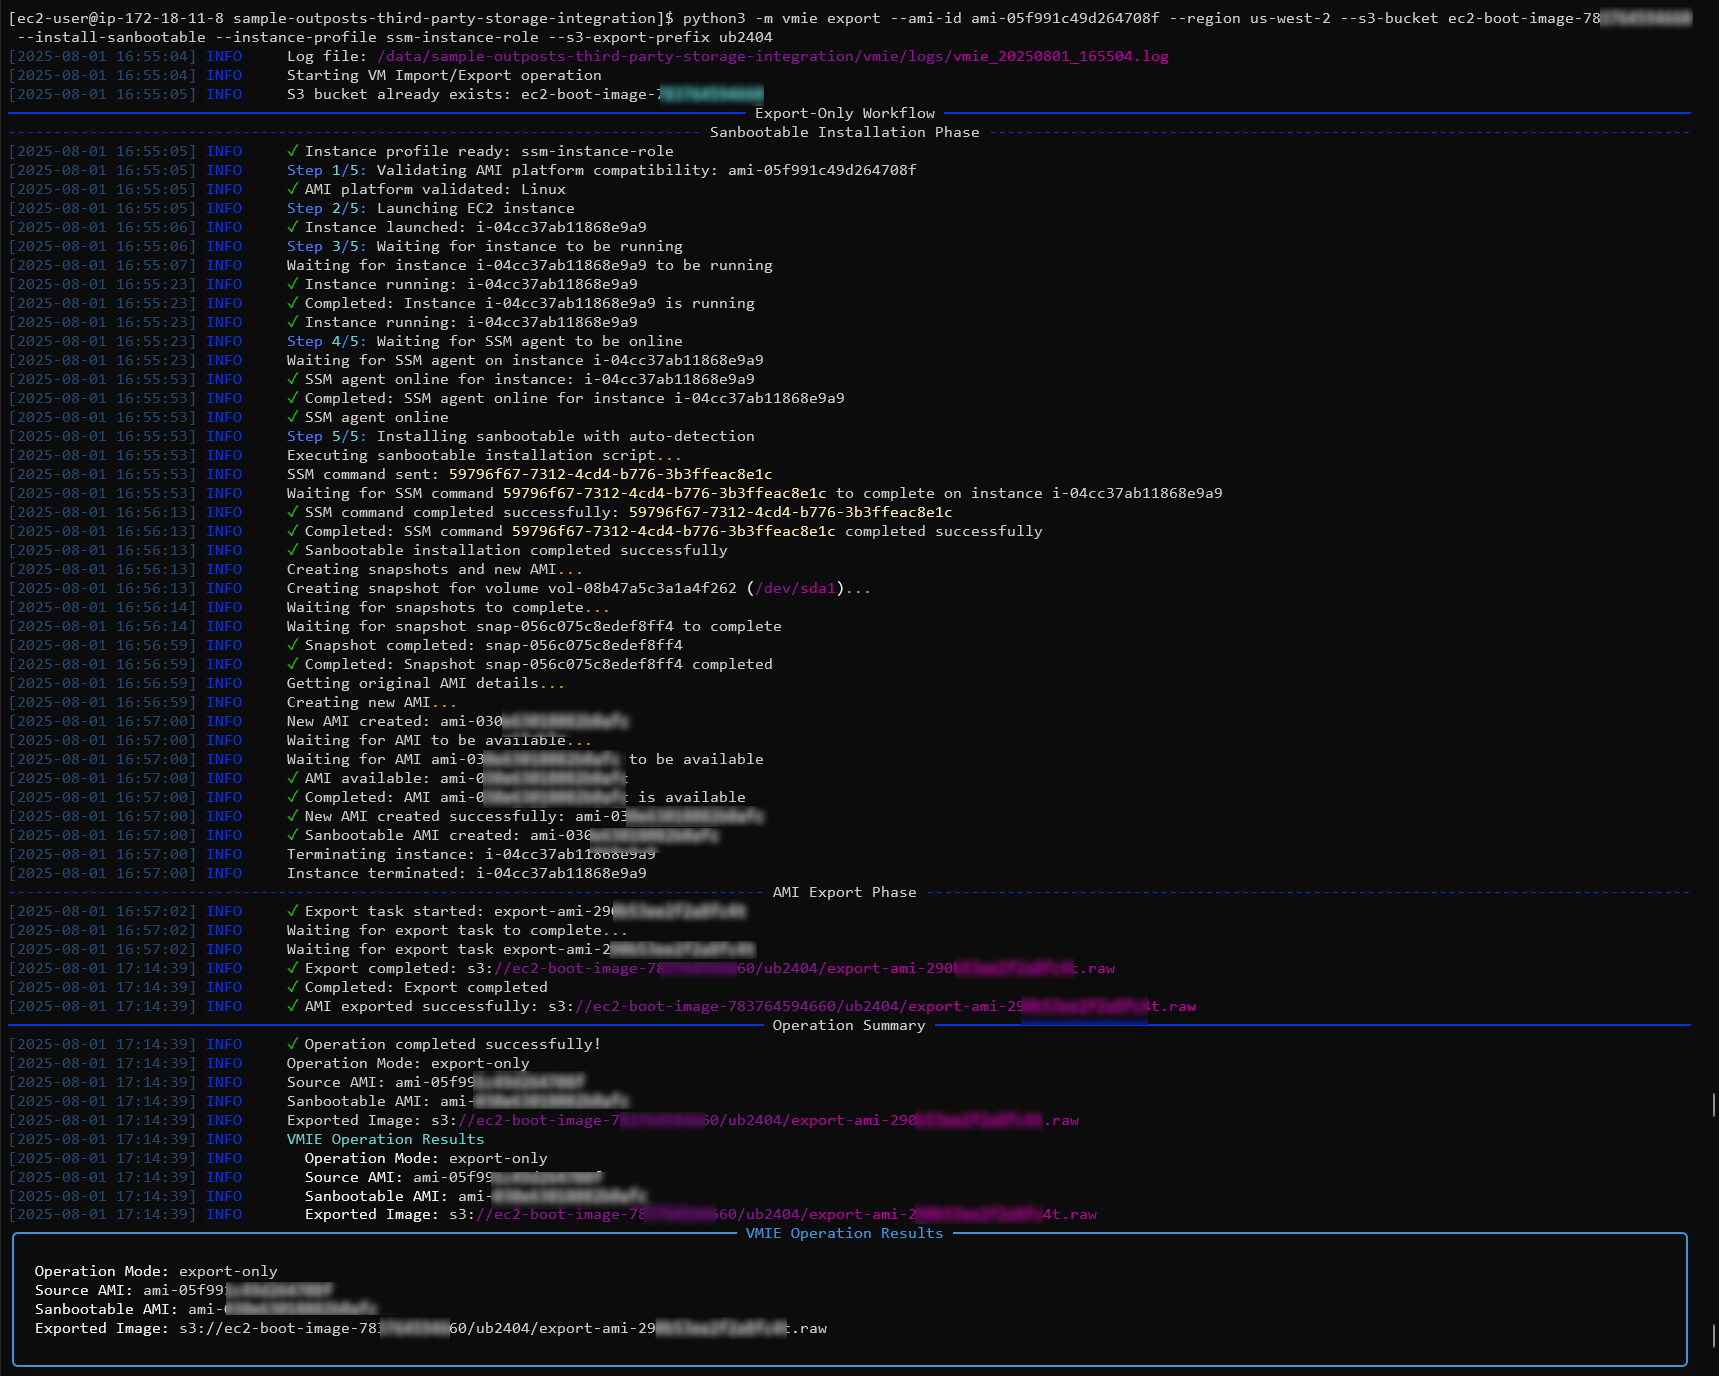
python3 -m vmie export --ami-id ami-05f991c49d264708f --region us-west-2 --s3-bucket ec2-boot-image-12345 --install-sanbootable --instance-profile ssm-instance-role --s3-export-prefix ubuntu2404
Once the export process is complete, we again see the path to our exported image that we will use in the following step.
Once again we will use the following command to download our image to our local machine.
aws s3 cp "s3://ec2-boot-image-12345/exports/vmie-export-20250724-215303/export-ami-abcd.1234.raw" ./ubuntu24.raw
Conclusion
By following the steps outlined above, you now have a foundation for preparing and exporting a image suitable for our stateless EC2 deployment using iPXE.
In the next part of this series, we’ll dive into connecting to Pure Cloud Block Store, writing our image to a volume, and deploying fully stateless EC2 instances. If you have questions or feedback, feel free to leave a comment below!
comments powered by DisqusSee Also
- Deploying a Linux EC2 Instance with Hashicorp Terraform and Vault to AWS and Connect to Pure Cloud Block Store
- Deploying a EC2 Instance with PowerShell to AWS
- Deploying a Windows EC2 Instance with Hashicorp Terraform and Vault to AWS
- Using CloudFormation to Manage EC2 in AWS
- Pure Cloud Block Store on AWS - Quick Launch