- A Guide to Using iPXE + Pure Cloud Block Store for Stateless EC2 Instances - Part 3
A Guide to Using iPXE + Pure Cloud Block Store for Stateless EC2 Instances - Part 3
Welcome back to Part 3 of the Using iPXE + Pure Cloud Block Store (CBS) for Stateless EC2. In the first part of the series we covered getting all the details ready, Part 2 did a deeper into the AWS and Pure Storage ecosystem and now part 3 will include some advanced day 2 automation.
Prerequisites
- Python
- GitHub Reposistory for AWS Third Party Storage
- Deployed Cloud Block Store on AWS
- (Optional) Install Terraform
Recap
Previously in Part1 and Part2 we covered the configuration of the environment and deploying a single EC2. It included the following steps:
Part 1
- Prerequisite Setup
- Building and Exporting the boot image
- Downloading boot image to our local machine
Part 2
- Create and mount a CBS volume to jump host
- Write boot image to be used as a template
- Deploy Stateless EC2 with boot volumes on CBS.
Now in Part 3 we will use advanced automation to bootstrap our machine.
- Create a custom iPXE Image that allows nested user data
- Install Additional Packages and Configuration
- Deployment of additional iSCSI volumes to our guest
Create a Custom iPXE Image
Currently, the iPXE image supports a single user data file. There is a pending update for the image to be updated to support additional bootstrapping. The following code can be used to clone the repository, make the local image and then upload it to AWS to use as a custom AMI.
git clone https://github.com/amazon-contributing/upstream-to-ipxe.git
cd upstream-to-ipxe/src
make CONFIG=cloud EMBED=config/cloud/aws.ipxe bin-x86_64-pcbios/ipxe.usb
../contrib/cloud/aws-import -r us-west-2 bin-x86_64-pcbios/ipxe.usb
When the import is complete, we will find the ID of our new AMI.

The next section we will proceed to create our EC2 using this new AMI.
Create EC2 Instance and Install NGINX
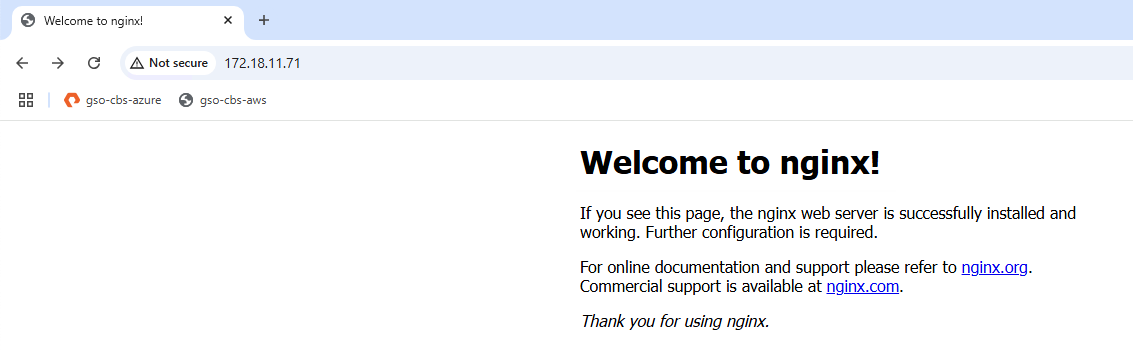
In this section we will create an EC2 using our new AMI, it allows the ability to do both pre-boot user data s well as post-boot user data. We will use this configuration to install updates as well as NGINX. Once the deployment is complete we will see that the default nginx site is available. The below sample Terraform code has been updated with the new AMI and an updated user data script.
Once you run terraform apply your machine will be deployed! Once the deployment is complete, navigate to your IP and see your website. The user data is not immediate so you can track the status on our linux machine at /var/log/cloud-init-output.log.
Create EC2 Instance and Mount Additional iSCSI Volume
In the final section we will take what we have done and build our final automation package. We will deploy our EC2 machine, configure the guest for iSCSI and mount an additional volume from our Pure CBS array.
NOTE
This example will utilize additional open source providers that may not be fully supported so please be aware of this when reviewing the code and examples.
When we run our terraform apply we will see that the host and volumes will be automatically created on thee array.
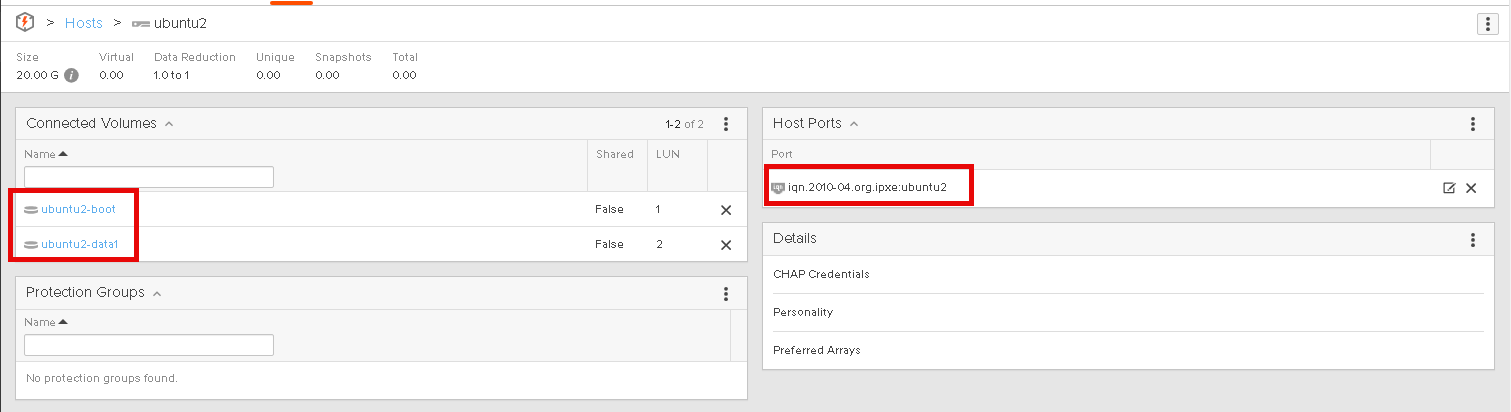
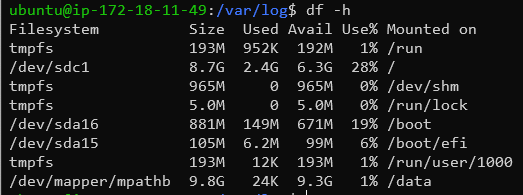
Once the deployment finishes we can see that our volume has been mounted to our /data directory. We can also again track the status of the automation on our linux machine at /var/log/cloud-init-output.log.
This automation creates a great repeatable process that can scale and provide ease of use to deploy multiple machines using a template boot volume.
Conclusion
That’s it! Hopefully this series gave you a few ideas on how powershell this can be, is there anything else you would like to see?
If you have questions or feedback, feel free to leave a comment below!
comments powered by DisqusSee Also
- A Guide to Using iPXE + Pure Cloud Block Store for Stateless EC2 Instances - Part 2
- A Guide to Using iPXE + Pure Cloud Block Store for Stateless EC2 Instances - Part 1
- Deploying a Linux EC2 Instance with Hashicorp Terraform and Vault to AWS and Connect to Pure Cloud Block Store
- Deploying a EC2 Instance with PowerShell to AWS
- Deploying a Windows EC2 Instance with Hashicorp Terraform and Vault to AWS