Cloud Block Store Use Cases for Microsoft Azure - Terraform Edition
Previously I explained how to use Terraform to Deploy an Azure VM. Now that Cloud Block Store iS GA in Azure, I can cover how to use Automation for Test/Dev, Disaster Recovery and Migration use cases to move workloads from on-premises to Microsoft Azure!
Overview
When it comes to automating deployments, its great to be able to use the same automation tool across clouds. This blog will focus on how to migrate windows based machines from on-premises to Microsoft Azure. We will utilize Terraform to automate provisioning. Utilizing previous powershell scripts to configure iSCSI will simplify and automate some of these use cases.
Pre-Requisites
- This is used to authenticate to Azure to deploy the VM via Terraform.
- This is used to automate the provisioning using a Terraform .TF file.
- This is the infrastructure to run the Azure virtual machines.
Terraform Manifest Configuration
Download the sample manifest from GitHub and update the variables for your environment. This includes the Azure Resource Group, Virtual Network, Subnet and Interface. You will also need to update the Azure VM’s hostname, admin username and password as well as any of fields you wish.
provider "azurerm" {
    features {}
}

data "azurerm_resource_group" "resourcegroup" {
    name     = "Azure-ResourceGroup"
}

data "azurerm_virtual_network" "virtualnetwork" {
    name                = "Azure-VirtualNetwork"
    resource_group_name = data.azurerm_resource_group.resourcegroup.name
}

data "azurerm_subnet" "subnet" {
    name                 = "Azure-Subnet"
    resource_group_name  = data.azurerm_resource_group.resourcegroup.name
    virtual_network_name = data.azurerm_virtual_network.virtualnetwork.name
}

resource "azurerm_network_interface" "networkinterface" {
    name                = "Azure-NetworkInterface"
    location            = data.azurerm_resource_group.resourcegroup.location
    resource_group_name = data.azurerm_resource_group.resourcegroup.name
    ip_configuration {
        name = "Azure-IP"
        subnet_id = data.azurerm_subnet.subnet.id
        private_ip_address_allocation = "Dynamic"
    }
}

resource "azurerm_windows_virtual_machine" "avm" {
    name = "DS-TERRAFORM"
    resource_group_name = data.azurerm_resource_group.resourcegroup.name
    location = data.azurerm_resource_group.resourcegroup.location
    computer_name = "hostname"
    admin_username = "terraform"
    admin_password = "Password1!"
    size = "Standard_B1s"
    network_interface_ids = [
        azurerm_network_interface.networkinterface.id,
    ]
    os_disk {
        caching              = "ReadWrite"
        storage_account_type = "Standard_LRS"
    }
    source_image_reference {
        publisher = "MicrosoftWindowsServer"
        offer     = "WindowsServer"
        sku       = "2019-Datacenter"
        version   = "latest"
    }
}

resource "azurerm_virtual_machine_extension" "customize" {
    name                 = "customize"
    virtual_machine_id   = azurerm_windows_virtual_machine.avm.id
    publisher            = "Microsoft.Compute"
    type                 = "CustomScriptExtension"
    type_handler_version = "1.9"
    protected_settings = <<PROTECTED_SETTINGS

    protected_settings = <<PROTECTED_SETTINGS
    {
        "commandToExecute": "powershell.exe -Command \"./chocolatey.ps1; exit 0;\""
    }
    PROTECTED_SETTINGS

    settings = <<SETTINGS
    {
        "fileUris": [
            "https://gist.githubusercontent.com/mcasperson/c815ac880df481418ff2e199ea1d0a46/raw/5d4fc583b28ecb27807d8ba90ec5f636387b00a3/chocolatey.ps1"
        ]
    }
    SETTINGS
}
Update the Terraform Manifest for Your Environment
This file is a standard deployment of an azure virtual machine. The best part about it is that you can utilize Azure customization to run a script once the machine is deployed.
To customize the Azure VM you’ll need to update the customize resource. You can either have it run a local file, or in my case it pulls down the script from a GIST. In an enterprise environment this can be a local server or repository.
resource "azurerm_virtual_machine_extension" "customize" {
    name                 = "customize"
    virtual_machine_id   = azurerm_windows_virtual_machine.avm.id
    publisher            = "Microsoft.Compute"
    type                 = "CustomScriptExtension"
    type_handler_version = "1.9"
    protected_settings = <<PROTECTED_SETTINGS
    protected_settings = <<PROTECTED_SETTINGS
    {
        "commandToExecute": "powershell.exe -Command \"./ConfigureAzureCBS-DR.ps1; exit 0;\""
    }
    PROTECTED_SETTINGS

    settings = <<SETTINGS
    {
        "fileUris": [
            "https://gist.githubusercontent.com/dstamen/e021dcc181c30a9fc5af2d33deafff3f/raw/56b568a9e1183bc5920a344eb51b8a90690fd620/ConfigureAzureCBS-DR.ps1"
        ]
    }
    SETTINGS
Scripted Use Cases
THe following script is a standard PowerShell script that will do the following for a Windows based Azure Virtual Machine.
- Install PowerShell Pre-Requistives and the PureStoragePowershellSDK
- Set iSCSI Service to Startup Automatically
- Set a Custom iSCSI IQN (this allows the host to be pre-configured on CBS)
- Configure iSCSI to talk to the CBS Array and Connect initiators
- Login to the flasharray and will overwrite the CBS volume with the latest replicated snapshot. It will then online the disk within windows.
#Install Pure Powershell Module
Install-PackageProvider -Name NuGet -MinimumVersion 2.8.5.201 -Force
Install-Module PureStoragePowershellSDK -Confirm:$false -Force

#Enable ISCSI
Set-Service -Name msiscsi -StartupType Automatic
Start-Service -Name msiscsi

#Confgure Static Initiator Name
Set-InitiatorPort -NodeAddress (Get-InitiatorPort).NodeAddress -NewNodeAddress "iqn.1991-05.com.ds-terraform"

#Configure ISCSI to CBS
$iscsitarget = "172.29.0.6"
if ((Get-IscsiTargetPortal).TargetPortalAddress -notcontains $iscsitarget){
    New-IscsiTargetPortal -TargetPortalAddress $iscsitarget
    Get-IscsiTarget | Connect-IscsiTarget -InitiatorPortalAddress (Get-NetIPAddress |Where-Object {$_.InterfaceAlias -like "Ethernet" -and $_.AddressFamily -like "IPv4"}).IPAddress -IsMultipathEnabled $true -IsPersistent $true -TargetPortalAddress $iscsitarget
}

#Create Volume from Latest Snap and Online Disk
$arrayendpoint = "IP-of-CBS"
$srcprotectiongroup = "arrayname:pgname"
$destvolumename = "destvolumename"
$srcvolumename = "sourcevolumename"
$pureuser = "pureuser"
$purepass = ConvertTo-SecureString "MYPASSWORD" -AsPlainText -Force
$purecred = New-Object System.Management.Automation.PSCredential -ArgumentList ($pureuser, $purepass)

# Connect to and set the active Pure Storage FlashArray
$array = New-PfaArray -endpoint $arrayendpoint -credentials $purecred -ignoreCertificateError

#Get Most Recent Completed Snapshot
Write-Host "Obtaining the most recent snapshot for the protection group..." -ForegroundColor Red
$MostRecentSnapshots = Get-PfaProtectionGroupSnapshots -Array $array -Name $srcprotectiongroup | Sort-Object created -Descending | Select-Object -Property name -First 2

# Check that the last snapshot has been fully replicated
$FirstSnapStatus = Get-PfaProtectionGroupSnapshotReplicationStatus -Array $array -Name $MostRecentSnapshots[0].name

# If the latest snapshot's completed property is null, then it hasn't been fully replicated - the previous snapshot is good, though
if ($null -ne $FirstSnapStatus.completed) {
    $MostRecentSnapshot = $MostRecentSnapshots[0].name
}
else {
    $MostRecentSnapshot = $MostRecentSnapshots[1].name
}

# Perform the DR volume overwrite
Write-Host "Overwriting the volume with a copy of the most recent snapshot..." -ForegroundColor Red
New-PfaVolume -Array $array -VolumeName $destvolumename -Source ($MostRecentSnapshot + '.' + $srcvolumename) -Overwrite | Out-Null

# Online the volume
Write-Host "Onlining the volume..." -ForegroundColor Red
Get-Disk | Where-Object {$_.OperationalStatus -eq "Offline"} | Set-Disk -IsOffline $false
This use case can be utilized for Test/Dev and/or Disaster Recovery. It utilizes a default Azure Machine template, but this can be customized for your liking. Remember any configuration here is done via powershell so truly the options are endless.
Deploy your Azure VM
Unlike with other Terraform providers where you specify login credentials in the manifest, Azure is a bit different. There are 4 options and the easiest is to authenticate using Azure CLI
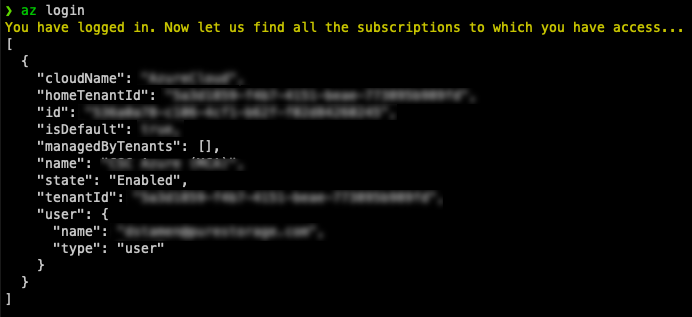
To login just run the below command. It will open a web browser and you’ll authenticate.
az login
Once authenticated, you can run your Terraform deployment.
Run terraform init to install any needed providers, terraform plan to make sure all the connectivity is working and then terraform apply to deploy!
terraform init
terraform plan
terraform apply
If everything is successful your Azure Virtual Machine instance should be deployed in ~5minutes!
Conclusion
Im loving how flexible it is to take advantage of Pure Storage in the Cloud! Using Cloud Block Store, it can be utilized for Migration, Test/Dev, Disaster Recovery as well as Public/Hybrid/Multi Cloud.
If you have any additional questions or comments, please leave them below!
comments powered by DisqusSee Also
- Deploying a Windows Azure VM with Hashicorp Terraform to Microsoft Azure
- Using the Pure Storage Cloud Block Store Terraform Provider for AWS
- Deploying a Linux EC2 Instance with Hashicorp Terraform and Vault to AWS and Connect to Pure Cloud Block Store
- Deploying a Windows EC2 Instance with Hashicorp Terraform and Vault to AWS
- Deploying a EC2 Instance with PowerShell to AWS