Deploying Tanzu Kubernetes Grid (TKG) on vSphere
Tanzu Kubernetes Grid (TKG) is part of VMware’s new Tanzu Portfolio of products. I have done quite a bit with vSphere with Kubernetes and Tanzu Kubernetes Clusters on vSphere with Kubernetes, but something came up and I began to explore native TKG. This blog will cover how to deploy TKG on vSphere and get your management and tkc clusters provisioned.
At first I figured I would have some of the same requirements as vSphere with Kubernetes, but as I started going down the path of deploying TKG i kept thinking to myself… Can it really be this easy? Not only is it easy, it is Free.
To begin I first reviewed the TKG Website and TKG Documentation
Before we can provison a TKG cluster we must first install Docker and TKG CLI. Instructions to install docker can be found here.
Installing the TKG CLI
- Go to https://www.vmware.com/go/get-tkg and log in with your My VMware credentials.
- Head to the Download Section
- TKG CLI is not currently available for Windows. Download either the Mac OS or Linux CLI
- Use either the gunzip command or the extraction tool of your choice to unpack the binarie. Run either one of the following commands:
Linux
gunzip tkg-linux-amd64-v1.0.0_vmware.1.gz
Mac OS
gunzip tkg-darwin-amd64-v1.0.0_vmware.1.gz
- Navigate to the executable for the Tanzu Kubernetes Grid CLI that you downloaded in the previous section.
- Rename the CLI binary for your platform to tkg, make sure that it is executable, and add it to your PATH.
Linux
mv ./tkg-linux-amd64-v1.0.0_vmware.1 /usr/local/bin/tkg
Mac OS
mv ./tkg-darwin-amd64-v1.0.0_vmware.1 /usr/local/bin/tkg
- Make the file executable.
chmod +x /usr/local/bin/tkg
- Run tkg version to check that the correct version of the binary is properly installed.
Deploying the TKG Management Cluster
TKG can be deployed either through the UI or CLI. This walk-through will cover the UI deployment of TKG.
Before we can deploy TKG we must first download and import the Base OS Image and the API Server Load Balancer OVA’s into vSphere.
Once our templates are imported we can proceed to launch the TKG UI. Run the following command:
tkg init --ui
If Docker is not installed or running you will receive the following error. Make sure it is running and run the command again.
When the above command is run it will launch the UI, if not you can navigate to http://127.0.0.1:8080
Click on Deploy on vSphere
Enter the vCenter Server, Username and Password and Click Connect.
If deploying to vSphere 7.0 you will be notified that it has not been optimized for Kubernetes but this just means you aren’t using vSphere with Kubernetes so click Proceed
Select your Datacenter and enter in your SSH Public Key
If you do not know your public key you can get it by running cat ~/.ssh/id_rsa.pub If you need to generate an SSH keypair, the instructions are here
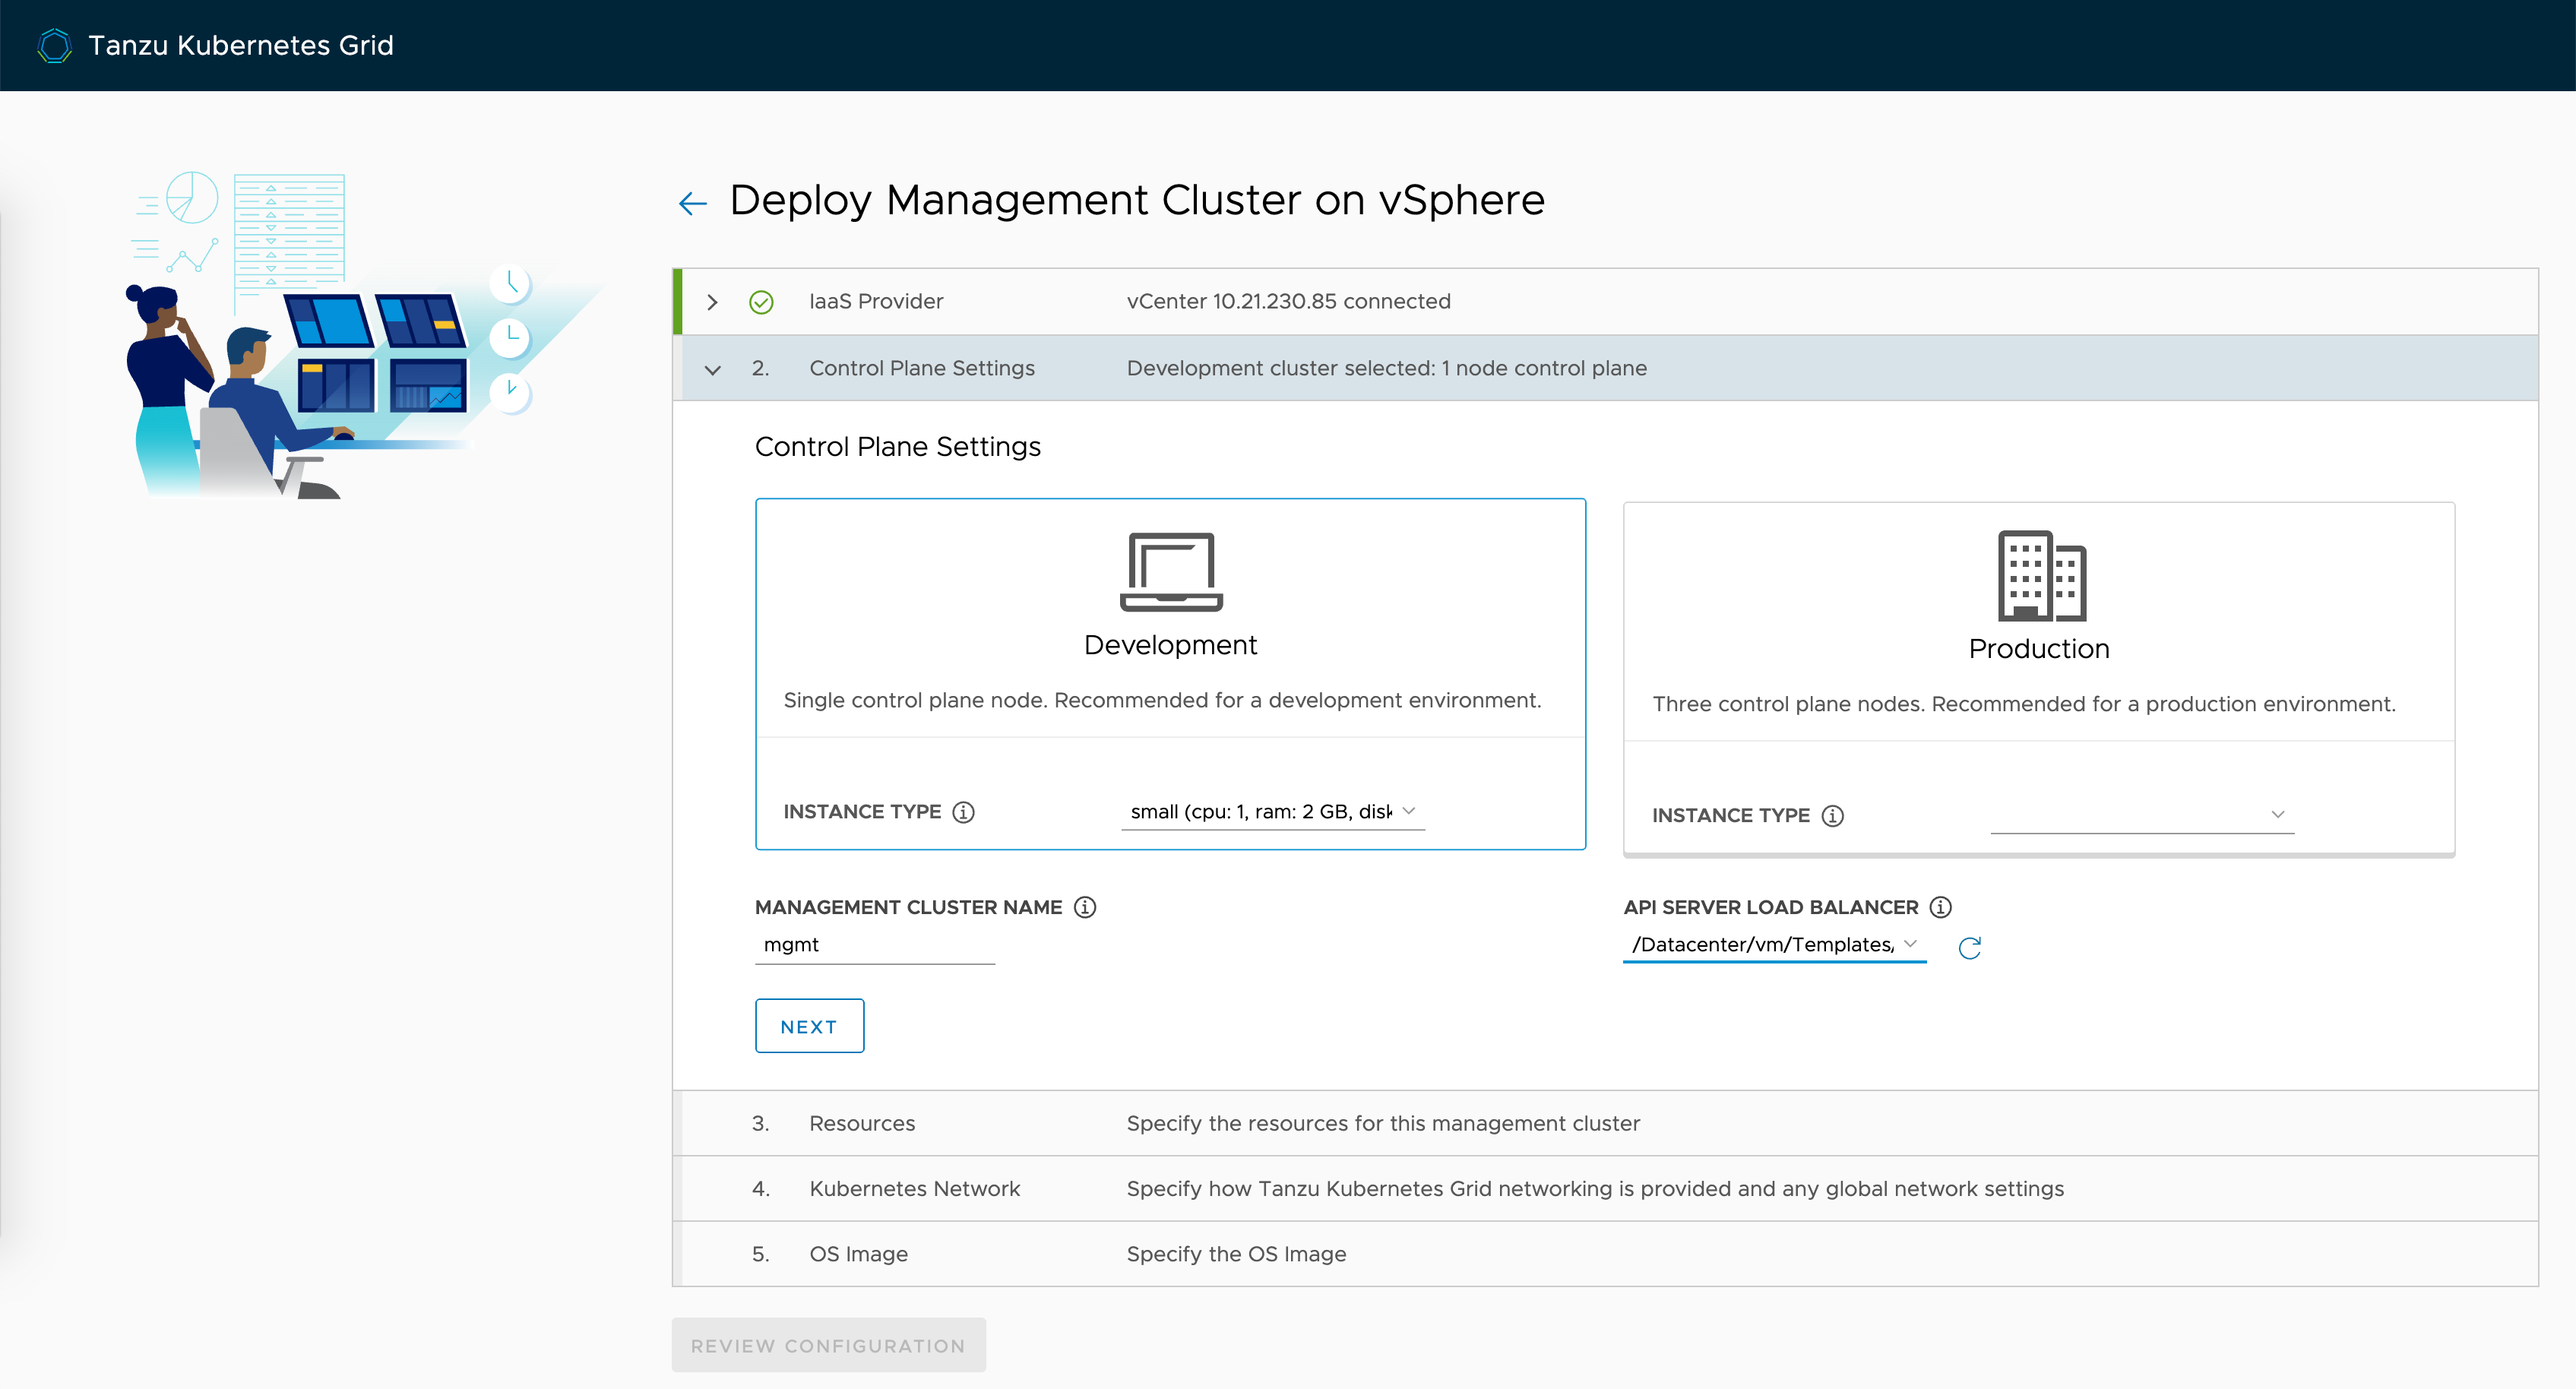
Select whether you wish to deploy for Development or Production and select a Size. Development is one Control Plane and one Worker and Production is three Control Planes and three Workers.
Name your Management Cluster and Select the Load Balancer Template
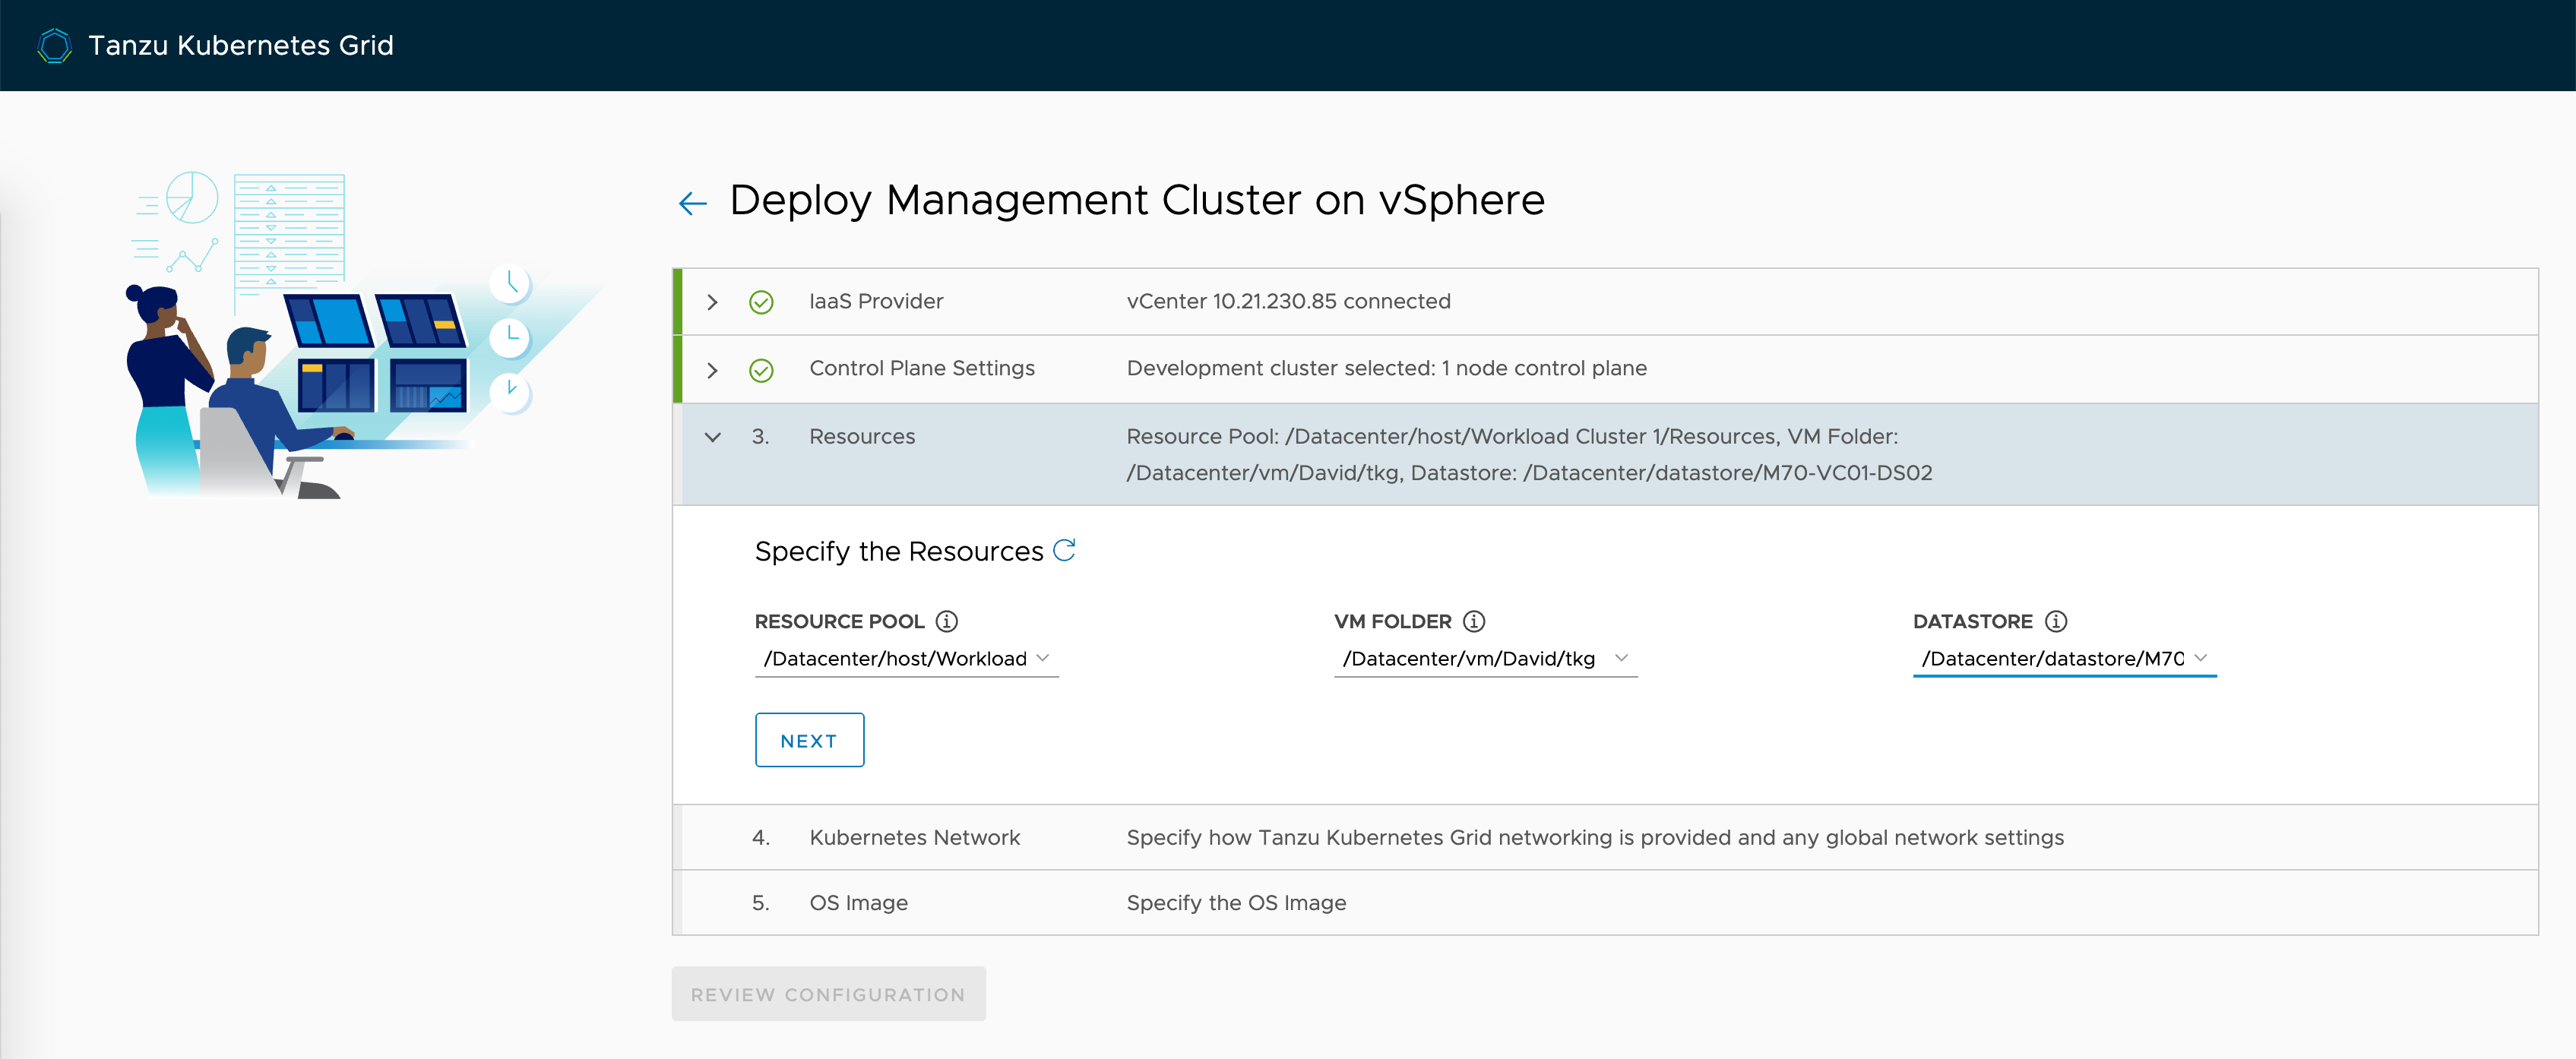
Specify the Resource Pool, VM Folder and Datastore for your VMs.
Select a Network for your VMs. You can leave the Service and Pod CIDR’s as default if you wish.
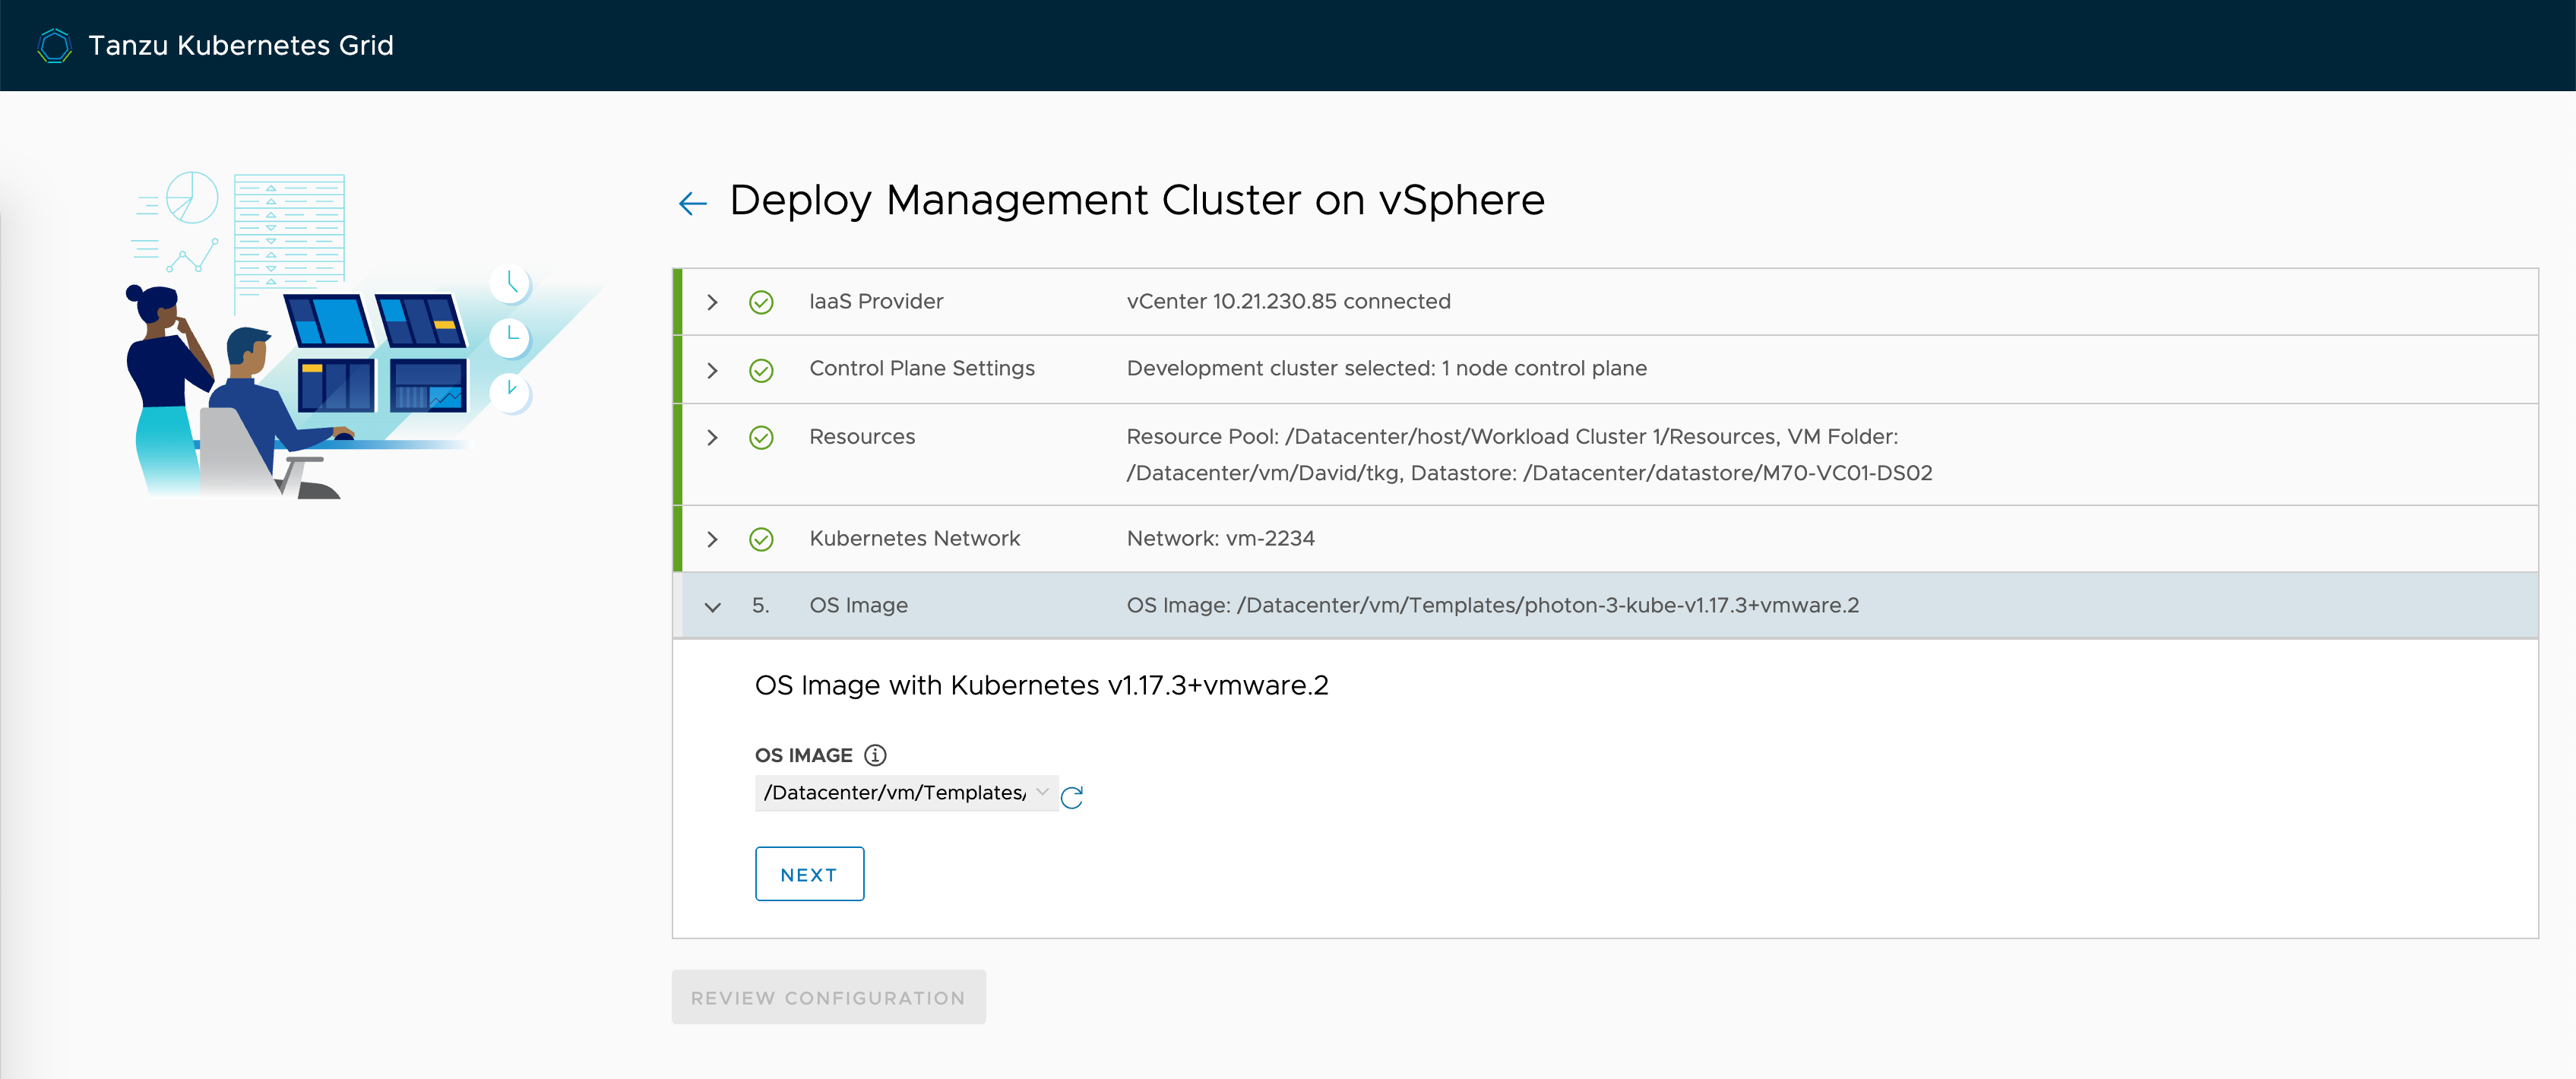
Select the Image Template you wish to use for your Kubernetes Cluster
Click on Review Configuration to Proceed.
Make sure everything entered looks correct and click on Deploy Management Cluster
Your cluster will now be deployed, when it is complete you will be presented with this screen!
Back to our CLI we can see the details of our management cluster by running:
tkg get management-cluster
Deploying the Tanzu Kubernetes Cluster
Once our management cluster is deployed its quite easy to deploy our Tanzu Kubernetes Clusters!
There are a few advanced options but i will focus on two of the simple commands
To deploy a development cluster (1 control plane and 1 worker)
tkg create cluster tkc01 --plan=dev
To deploy a production cluster (3 control plane and 3 worker)
tkg create cluster tkc --plan=prod
To monitor the deployment status, you can run the following:
tkg get cluster
When it is complete we can see all the nodes that have been deployed!
Deploying a Workload to the Tanzu Kubernetes Cluster
Find the Kubernetes Context you wish to deploy to:
kubectl config get-contexts
Switch to the context of your TKC.
kubectl config use-context tkc01-admin@tkc01
If we want to access our application through an external-ip. I recommend using MetalLB as its one of the easier pieces I have found to setup.
To install run:
kubectl apply -f https://raw.githubusercontent.com/metallb/metallb/v0.9.3/manifests/namespace.yaml
kubectl apply -f https://raw.githubusercontent.com/metallb/metallb/v0.9.3/manifests/metallb.yaml
# On first install only
kubectl create secret generic -n metallb-system memberlist --from-literal=secretkey="$(openssl rand -base64 128)"
You will then need to execute a YAML to specify an IP Pool to use.
apiVersion: v1
kind: ConfigMap
metadata:
  namespace: metallb-system
  name: config
data:
  config: |
    address-pools:
    - name: default
      protocol: layer2
      addresses:
      - 10.21.234.45-10.21.234.55
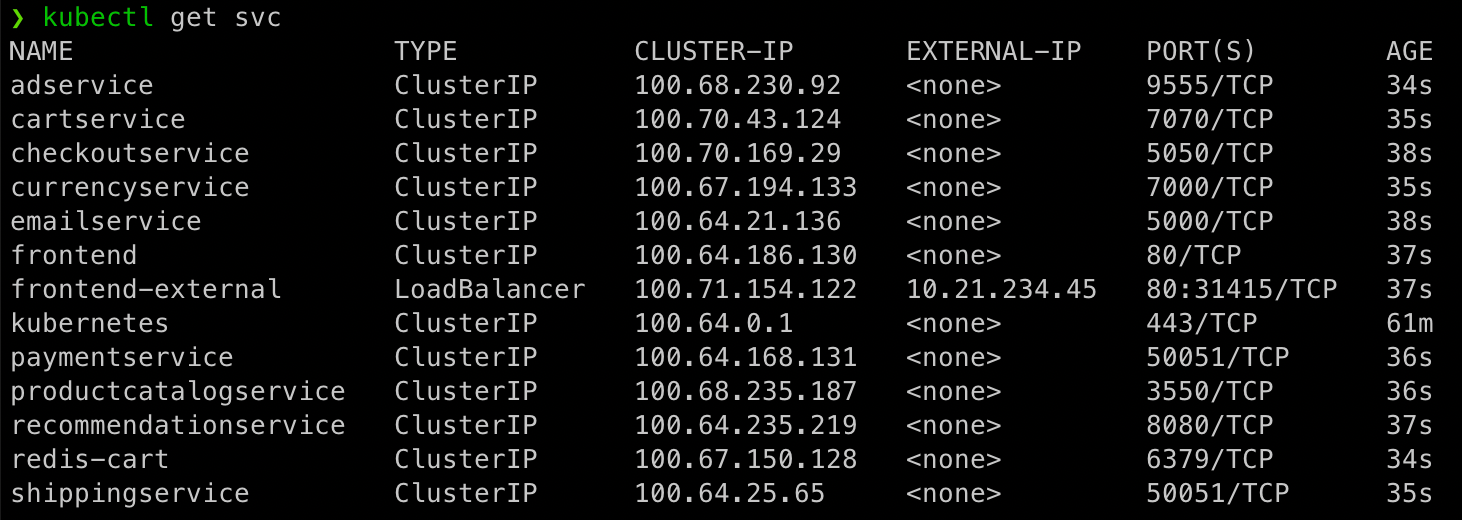
Deploy your application and find out its External-IP using kubectl get svc
Your application should now be running…
Conclusion
Knowing how difficult it is to install vanilla k8s and how much planning and difficulty goes into deploying vSphere with Kubernetes I was not expecting the deployment of TKG to be this easy! I hope this walk-through helped get your TKG environment up and running!
Questions or Comments? Leave them below!
comments powered by DisqusSee Also
- Part 6: Deploying vSphere with Kubernetes - Provisioning and Managing a Tanzu Kubernetes Cluster
- Part 5: Deploying vSphere with Kubernetes - Using vSphere with Kubernetes
- Part 4: Deploying vSphere with Kubernetes - Enabling vSphere with Kubernetes
- Part 3: Deploying vSphere with Kubernetes - Deploy and Configure NSX-T
- Part 2: Deploying vSphere with Kubernetes - Configuring vCenter Server


